You can now sell your products in your Facebook Shop. The buyer may view the product from your Facebook Shop then checkout via your website.
To start:
A. Sync your products
B. Setup your Facebook Shop
List your products in Facebook Shop
Step 1: Log in to your Lelong.my account then in “Seller Dashboard” go to “N.API Setup – 2. Sync To Facebook”, then you will be directed to the “Manage Facebook Product Feed” page.
Step 2: Click on “Add New Feed” to select the products.

Step 3:
a) Give a name for your feed / list. And if you want to track the performance of this feed you may add in your “fb utm campaign” & “fb utm medium”.
b) Select the product(s) you would like to list in your Facebook Shop.
i: Click on the “Please Select Your Product” or “+” button to select your products.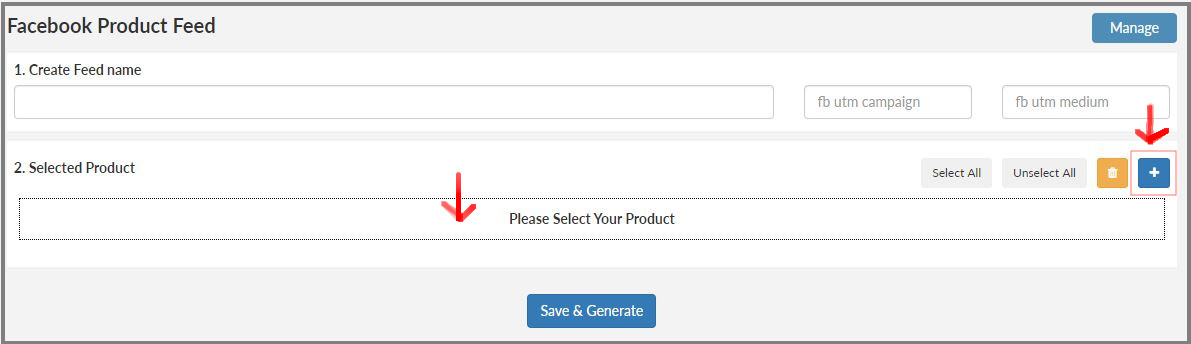
ii) A list of your products will be display. To add the product into your list just tick on the box. Once done, click on “Confirm”.
c. After product(s) selected, your page will display as below: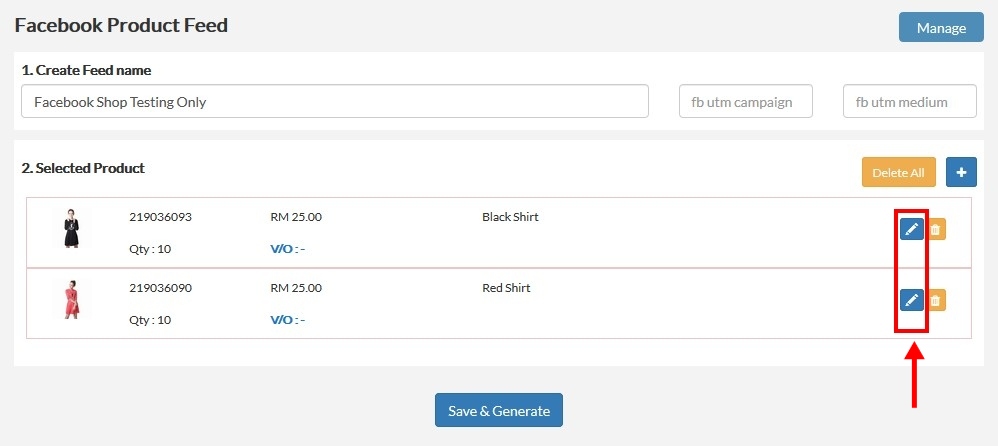
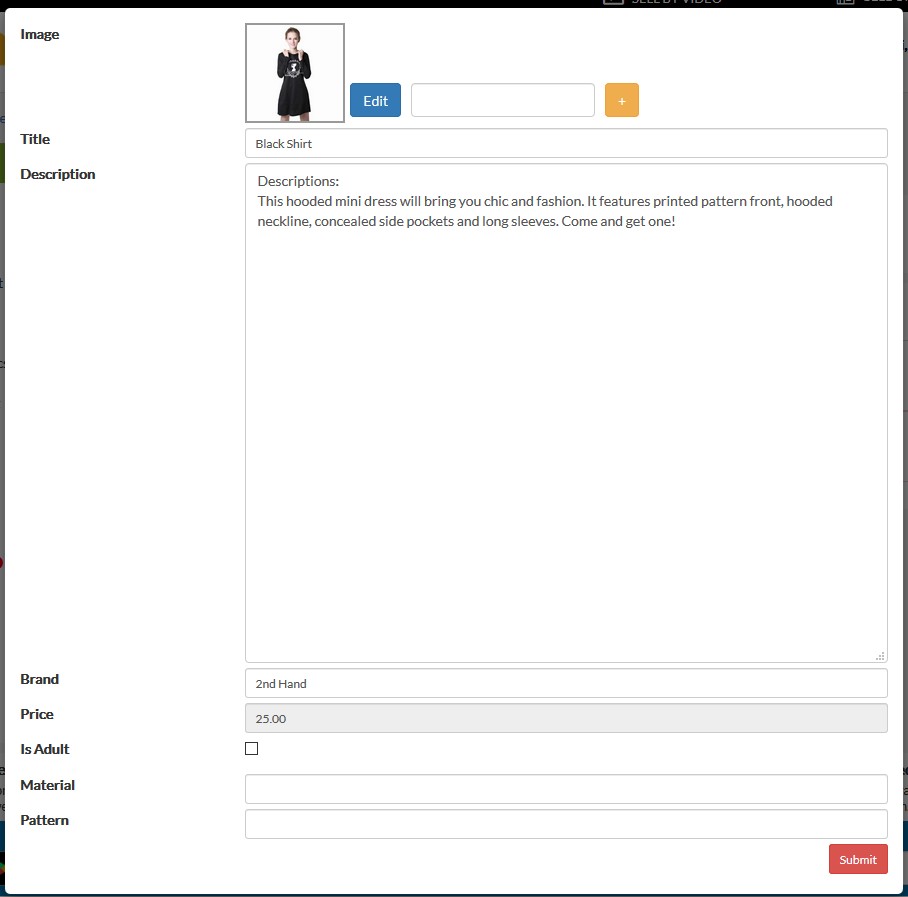
You may edit your product title, description & images in order to look more attractive in your Facebook Shop. To do so, just click on the “edit” button on the right. Then a window will pop-up for you to edit your product info. Kindly be informed, product description must be between 30 to 5000 characters.
d) To save your feed, click on “Save & Generate”.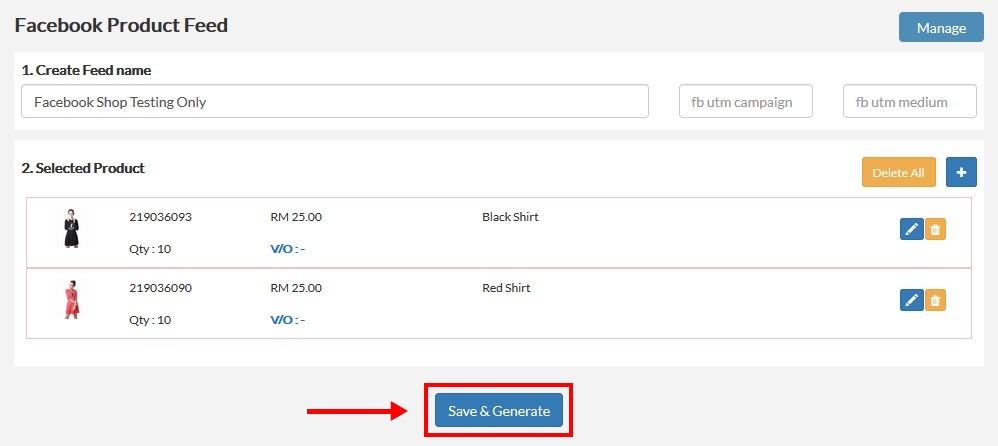
Once the feed is successful generated, a successful message will prompt as below: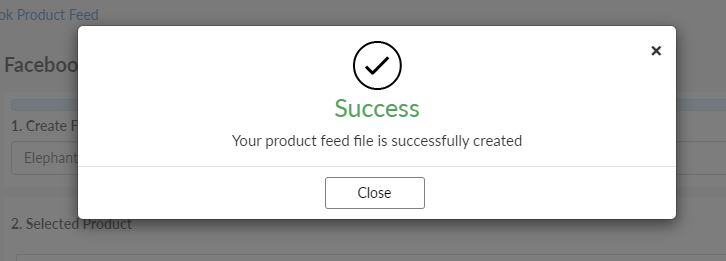
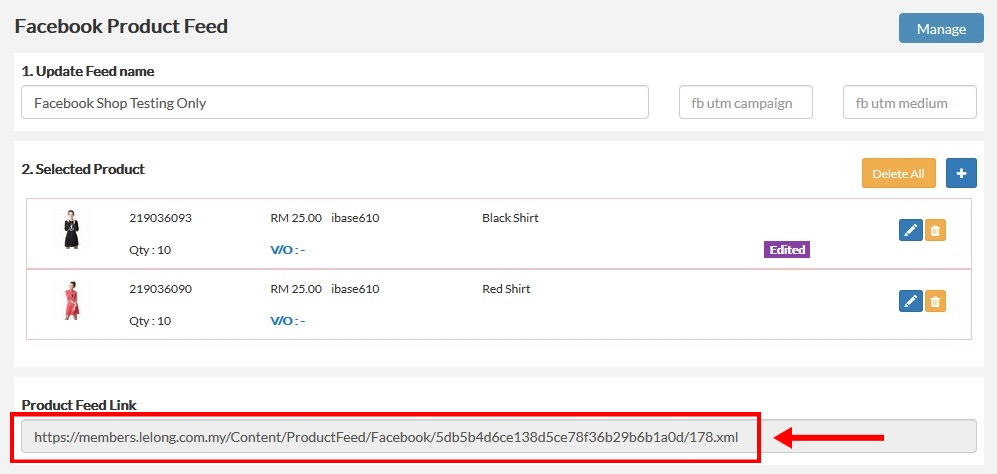
Step 4: Now your product list will display as per attached. Click on the “Product Feed Link” to copy the feed link.
Setup Facebook Shop
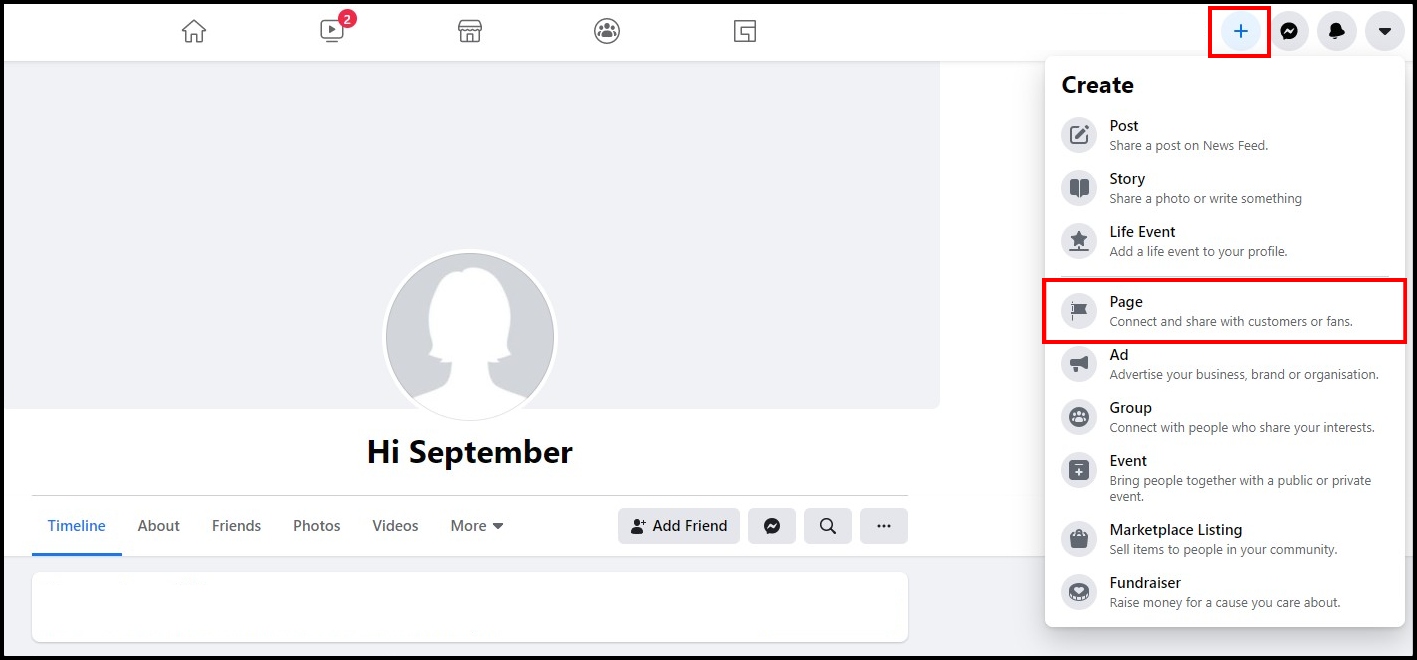
Step 5: Create a Facebook page. Click on the “+” button on top of your Facebook account. The choose for “Page“.
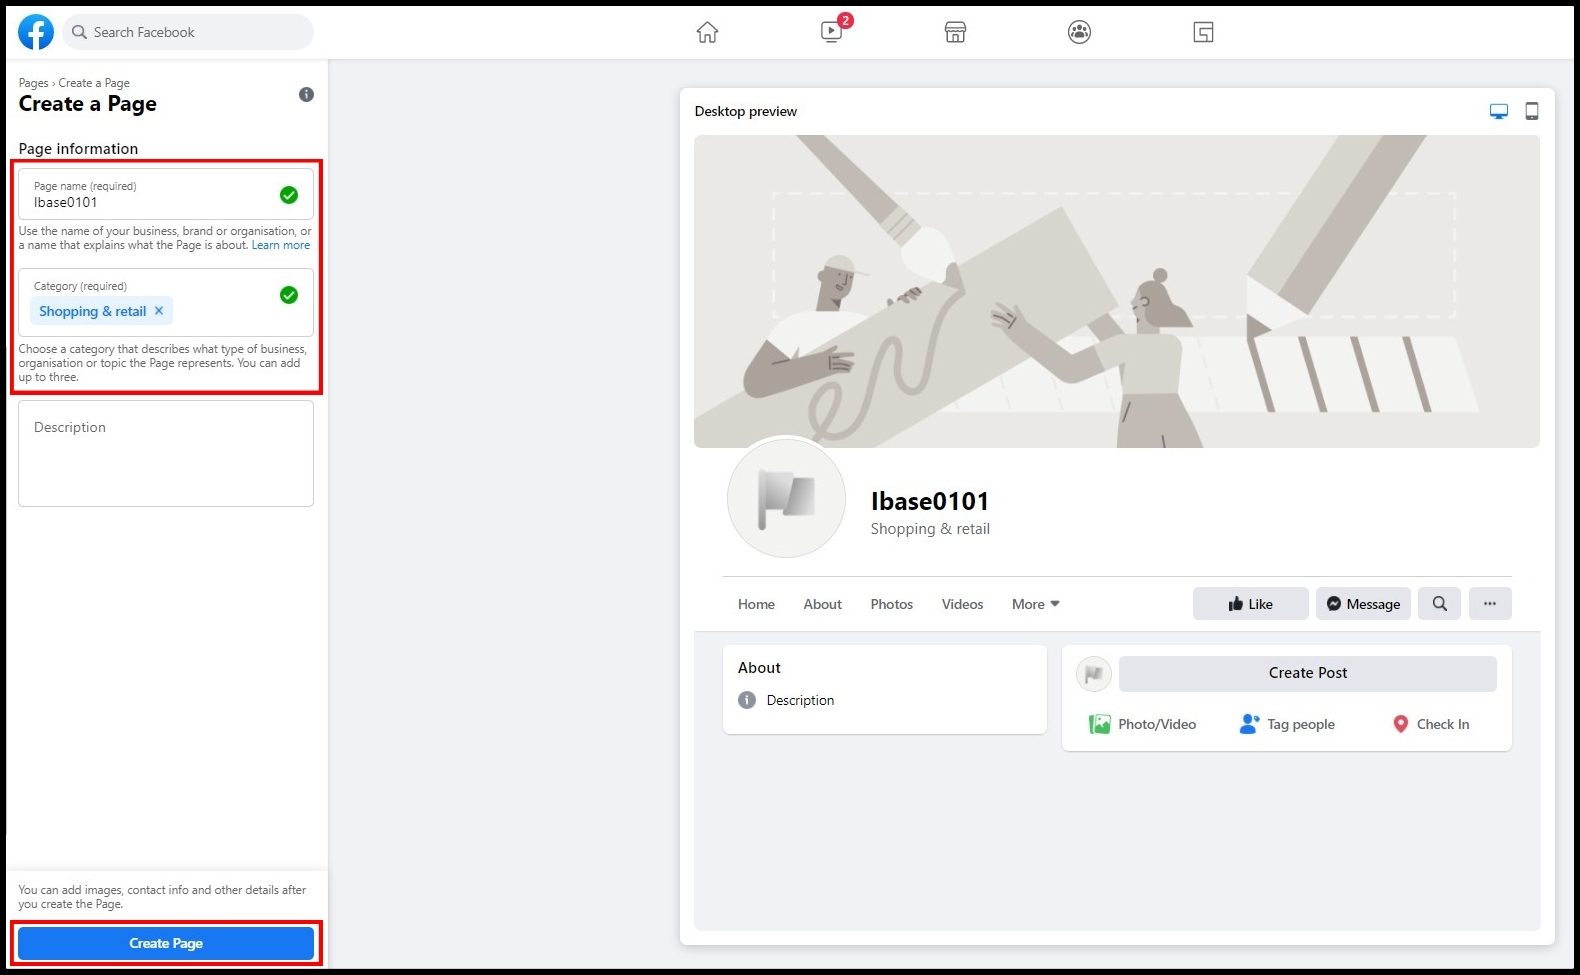
Step 6: Give a name to your page and update your page category. For category choose for “Shopping & Retail“. Click “Create Page“.
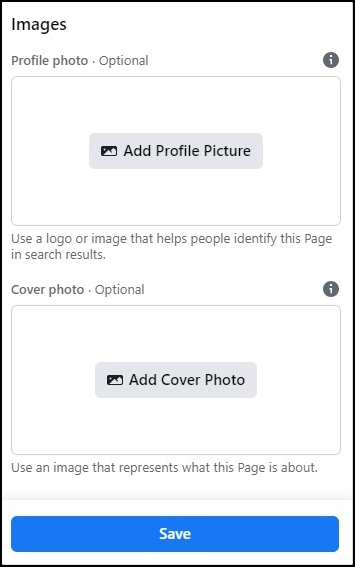
Step 7: Add a profile picture and cover photo for your page.
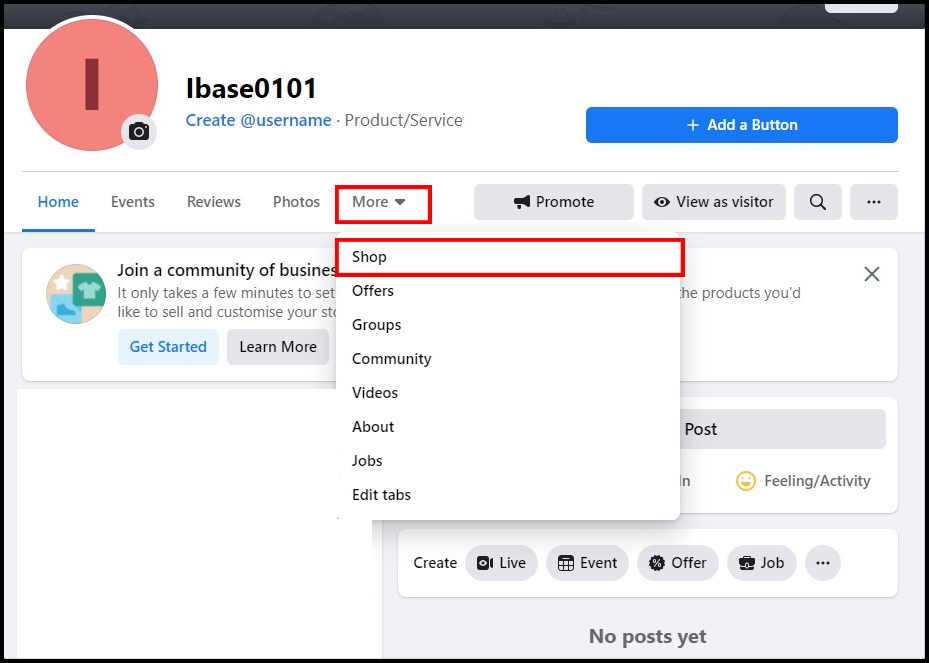
Step 8: Now your page is created. To setup your Facebook Store, click on “More” and choose for “Shop”.
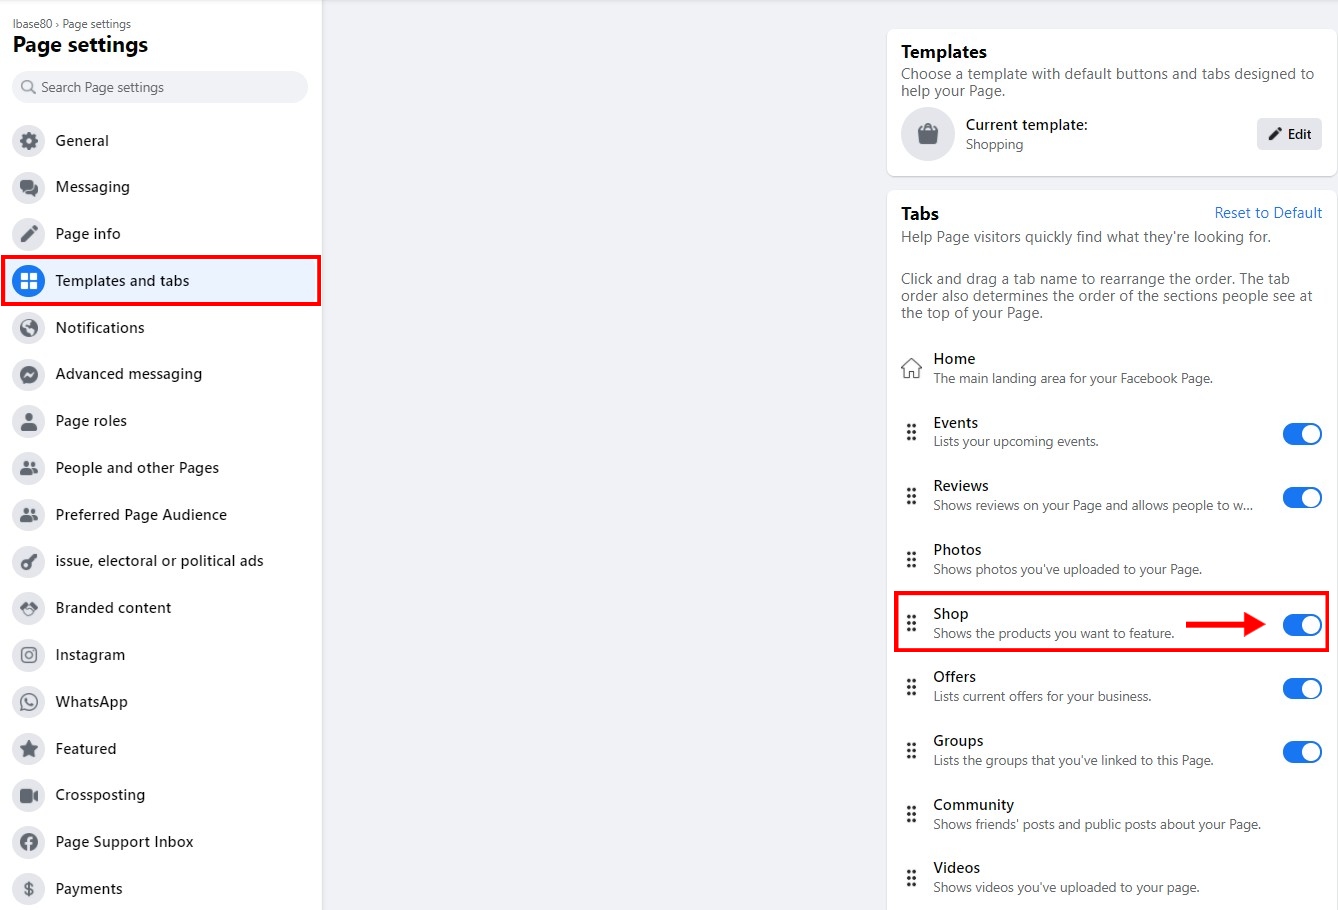
Remark: If your page do not display “Shop”, you may add a shop section to your Facebook Page
To add a Shop section you need to go to your Page settings, select the “Templates and tabs” section and click on “Shop” button to blue color for enable shop tabs.
Step 9:
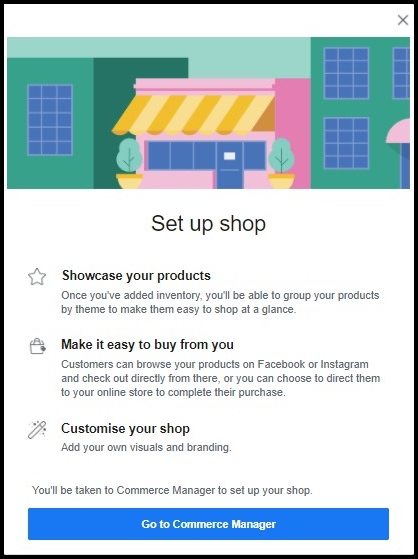
a) Click “Go to Commerce Manager” to setup your shop section.
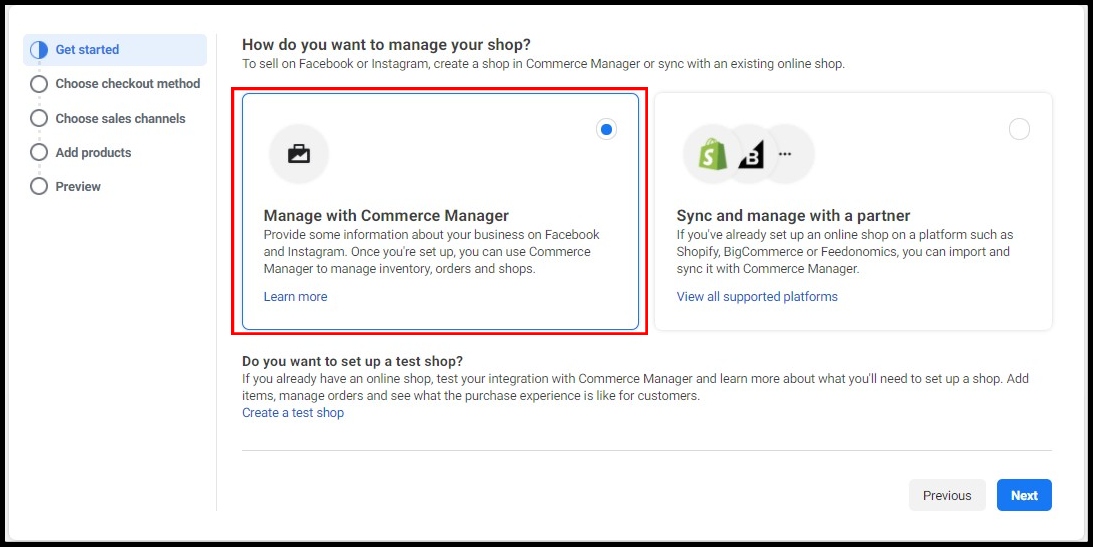
b) Choose “Manage with Commerce Manager“.
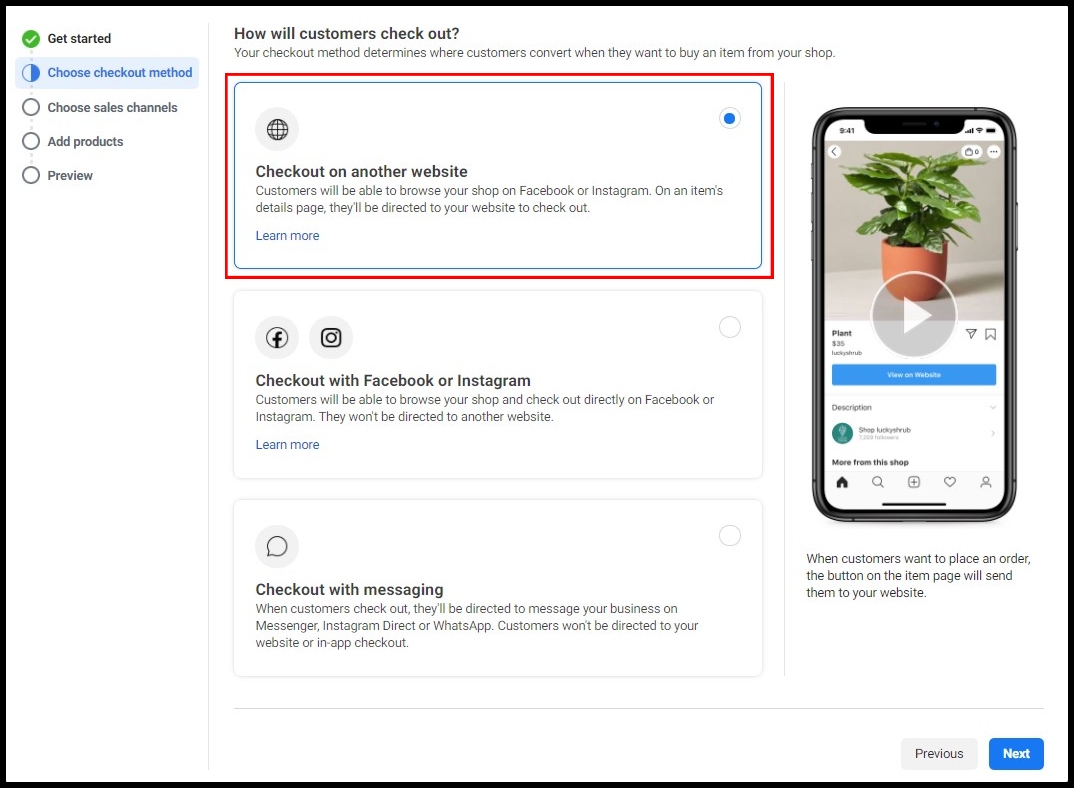
c) Select your checkout method. Suggested to choose for “Checkout on another website“.
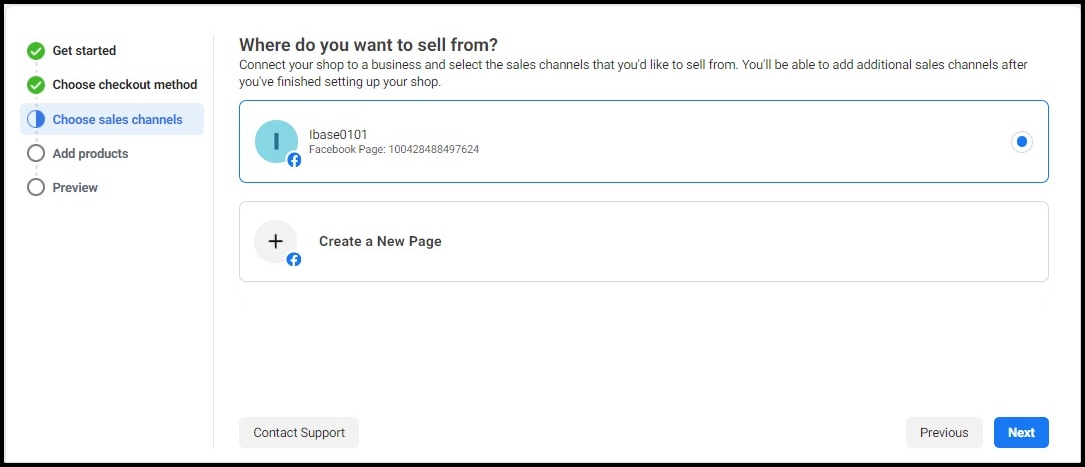
d) Choose a business. Then click “Next“.
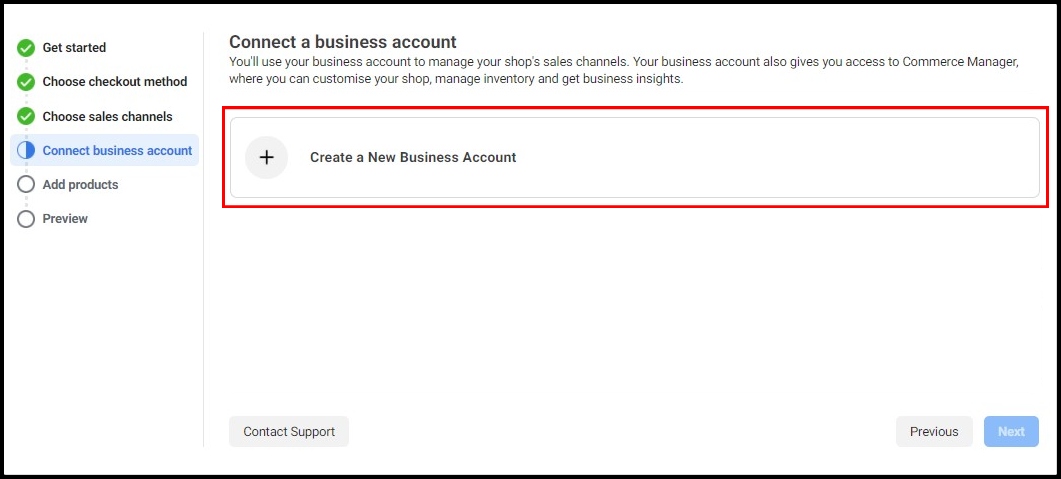
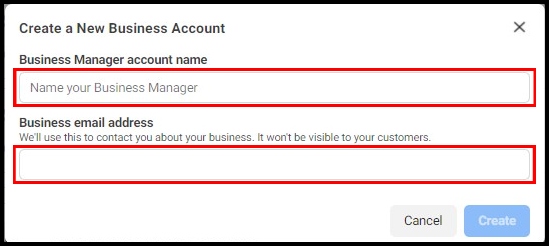
e) Create your new business account. Then, update Business Manager account name and your business email address.
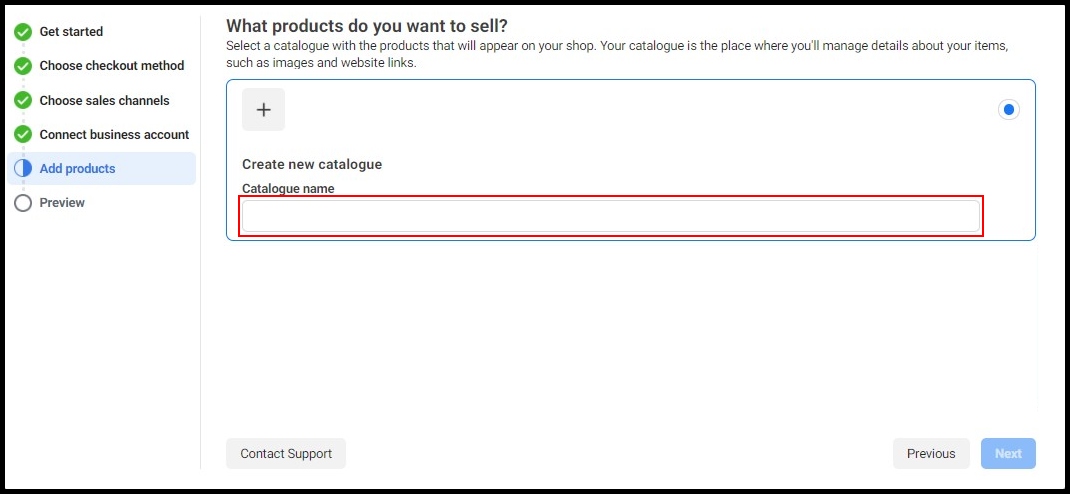
f) Name your new catalogue.
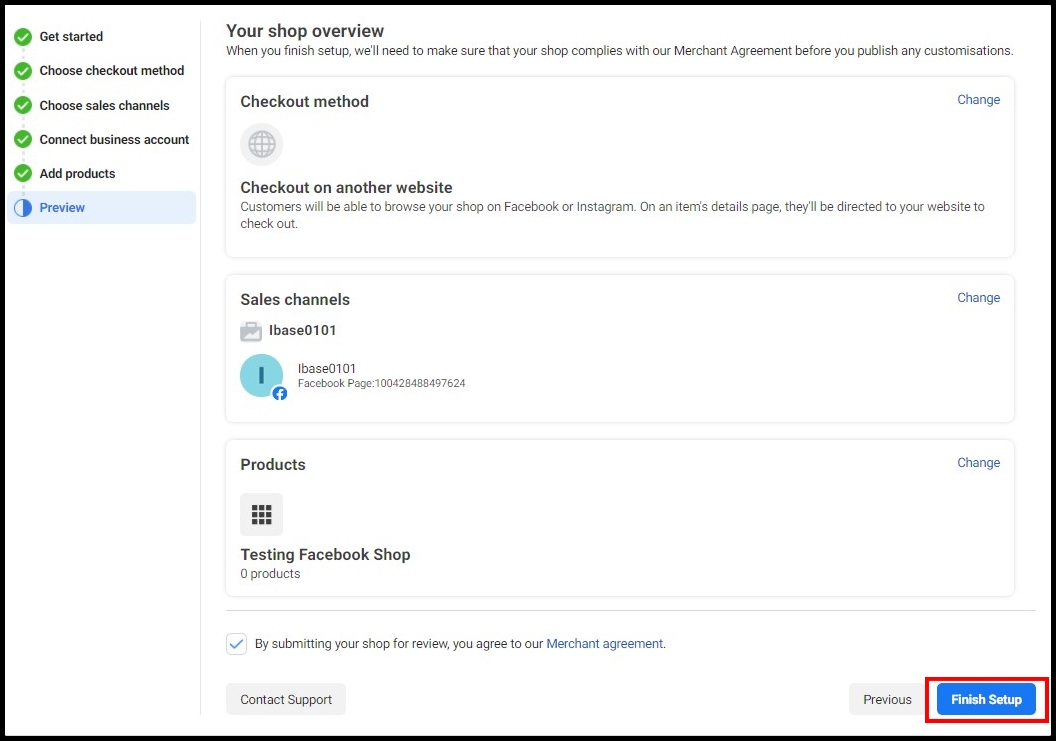
g) Review your shop details and you must check the box for the Merchant Agreement and click “Finish Setup” button.
Step 10: Now log on to Facebook Catalogue Manager: https://www.facebook.com/products
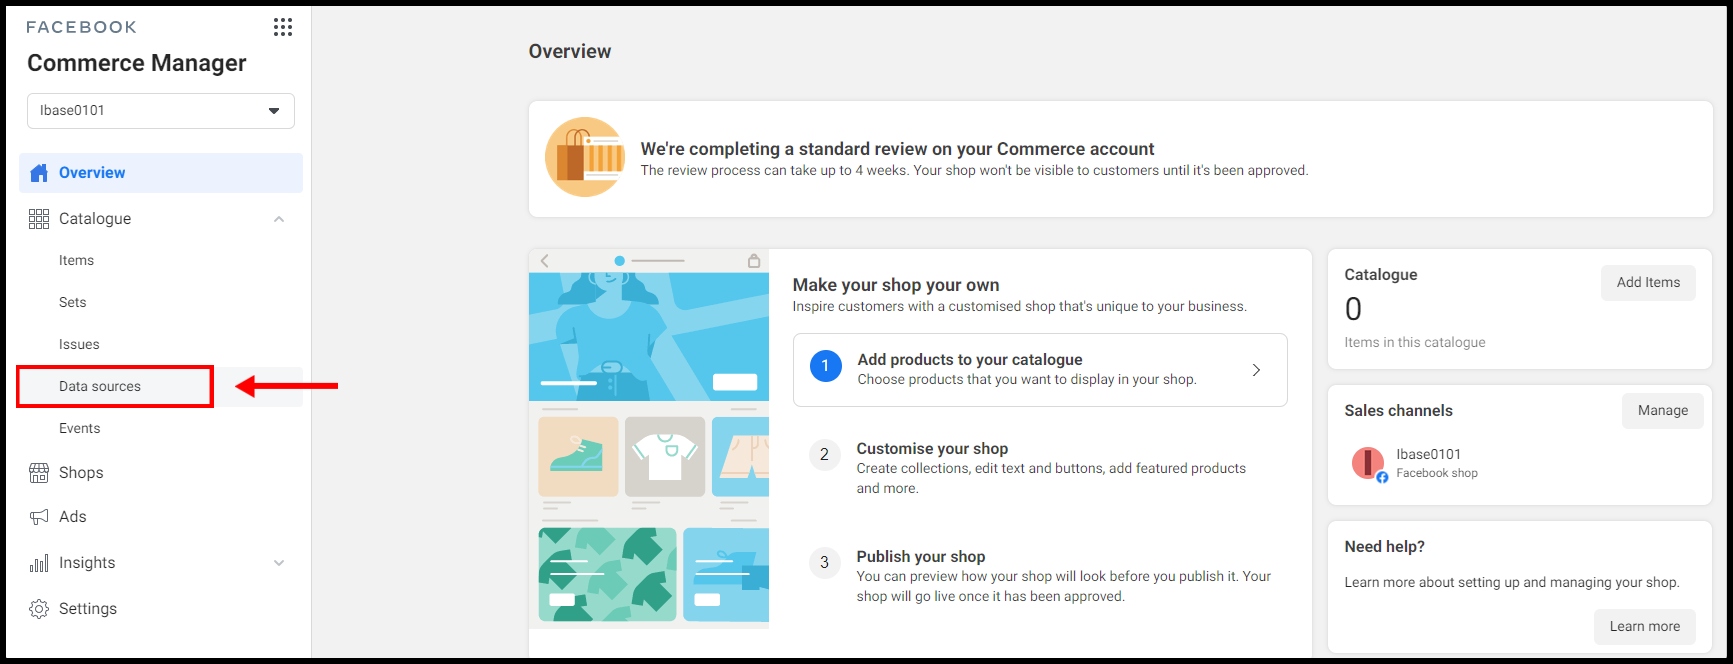
i) After login, you will see a catalogue that is link to your facebook page.Then, click on catalogue name to add products.
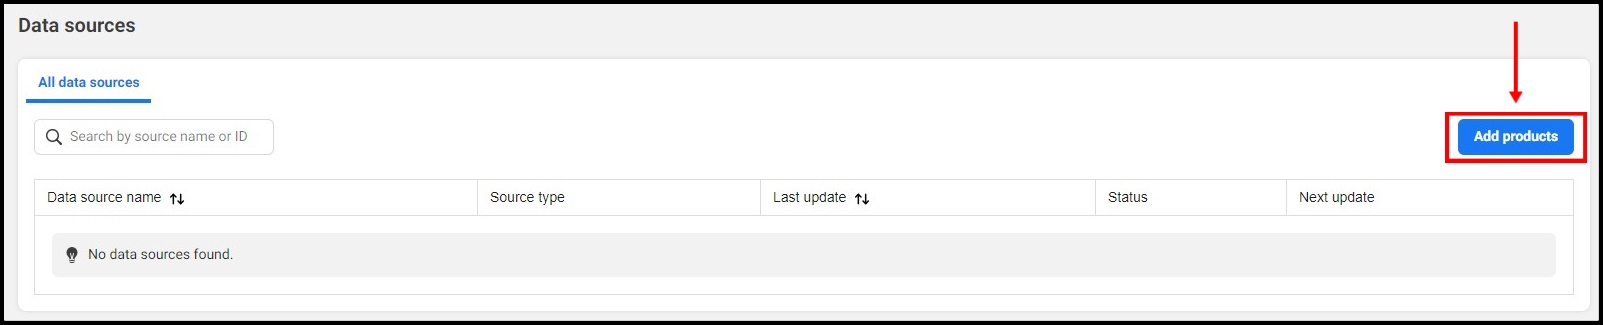
ii) You will directed to the catalogue setting page as per below. Click on “Data sources” on the left panel.
iii) Click on “Add Products”.
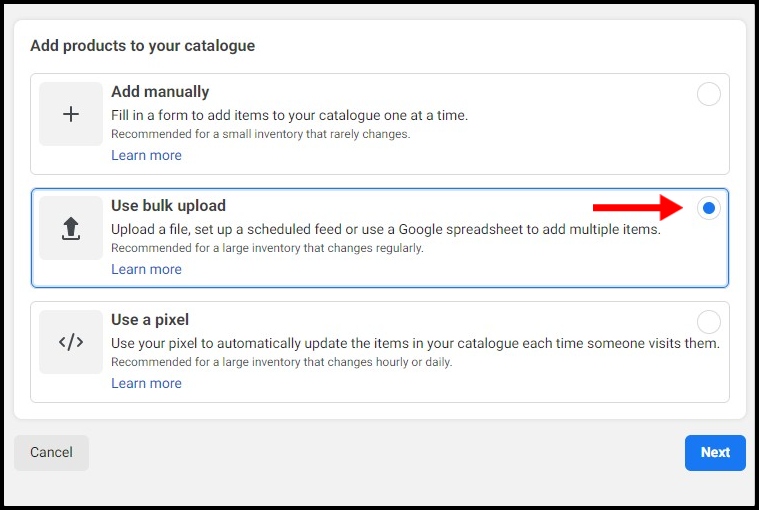
iv) Select “Use bulk upload” as your add products method.
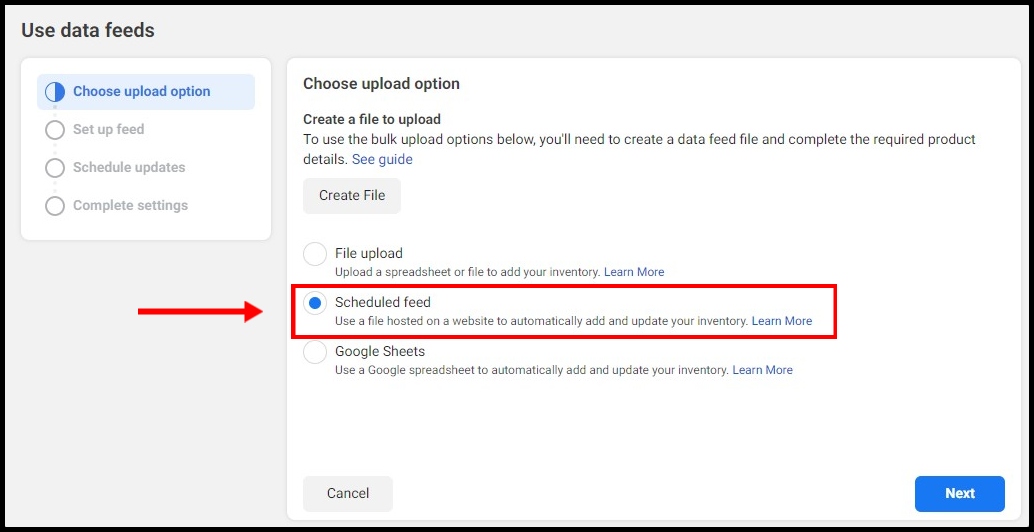
v) Select your upload method as “Set automatic file upload schedule”.
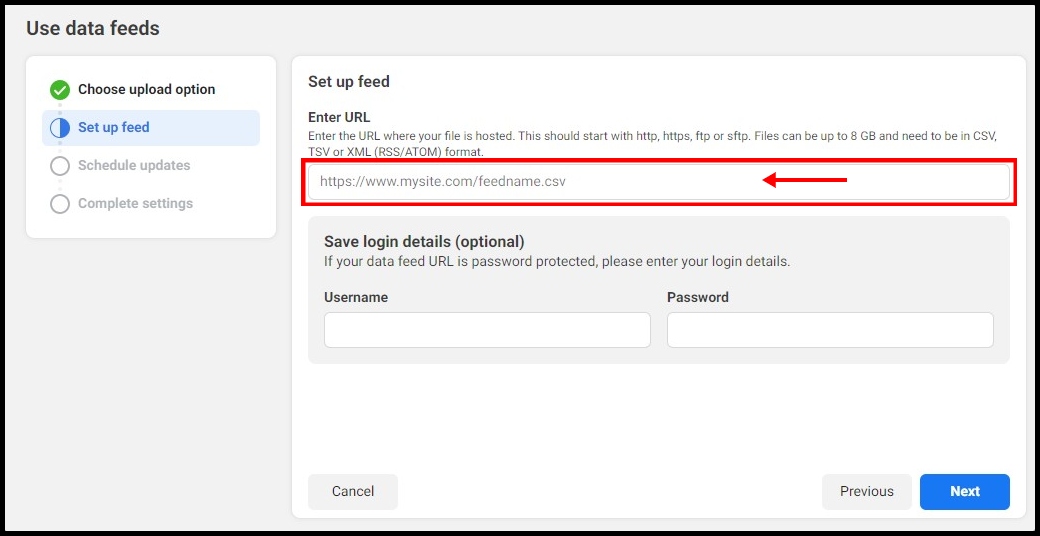
vi) Paste in the data feed link you copy from “Step 4”.
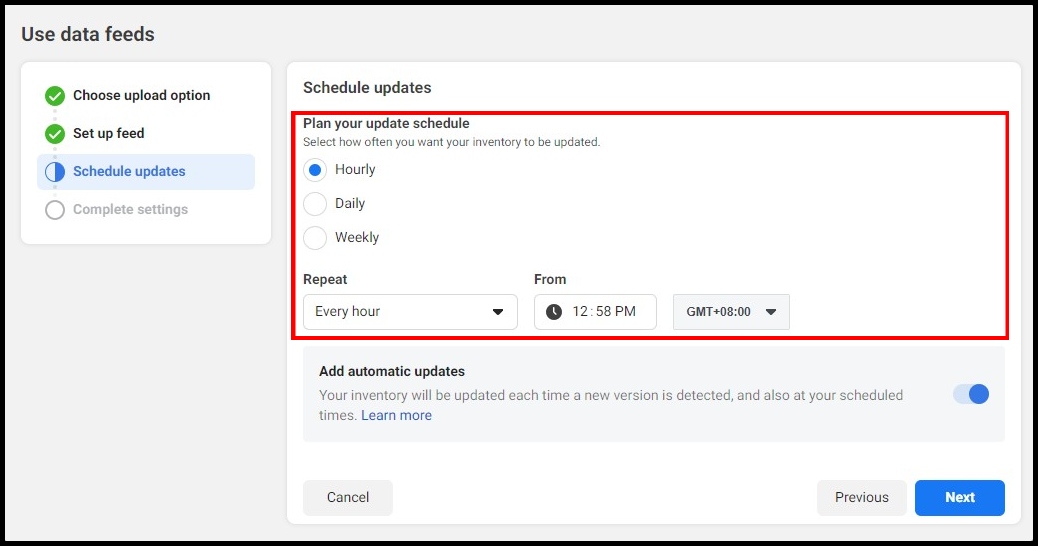
vii) Select when you want to auto update your data information from this URL, you may set it as hourly, daily or weekly. Once done, then click on “Next”.
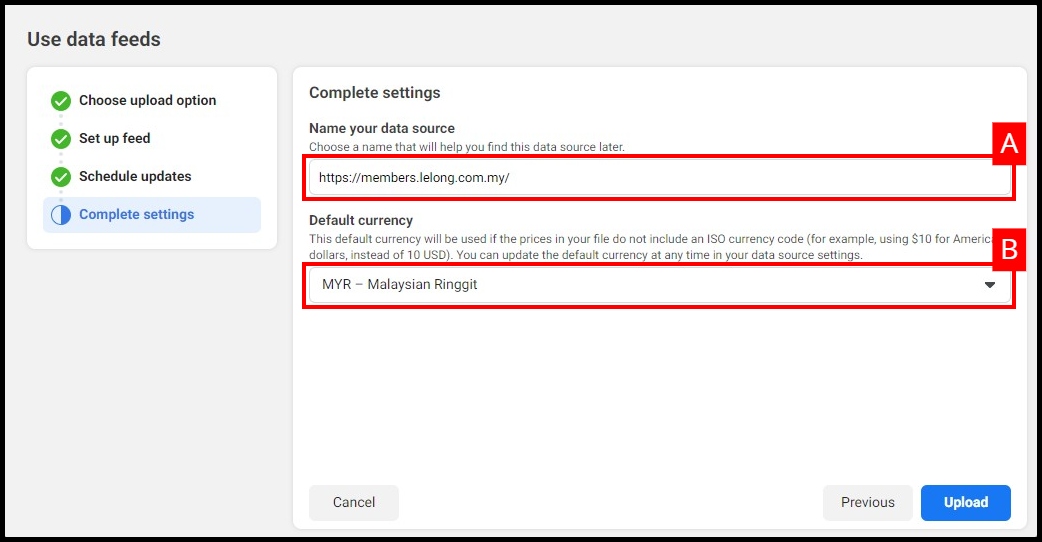
viii) A – Name your product list.
B – Set your default currency
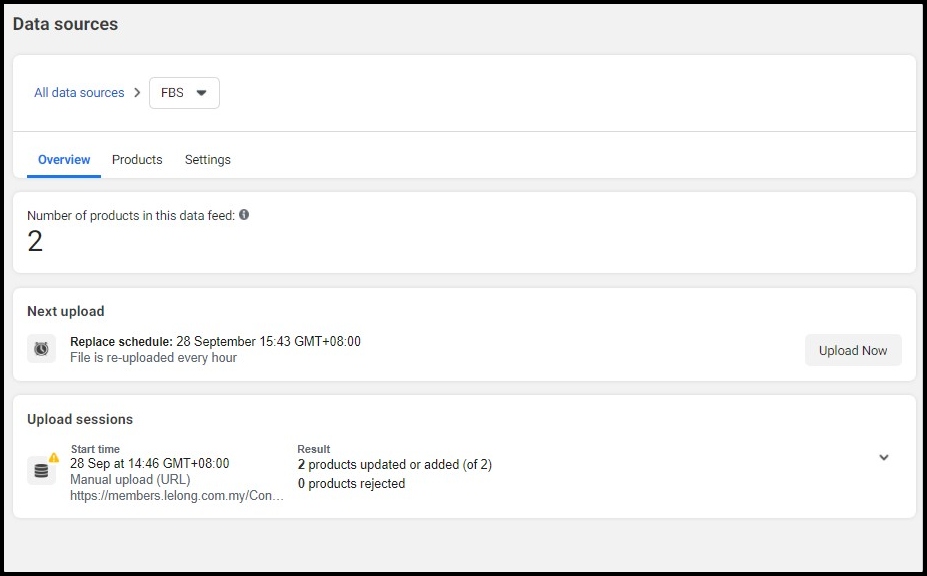
Now your products done uploaded to Facebook Shop.
* As per Facebook posting policy, each product only allows being appeared in one product feed. If you wish to feature the same product in other feed,
you need to remove the product from the previous feed or delete the previous feed.
Learn more about how to manage your Facebook Feed here.