Log in with Google is now available.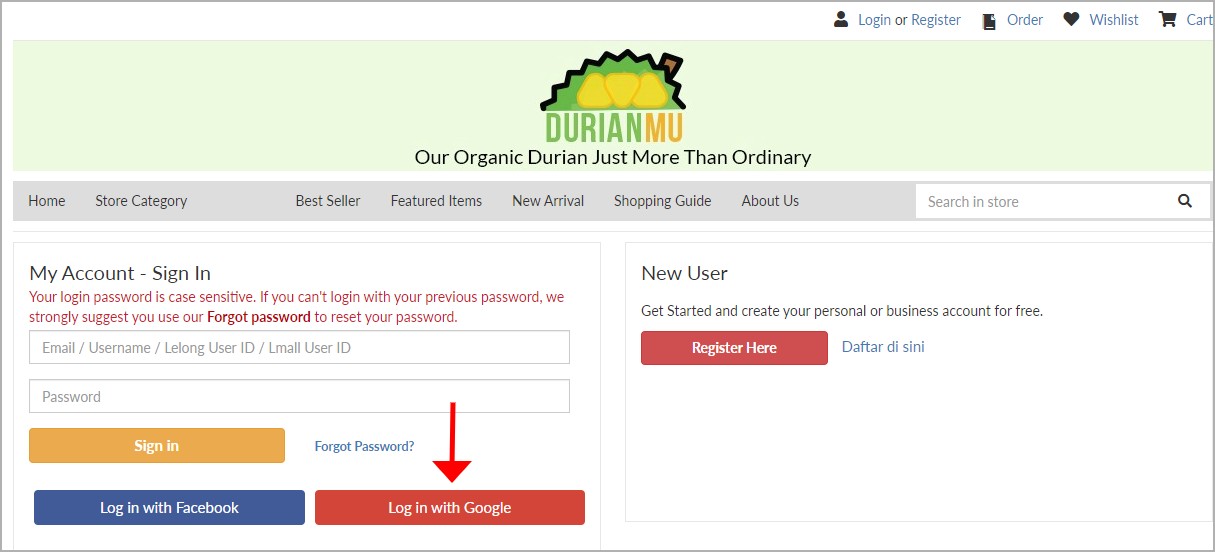
In order to enable your user may log-in using Google account, a Google Client ID is required to be updated under ” G. My Store -> 3. Store Setting->Social Media -> Google”.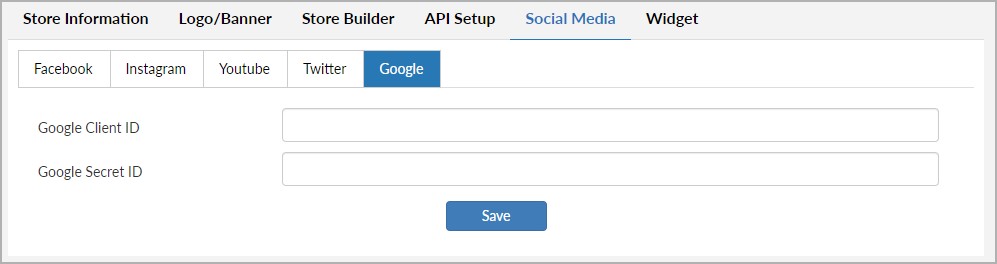
How to get Google Client ID?
Step 1: Log in to Facebook and then navigate to https://developers.google.com/identity/sign-in/web/sign-in.If you yet sign in to your Google account, select login on the top right to sign in to your account.
Step 2: Click on “Credentials page“.
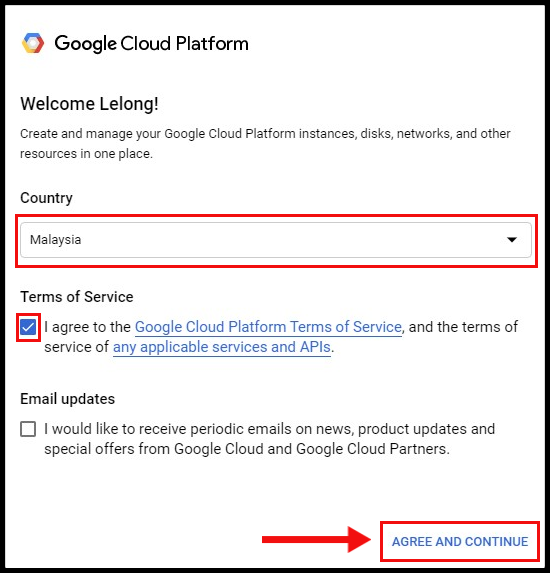
Step 3: Select Malaysia as country, then tick boxes under Terms and Services also click button Agree and Continue.
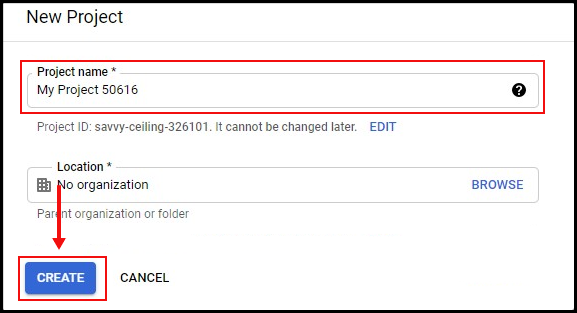
Step 4: Click “CREATE PROJECT“.

Step 5: Name your project, then click “CREATE“.
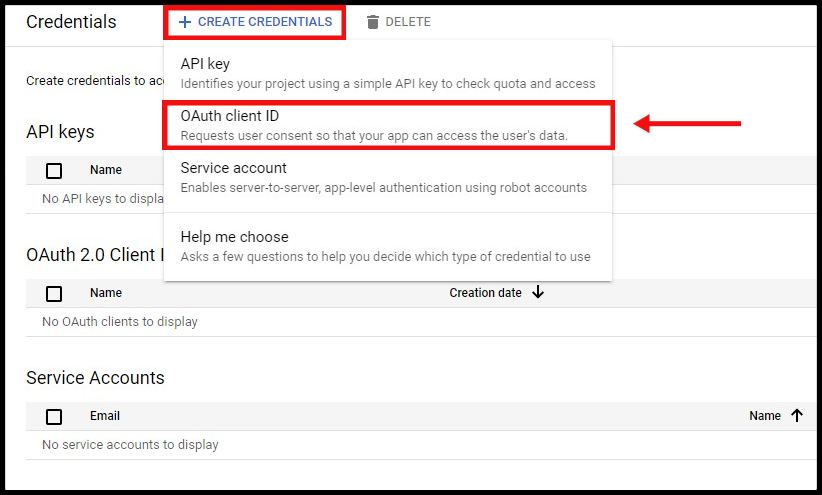
Step 6: Click “+ Create Credentials“, then select “OAuth client ID“
Step 7: Click “Configure Consent Screen” button.

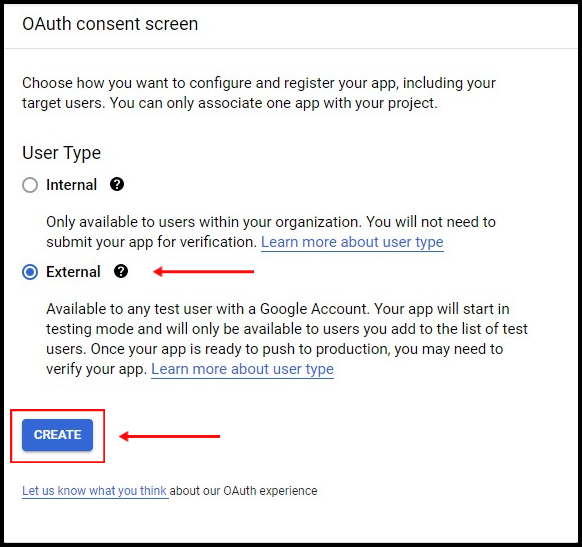
Step 8: In OAuth consent screen, choose External for user type. Then click CREATE.
Step 9 :In OAuth consent screen, under App information section enter your App name and your email address. For example :
App name: Durianmu
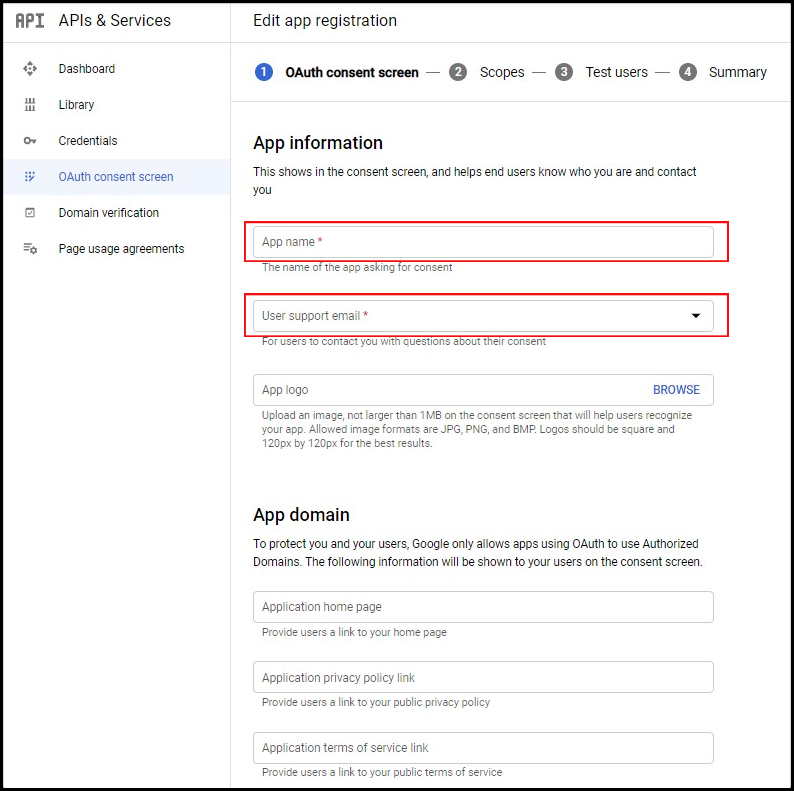
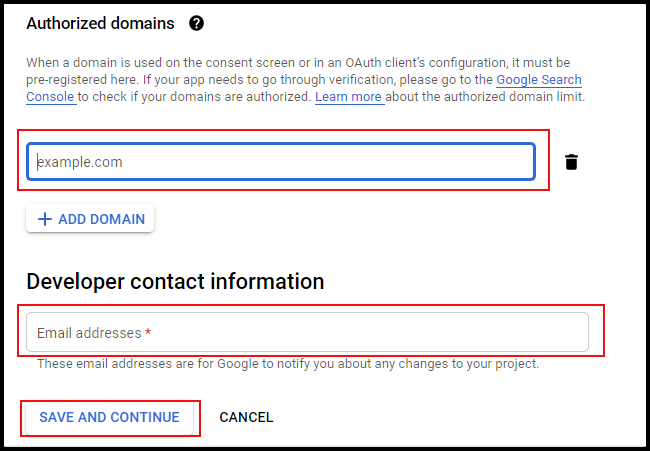
In Authorized domains, enter your domain. For example : durianmu.com. Enter your email address under Developer Contact Information section. Then, click Save and Continue button.
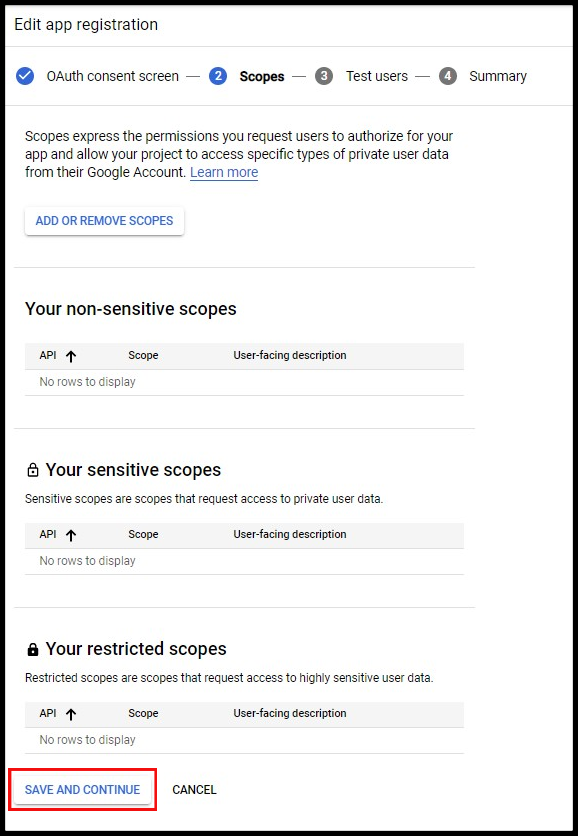
Step 10: In scopes page, click Save and Continue.
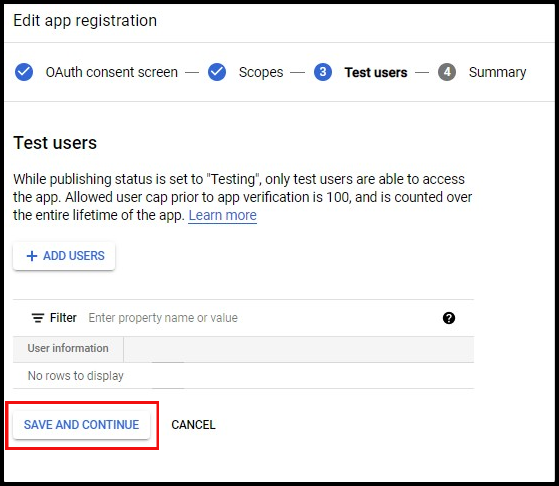
Step 11: In test users page, click Save and Continue.
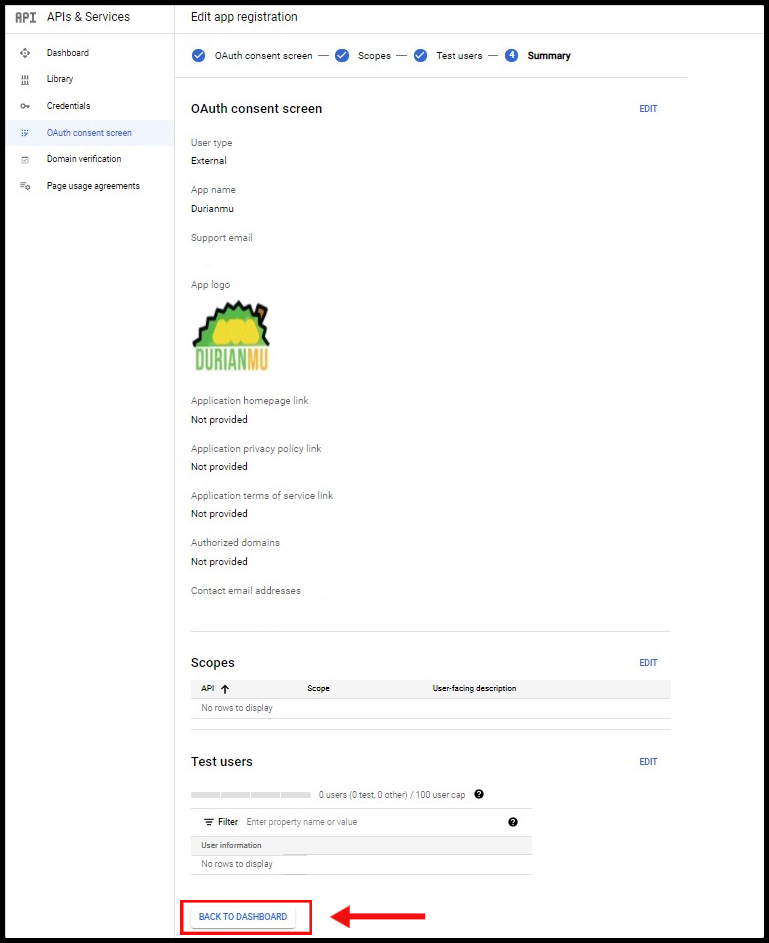
Step 12: In summary page, double check your details. You may amend by click button EDIT. Once confirmed, click button “Back to Dashboard“.
Step 13 : In dashboard, go to credentials. Click “+ Create Credentials“, then select “OAuth client ID“
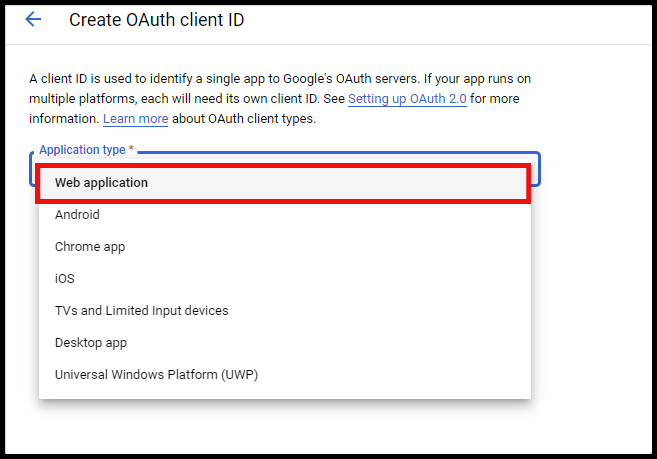
Step 14: Select “Web application” for “OAuth Client” setting.
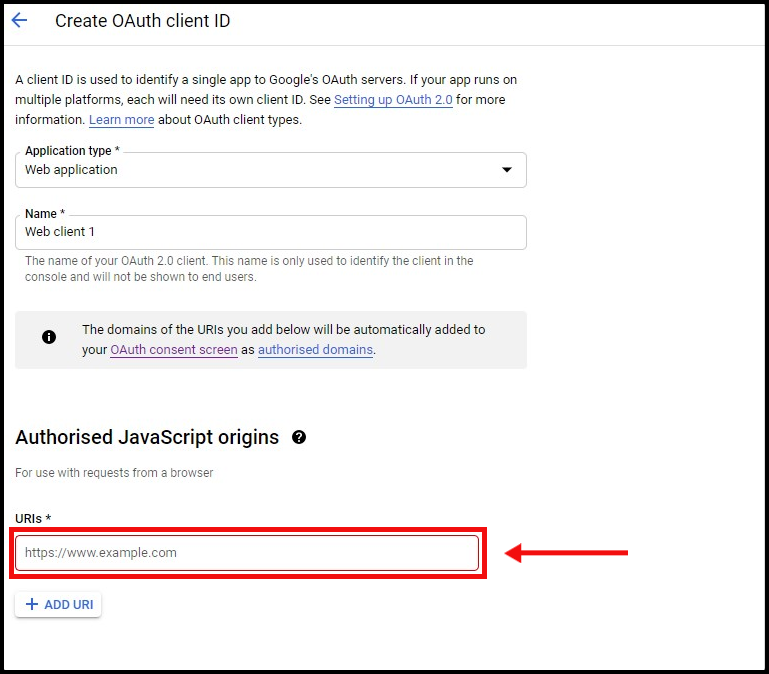
Step 15: Update the “Authorized JavaScript Origins” with your domain name.
For example: https://www.durianmu.com
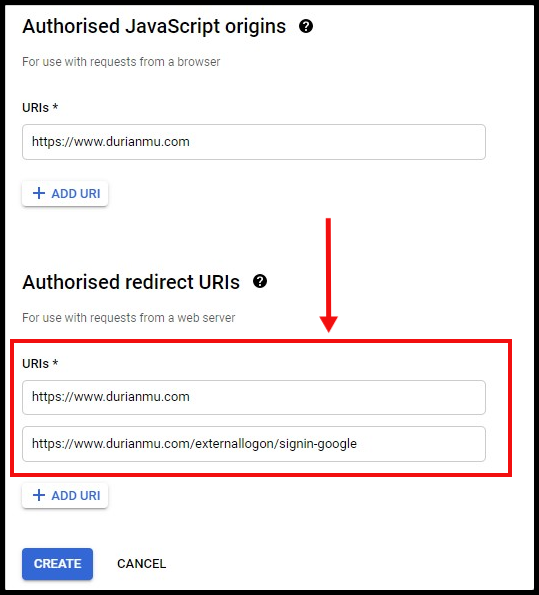
Step 16: Fill up the “Authorised redirect URLs” as below:
a. your domain/ website URL
b. your domain / website URL+ /externallogon/signin-google
then, click on “Create”.
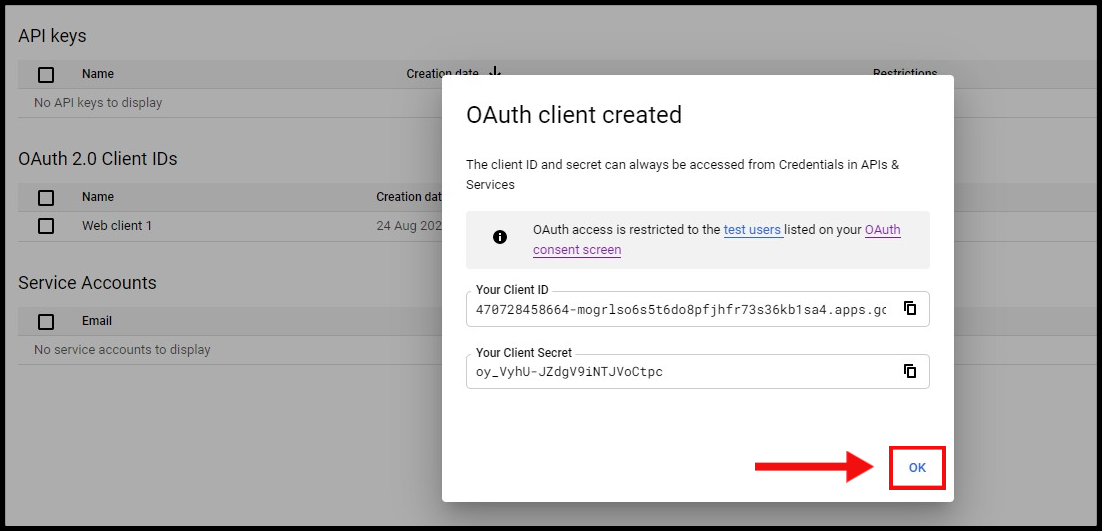
Step 17: Now your OAuth client has been created, click on “OK”.
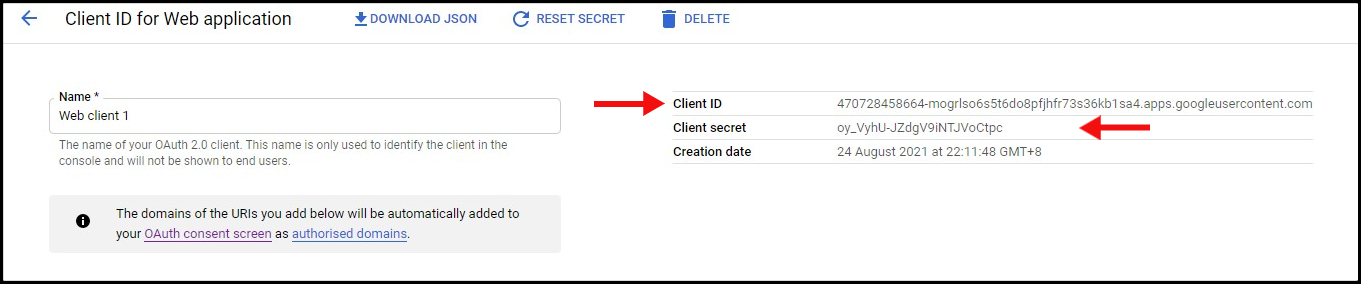
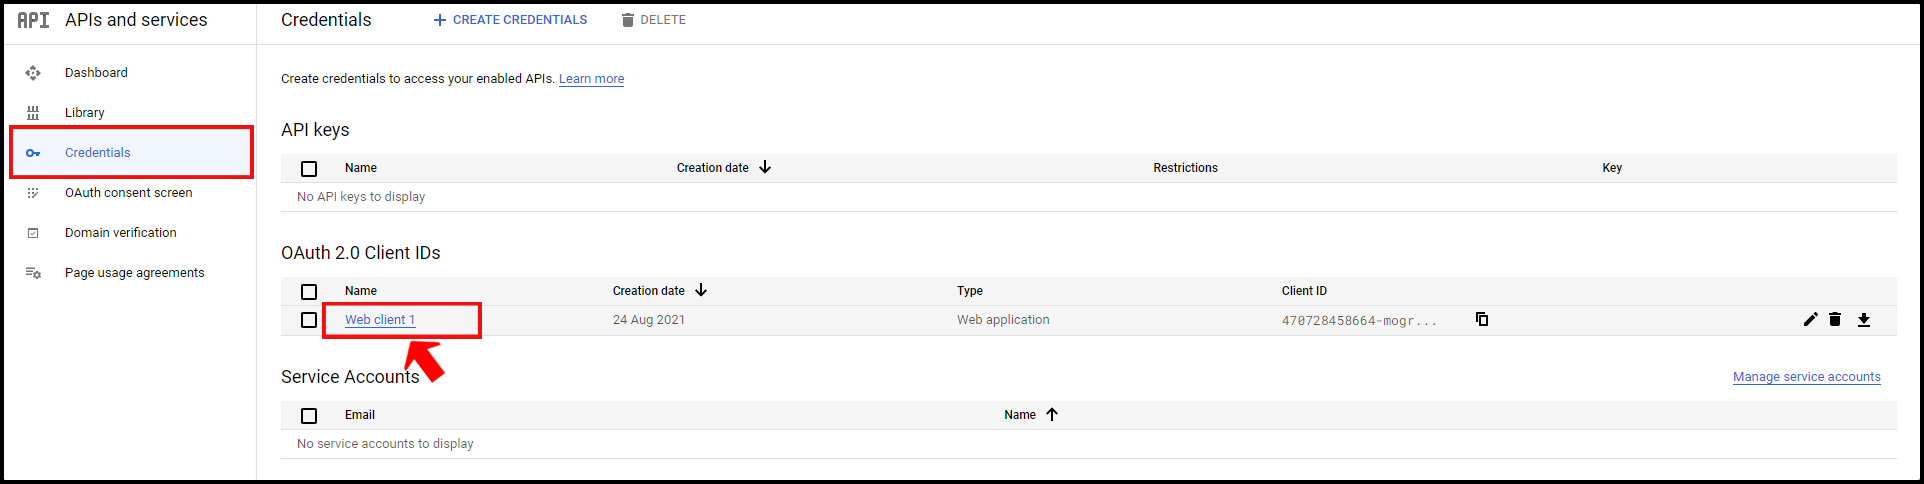
Step 18: Now, access to your console page – https://console.developers.google.com/?authuser=0. Then go to “Credentials -> Web client 1”.
Step 19: Once done, on the right side of the page there is your client ID and client secret.