Integrate your Lelong.my or Webstore Pro platform with ninjavan for smart order fulfillment. Follow the step by step guide below to integrate your store with ninjavan easily :
Step 1: Register ninjavan Pro Account
- Fill in Webstore Pro x ninjavan Registration Form.
- Ninja Van sales team with contact you and advice you with your registration.
- Once your account is activated, log in to your ninjavan Pro account.
Step 2: Setting Up ninjavan Integration
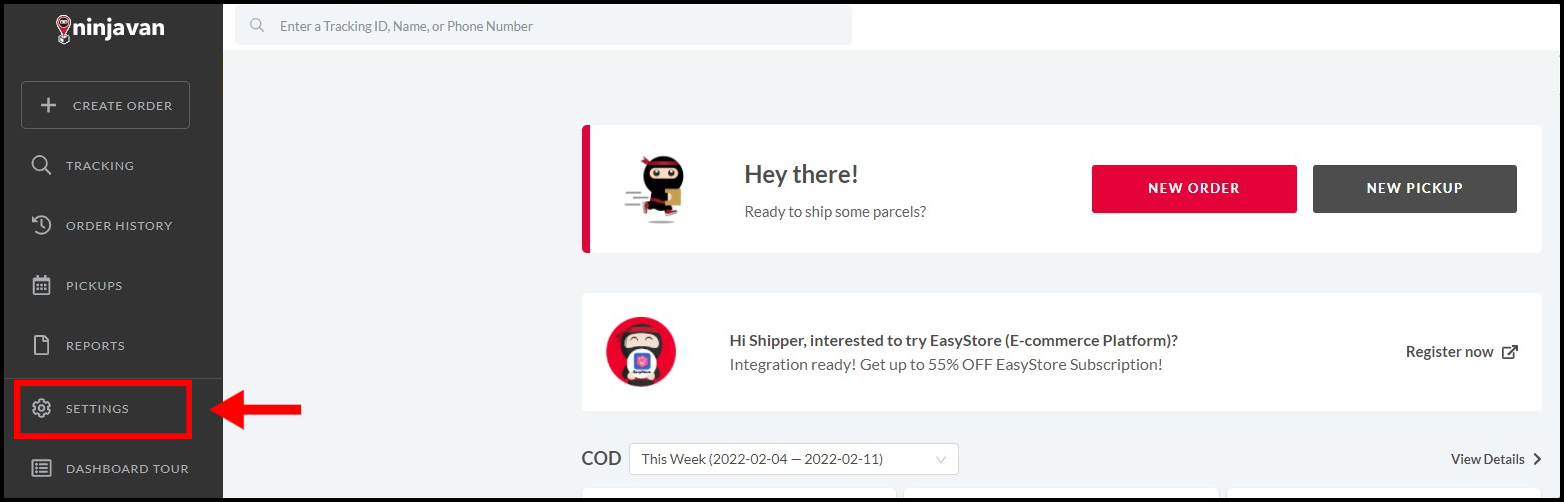
- In ninjavan dashboard, click on “Settings”.
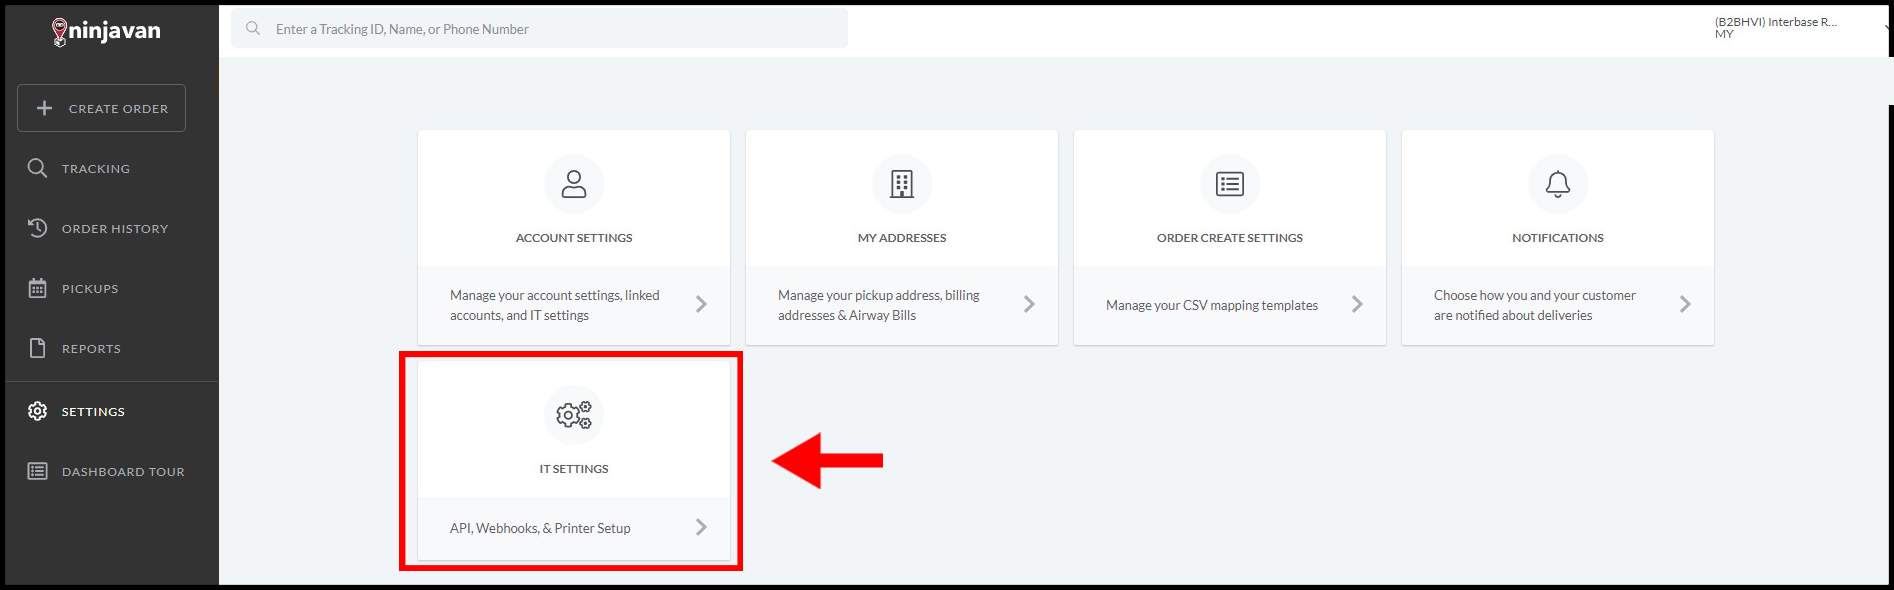
2. Under Settings, click “IT Settings : AP, Webhooks & Printer Setup“.
3. Your API key will be updated. Copy the API key and click  icon to copy the Client Key and Client ID.
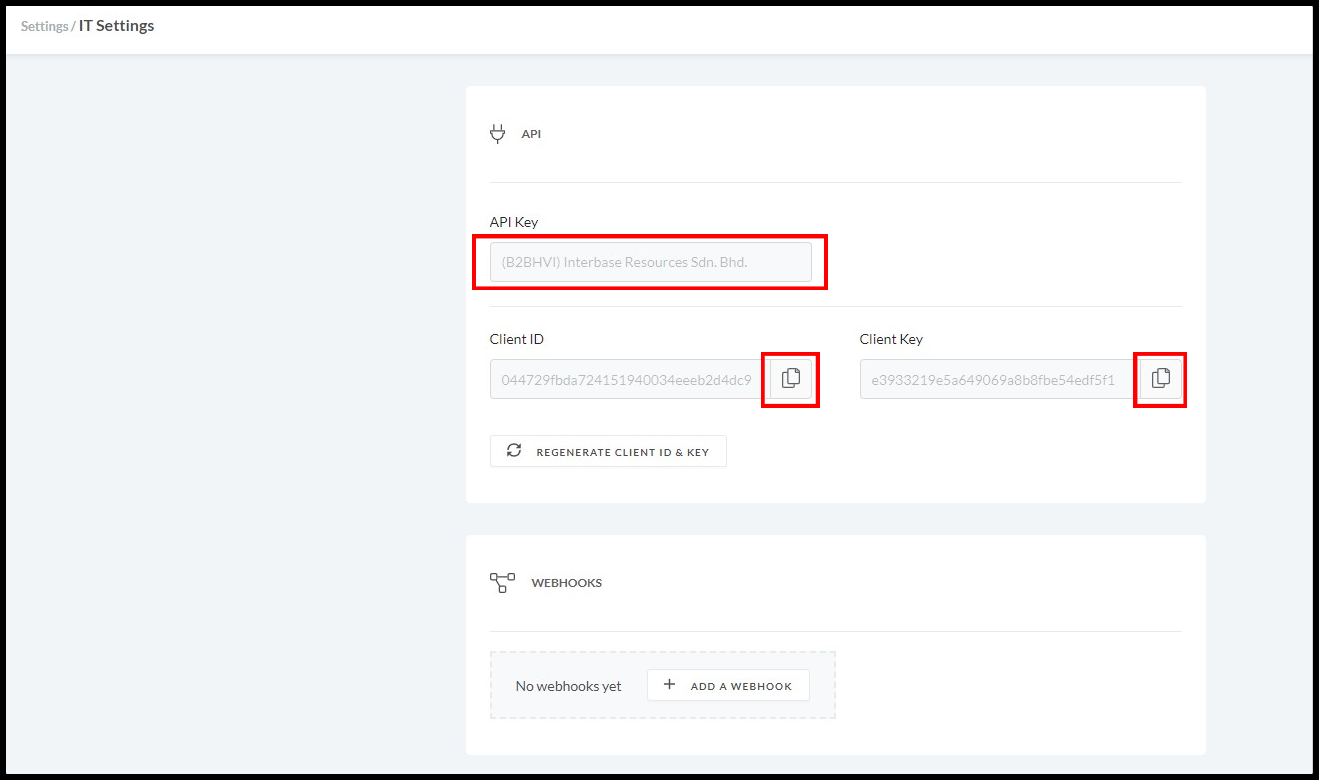
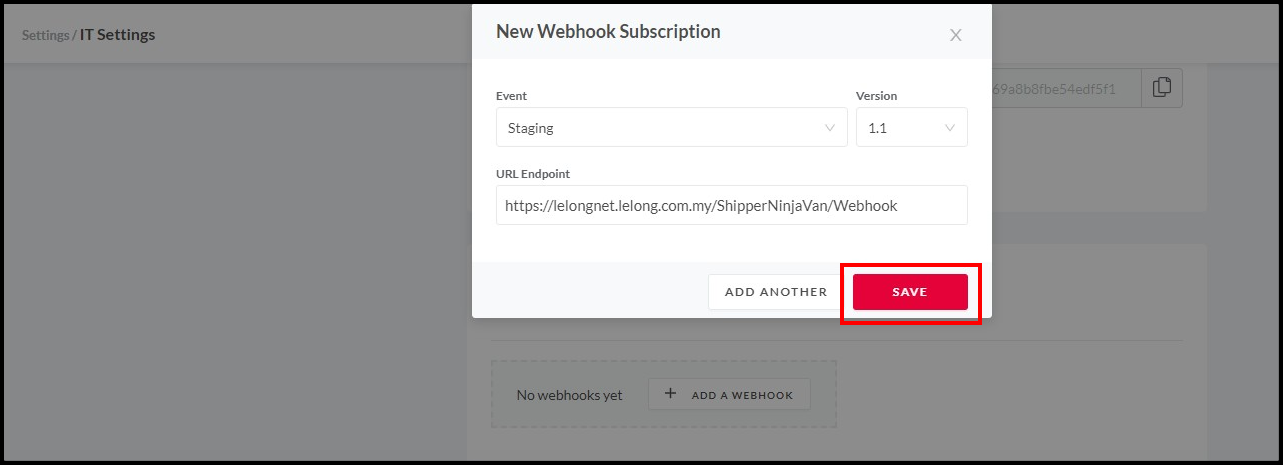
4. Under Webhooks section, click on “+ADD A WEBHOOK“.

5. Select :
i. the Event as Staging,
ii. the Version as 1.1,
iii. under the URL Endpoint, add webhook url.
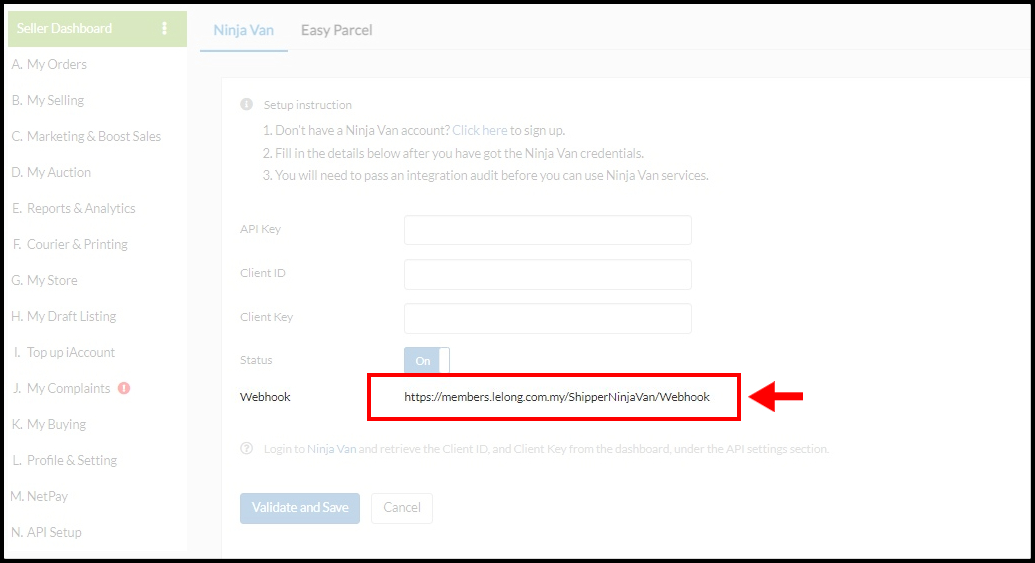
NOTE: You may get the Webhook URL by log in to your Lelong.my account. Then in “Seller Dashboard” go to “N. API Setup – 3. Ninja Van”, then you will be directed to the “NinjaVan” integration page. Copy Webhook URL and update on your ninja van URL EndPoint.
iv. and click on SAVE button.
vi. Repeat the step i – iv for all options in Event.
6. The Webhooks setting was successfully updated.

Step 3 : Setting Up ninjavan Integration in Webstore Pro / Lelong.my
1. Go to “N. API Setup” and click on “3. Ninja Van”.
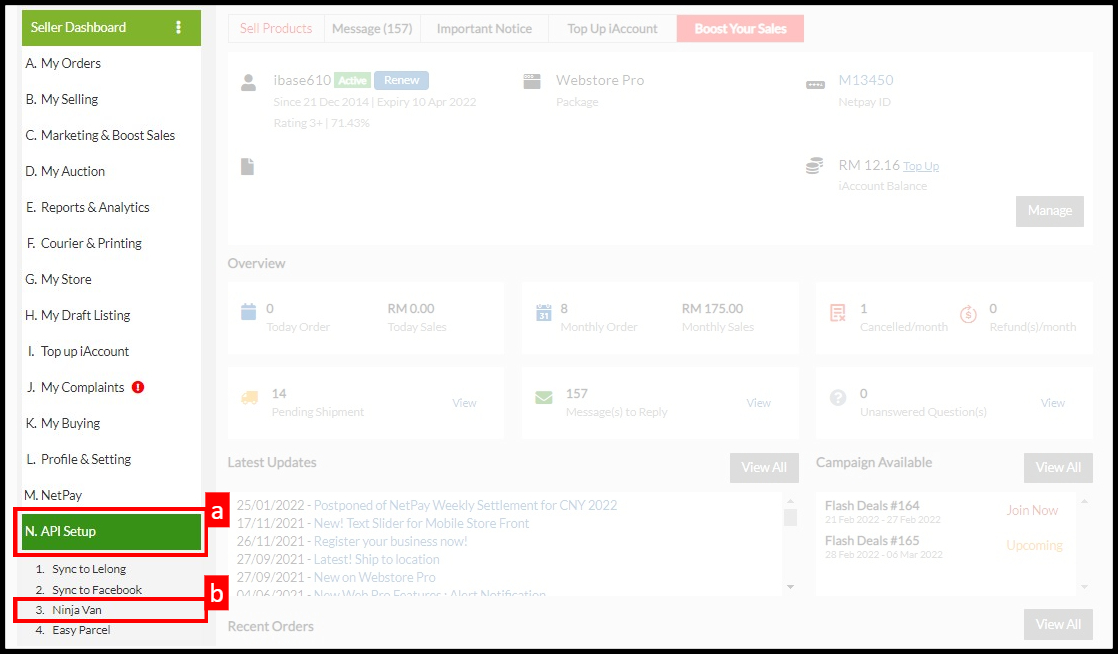
2. Click ninjavan.
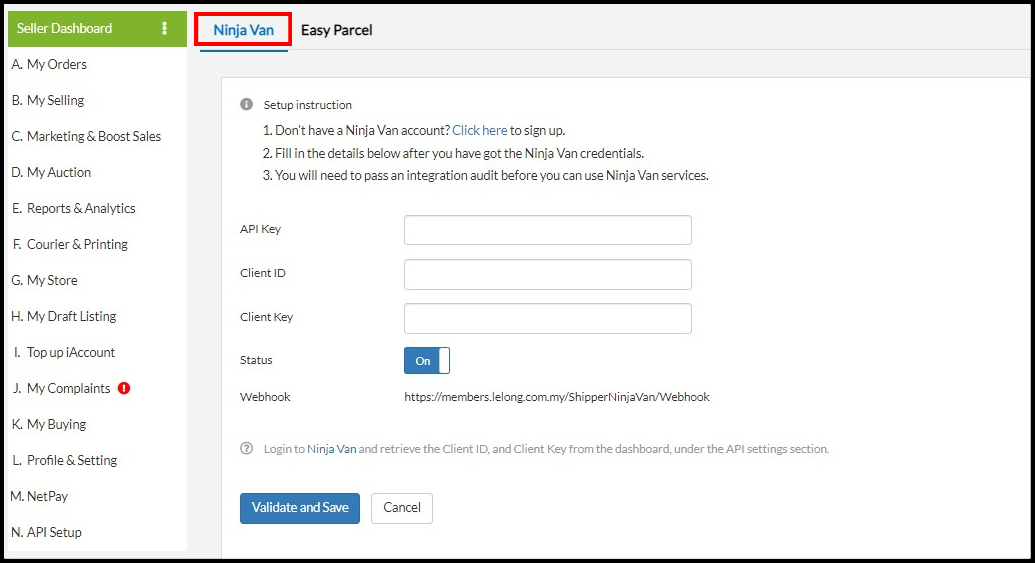
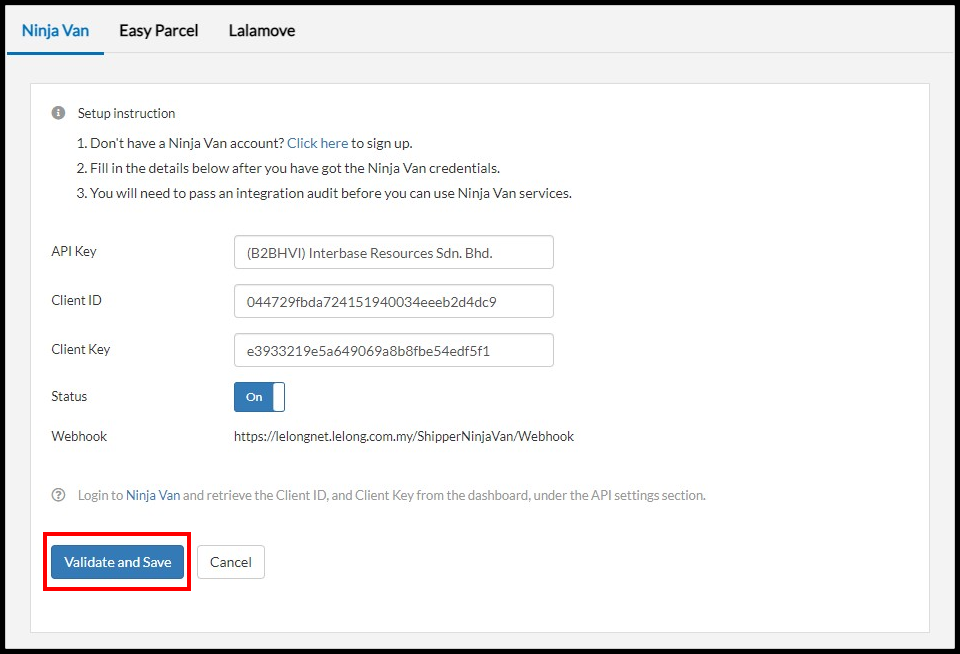
3. Paste your API Key, Client ID and Client Key. Toggle Status to “On” to enable the option.
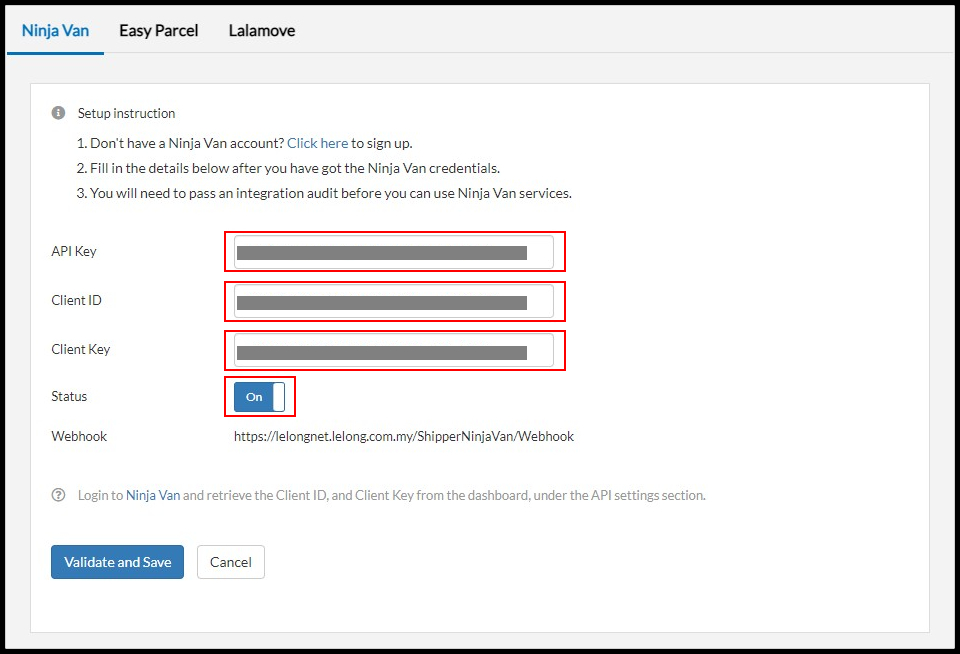
4. Click the “Validate and Save” button to update.
NOTE: Kindly wait for 5-7 working days for your API setup to be updated. Once activated, you may proceed to ship the parcel accordingly.
Step 4: Arrange Shipment
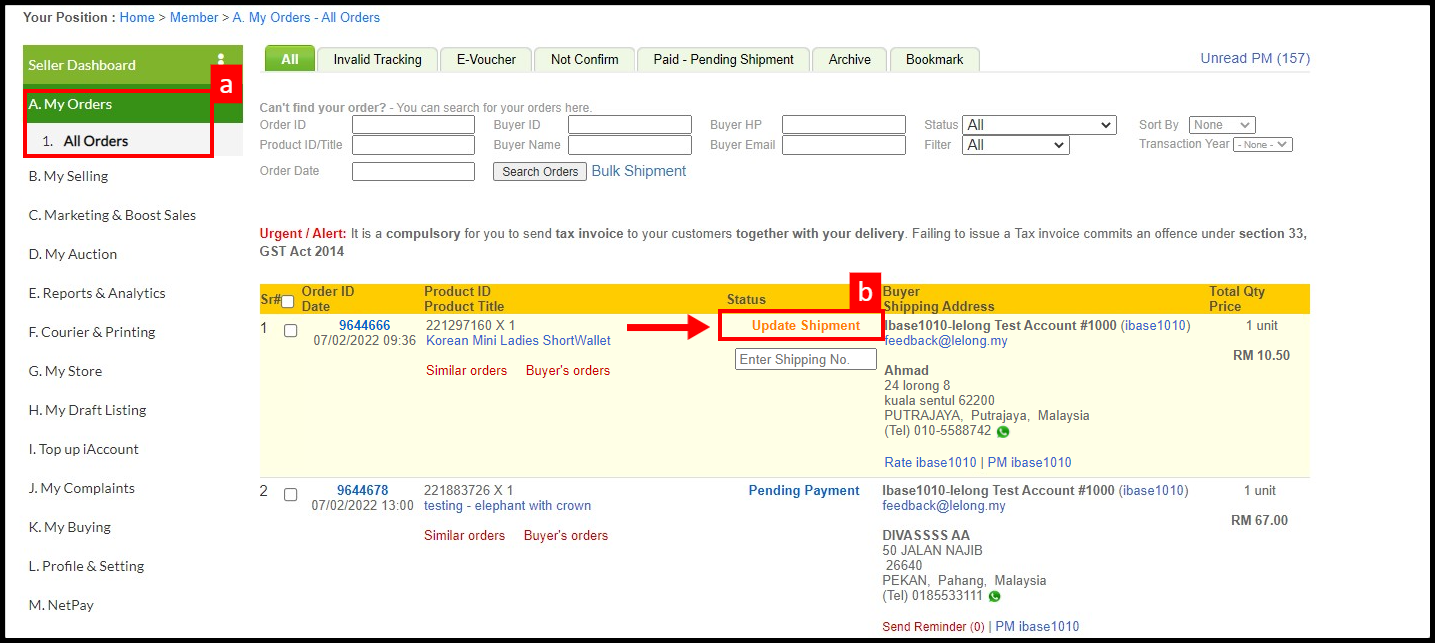
- After the customer paid, you may arrange shipment and update the tracking number accordingly. Go to A. My Orders > All Orders. Then, click Update Shipment to which order id you wish to update the tracking number.
2. Under Ninja Van section, click Submit to Ninja Van button.

3. The tracking number was successfully updated.

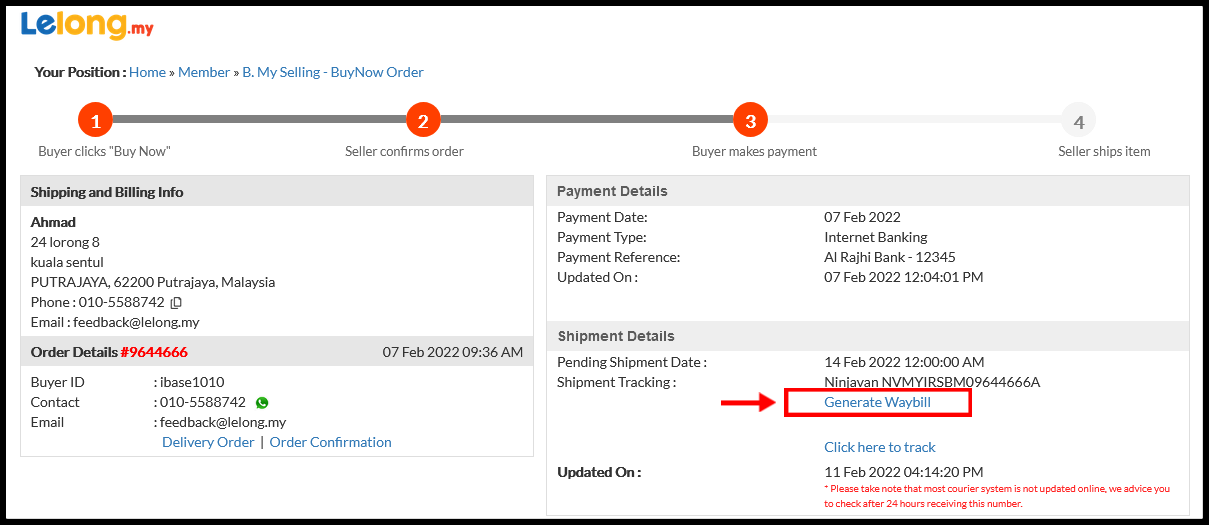
NOTE: Kindly print out your sticker air waybill and stick it on the parcel.
Click the Generate Waybill button to download Waybill and print it out.
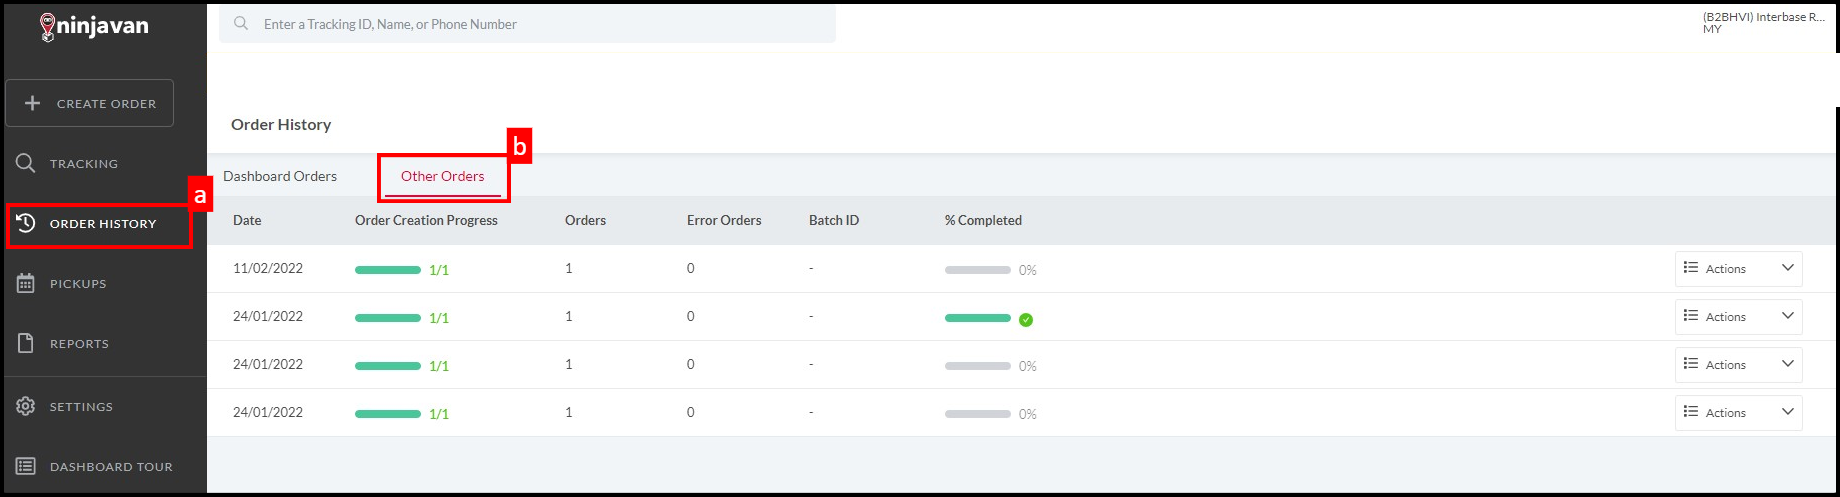
How to Track Shipment Status in ninjavan
1. Login to your ninjavan account and select Order History > Other Orders.
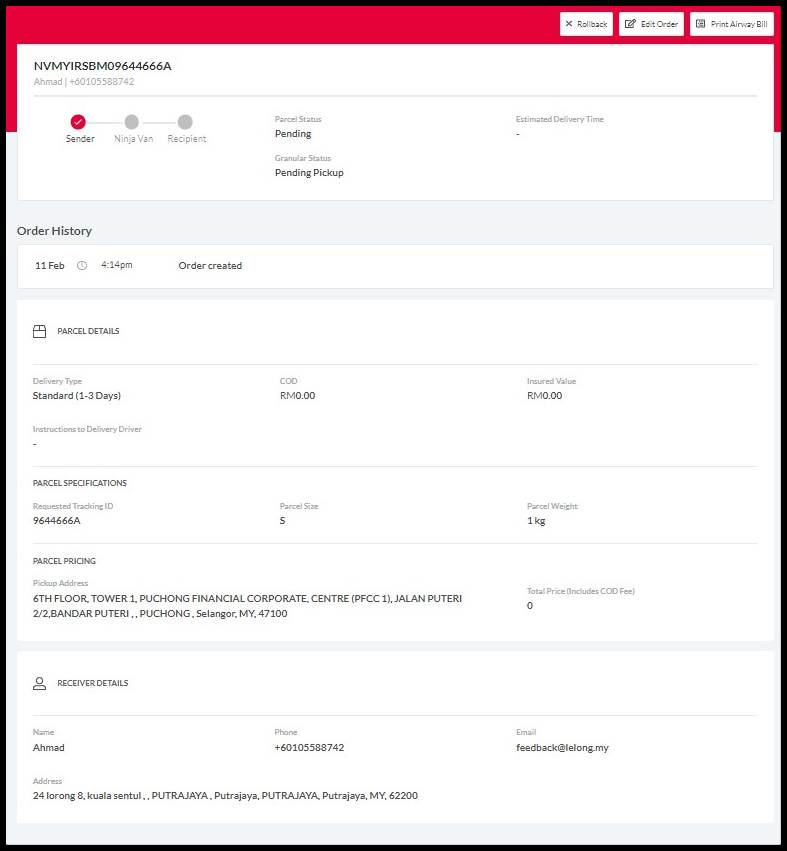
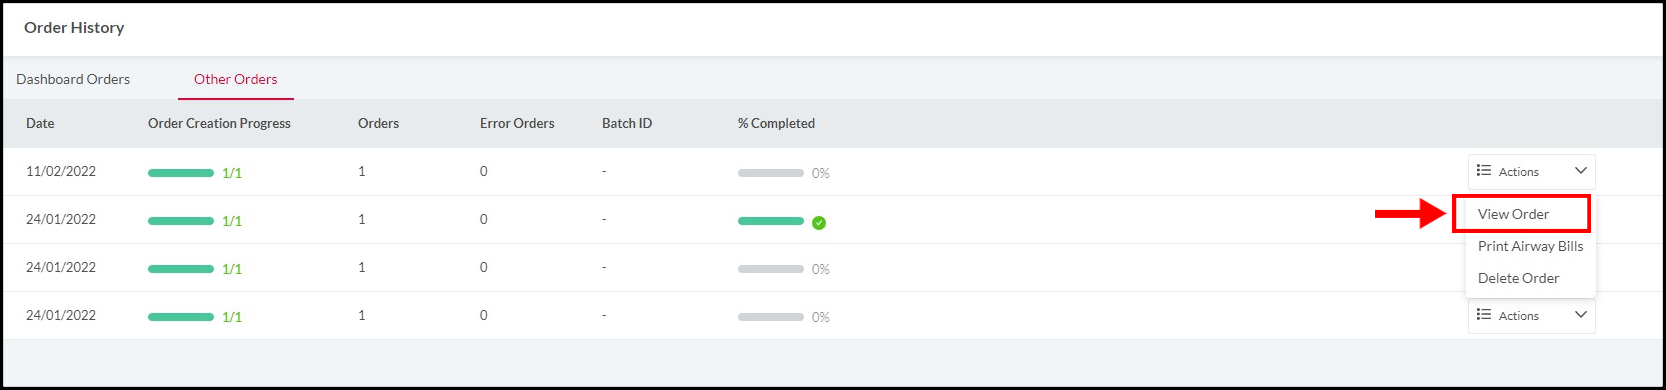
2. Select the parcel that you would like to view or manage. Under Actions drop-down list, choose for View Order.
3. The details of the parcel will be displayed as below: