Step 1: Register Tiktok for Business Account
- Fill in Tiktok for Business Sign Up Form.
- Once your account is activated, login to your Tiktok for Business account.
Step 2: Setting Up Tiktok Tracking
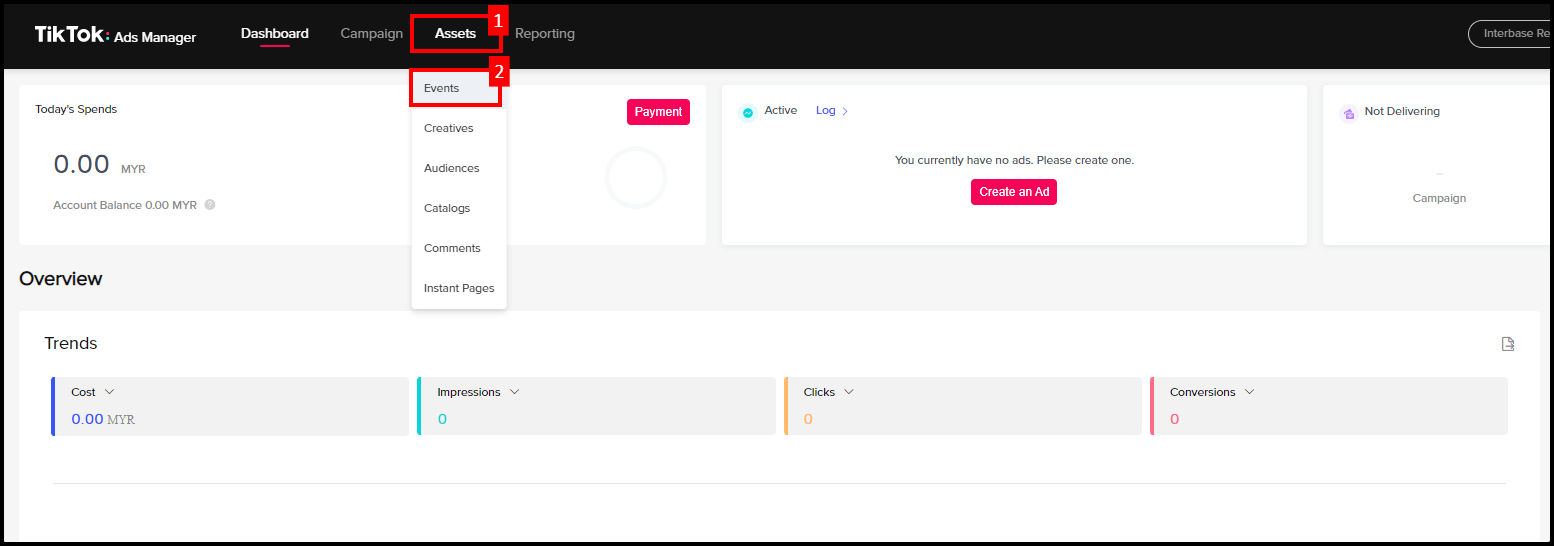
- Click on Assets, then select Events.
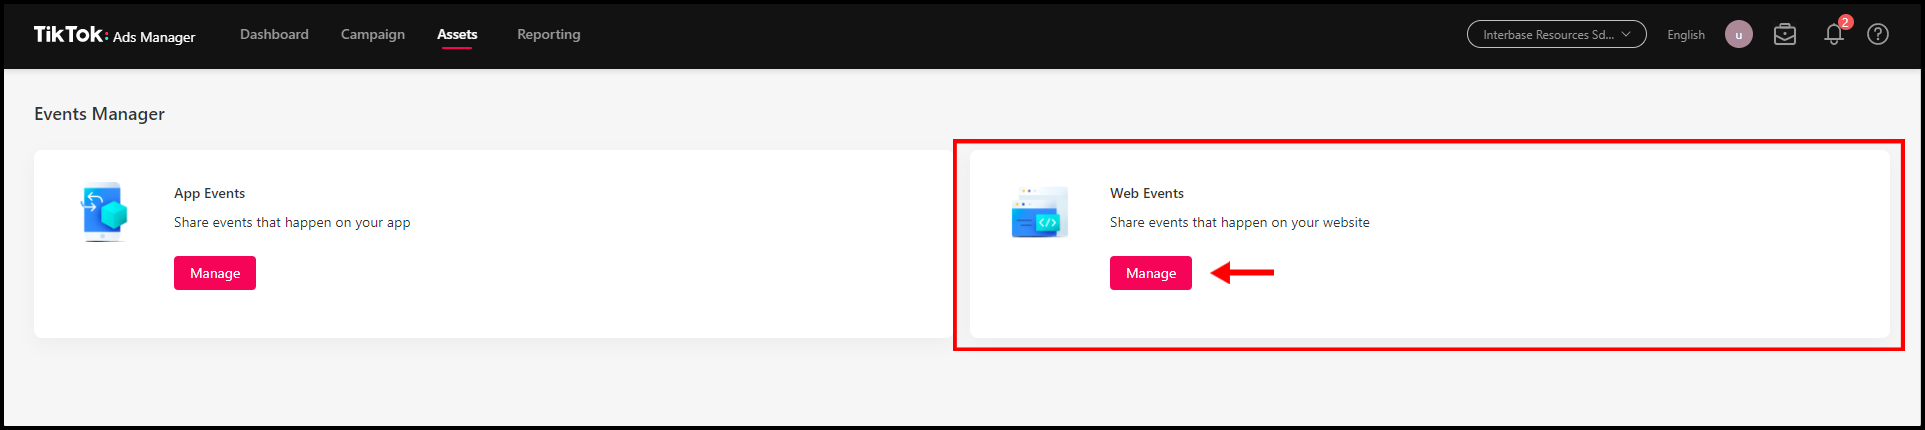
2. For Events Manager, select on Web Events, then click Manage.
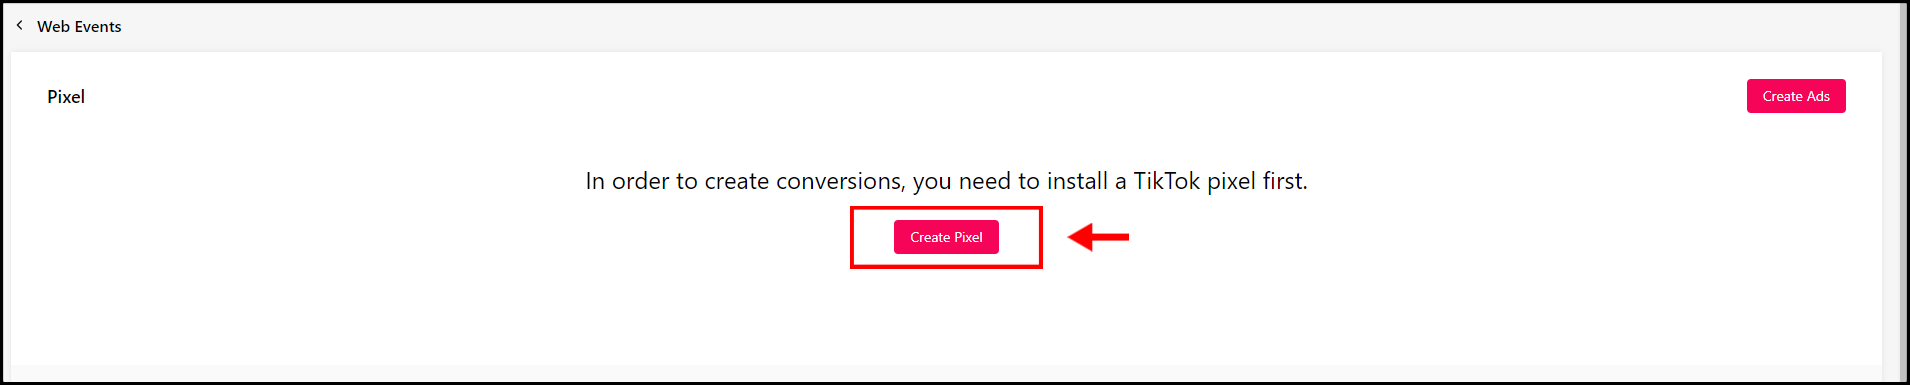
3. For Pixel, click Create Pixel button.
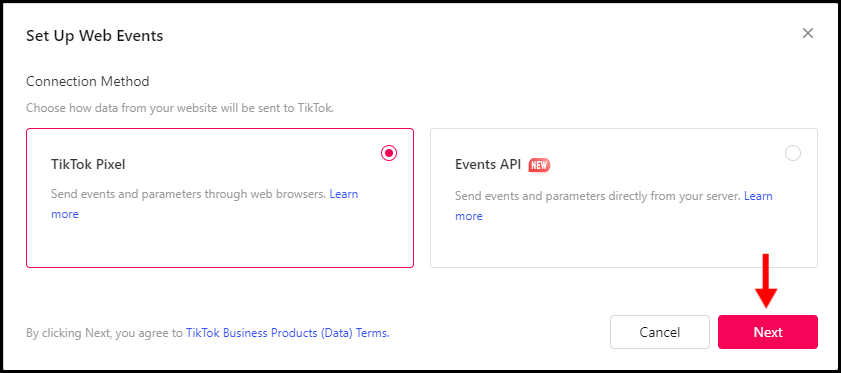
4. Next, for Connection Method, choose for TikTok Pixel. Then, click Next.
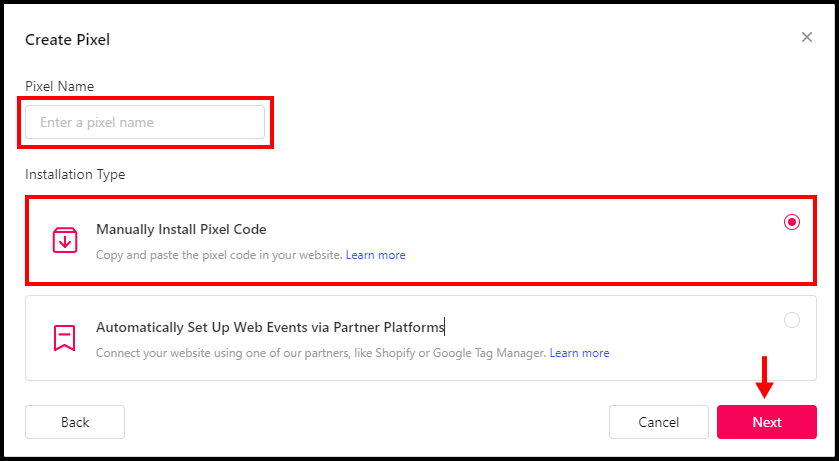
5. Enter a Pixel Name and select on Manually Install Pixel Code. Then, click Next.
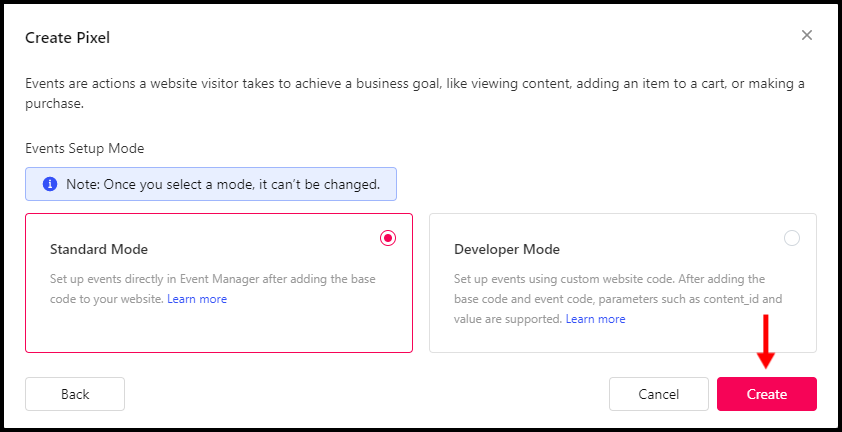
6. For Events Setup Mode, select on Standard Mode. Then, click Create.
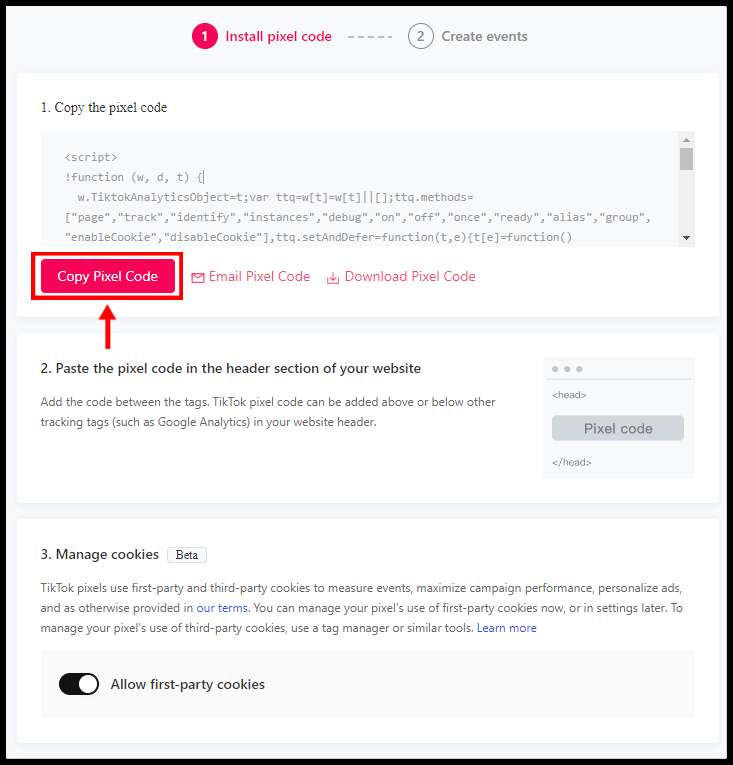
7. Click “Copy Pixel Code” button. Then paste the code to Notepad.
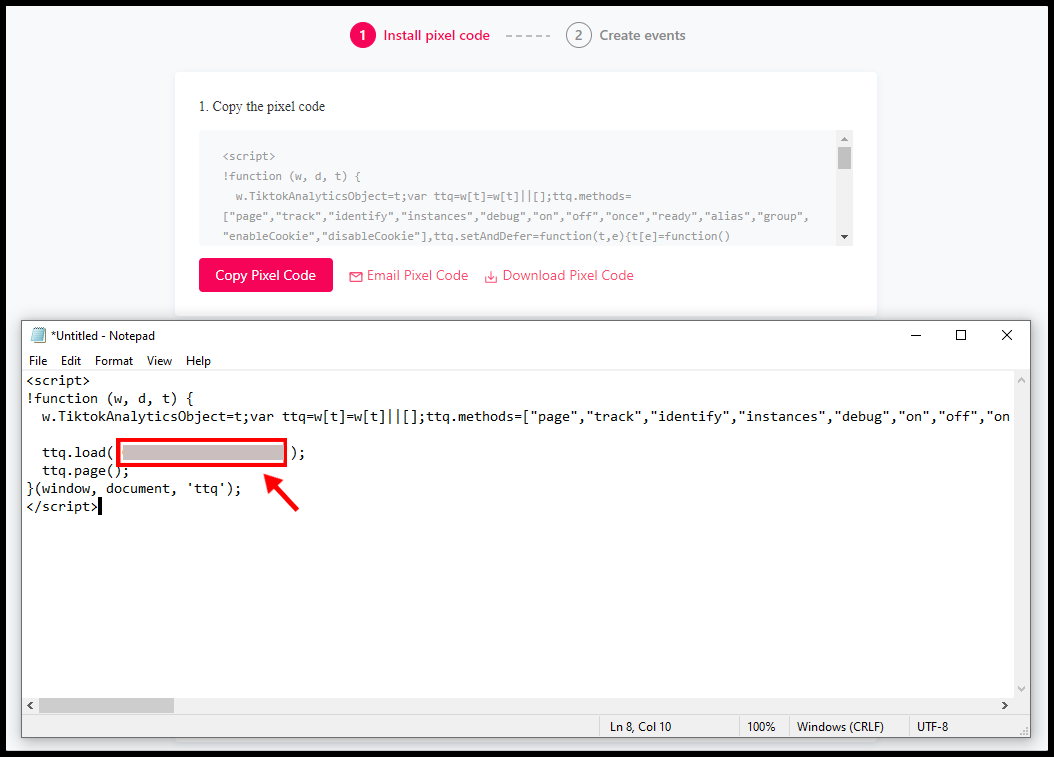
8. You Pixel Id will be located in the highlighted box. Copy the Pixel Id to paste in the Setting Page TikTok Tracking of Lelong.my account.
9. In Seller Dashboard > Go to G. My Store > 3. Store Settings.

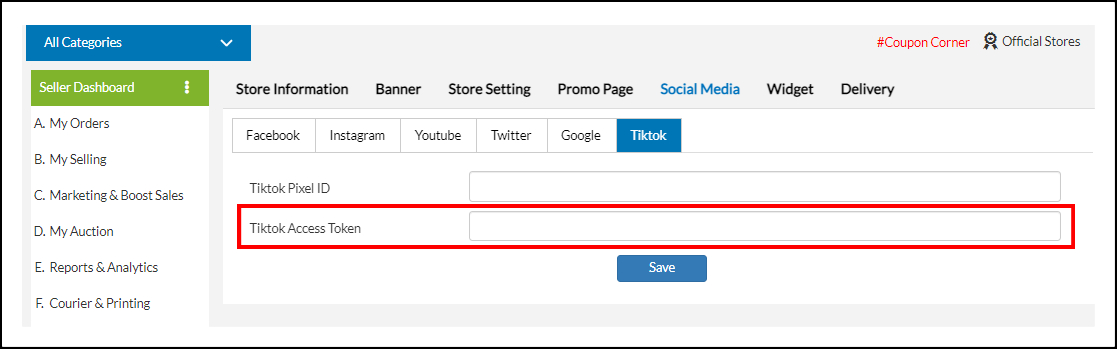
10. Choose Social Media tab > then click TikTok.
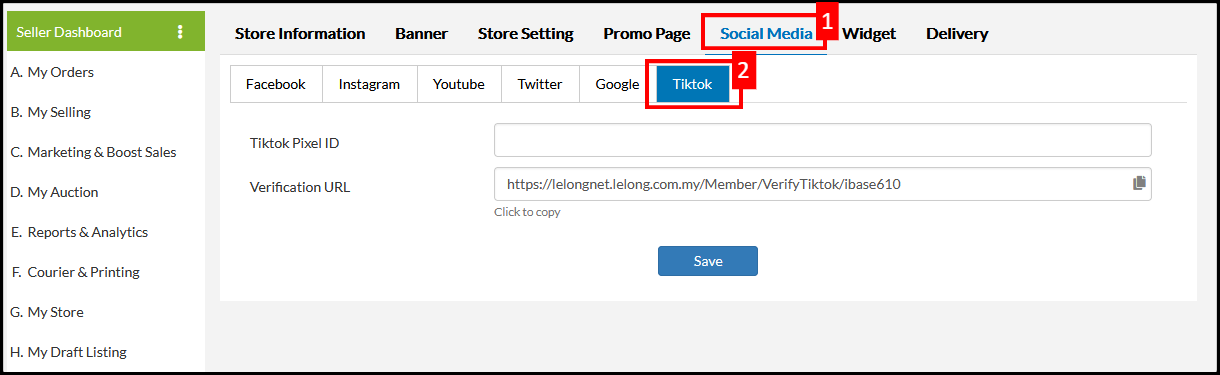
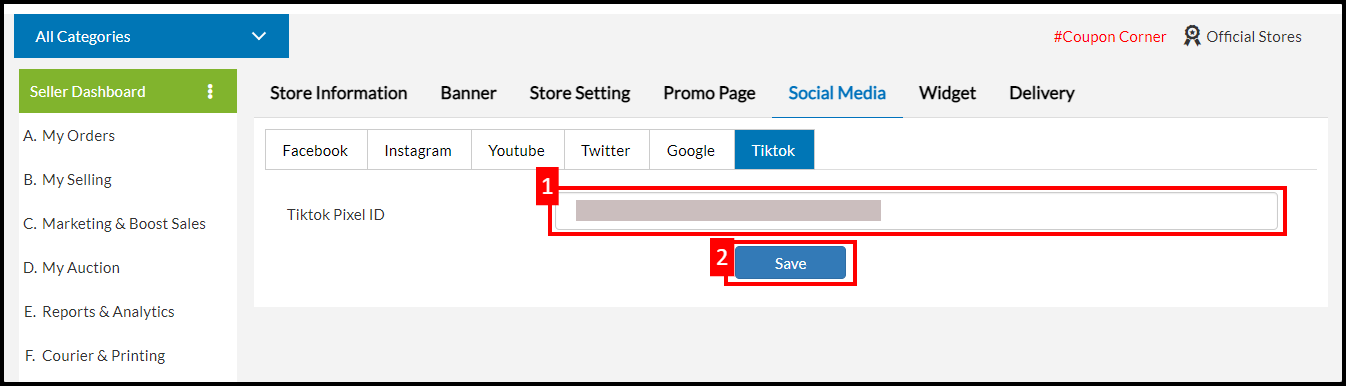
11. Paste your TikTok Pixel Id. Then, click Save.
12. Click  icon to copy the Verification URL.

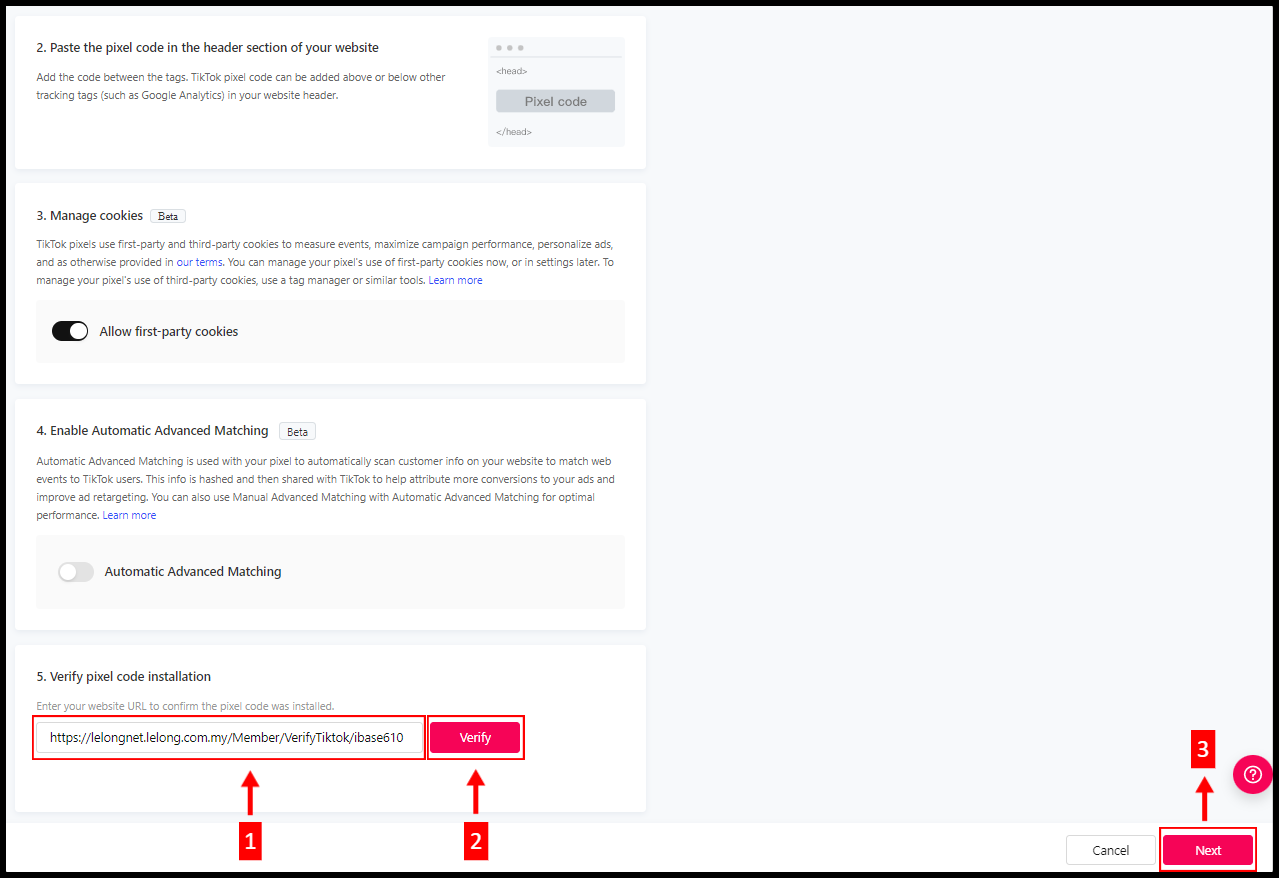
13. Return back to Install Pixel Code page, scroll down page until section “No 5. Verify pixel code installation“.
- Paste the Verification URL.
- Click “Verify”.
- Click Next.
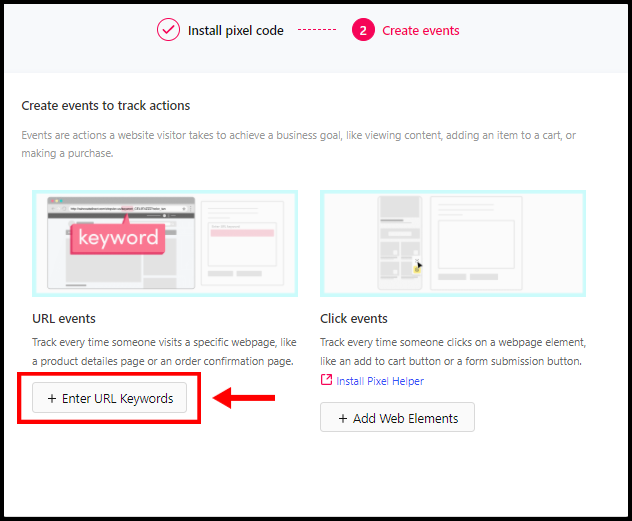
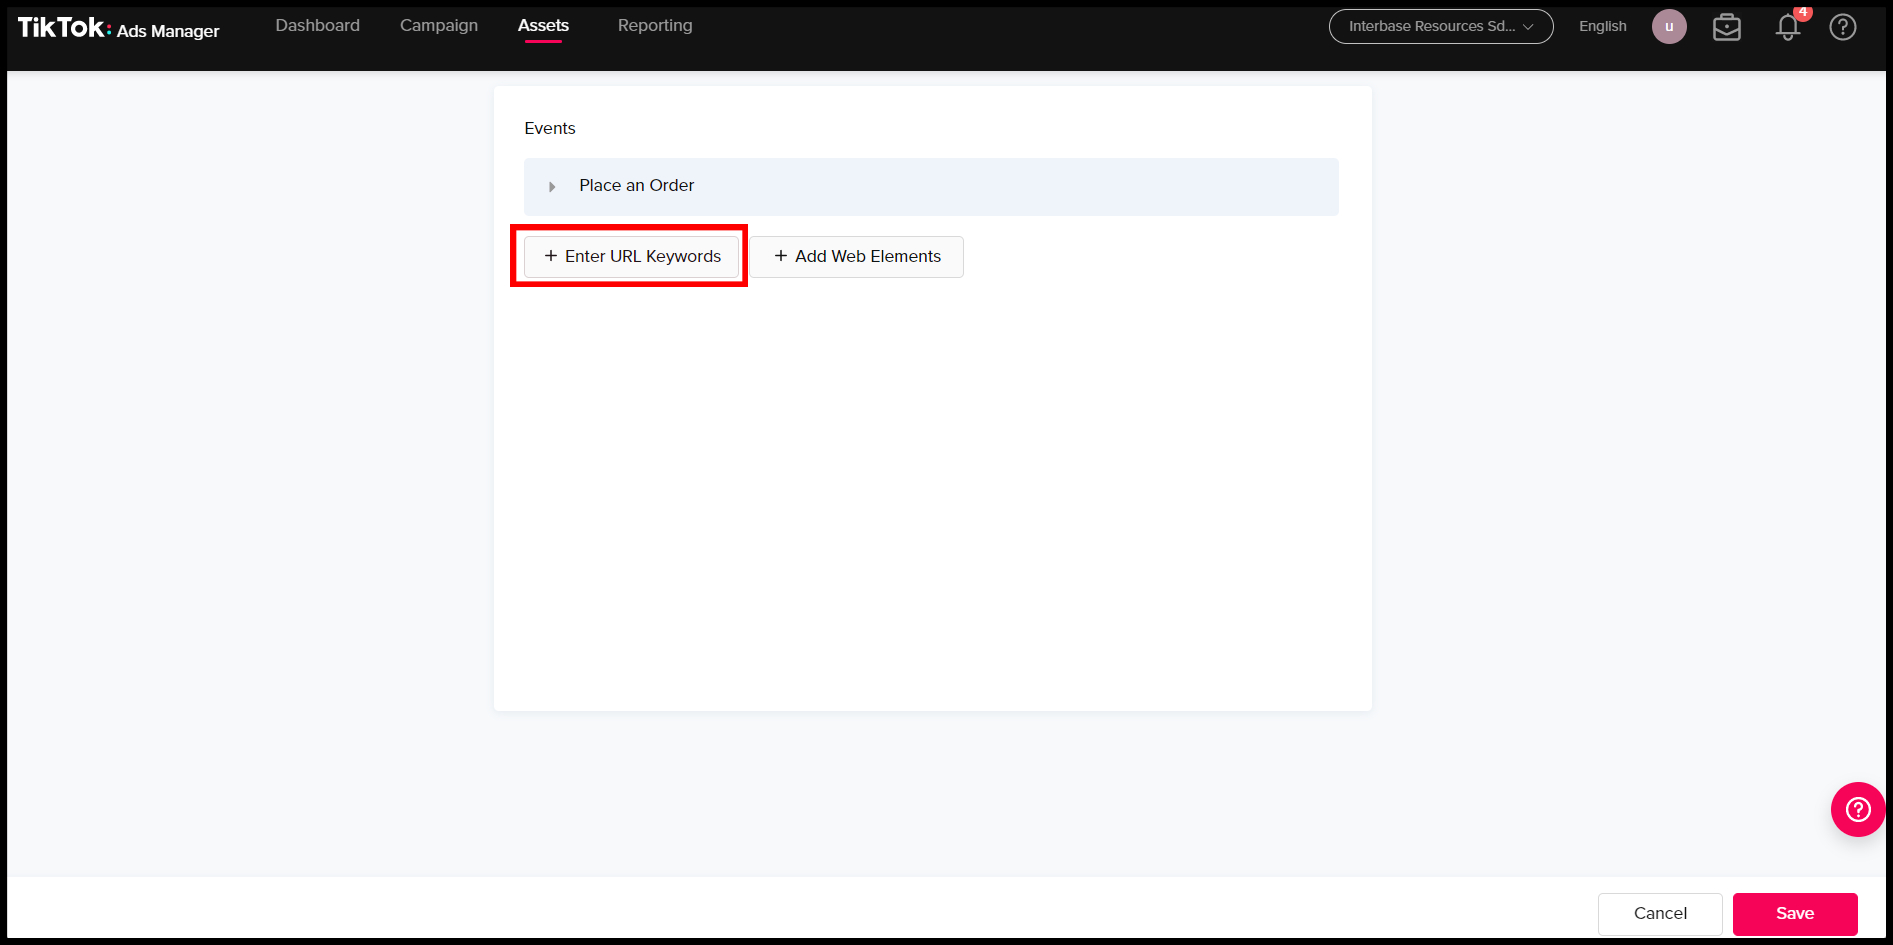
14. Next, under URL Events, click + Enter URL Keywords.
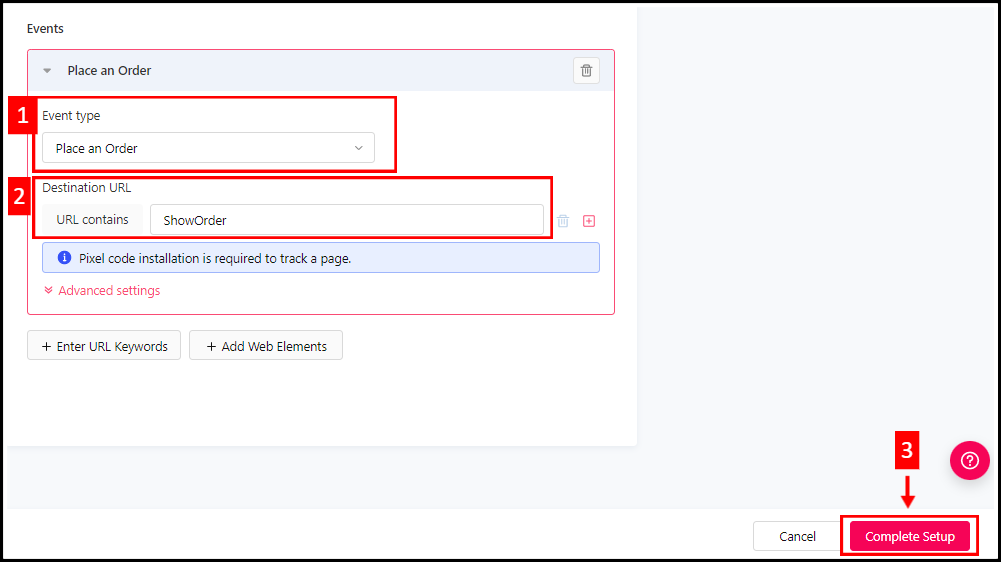
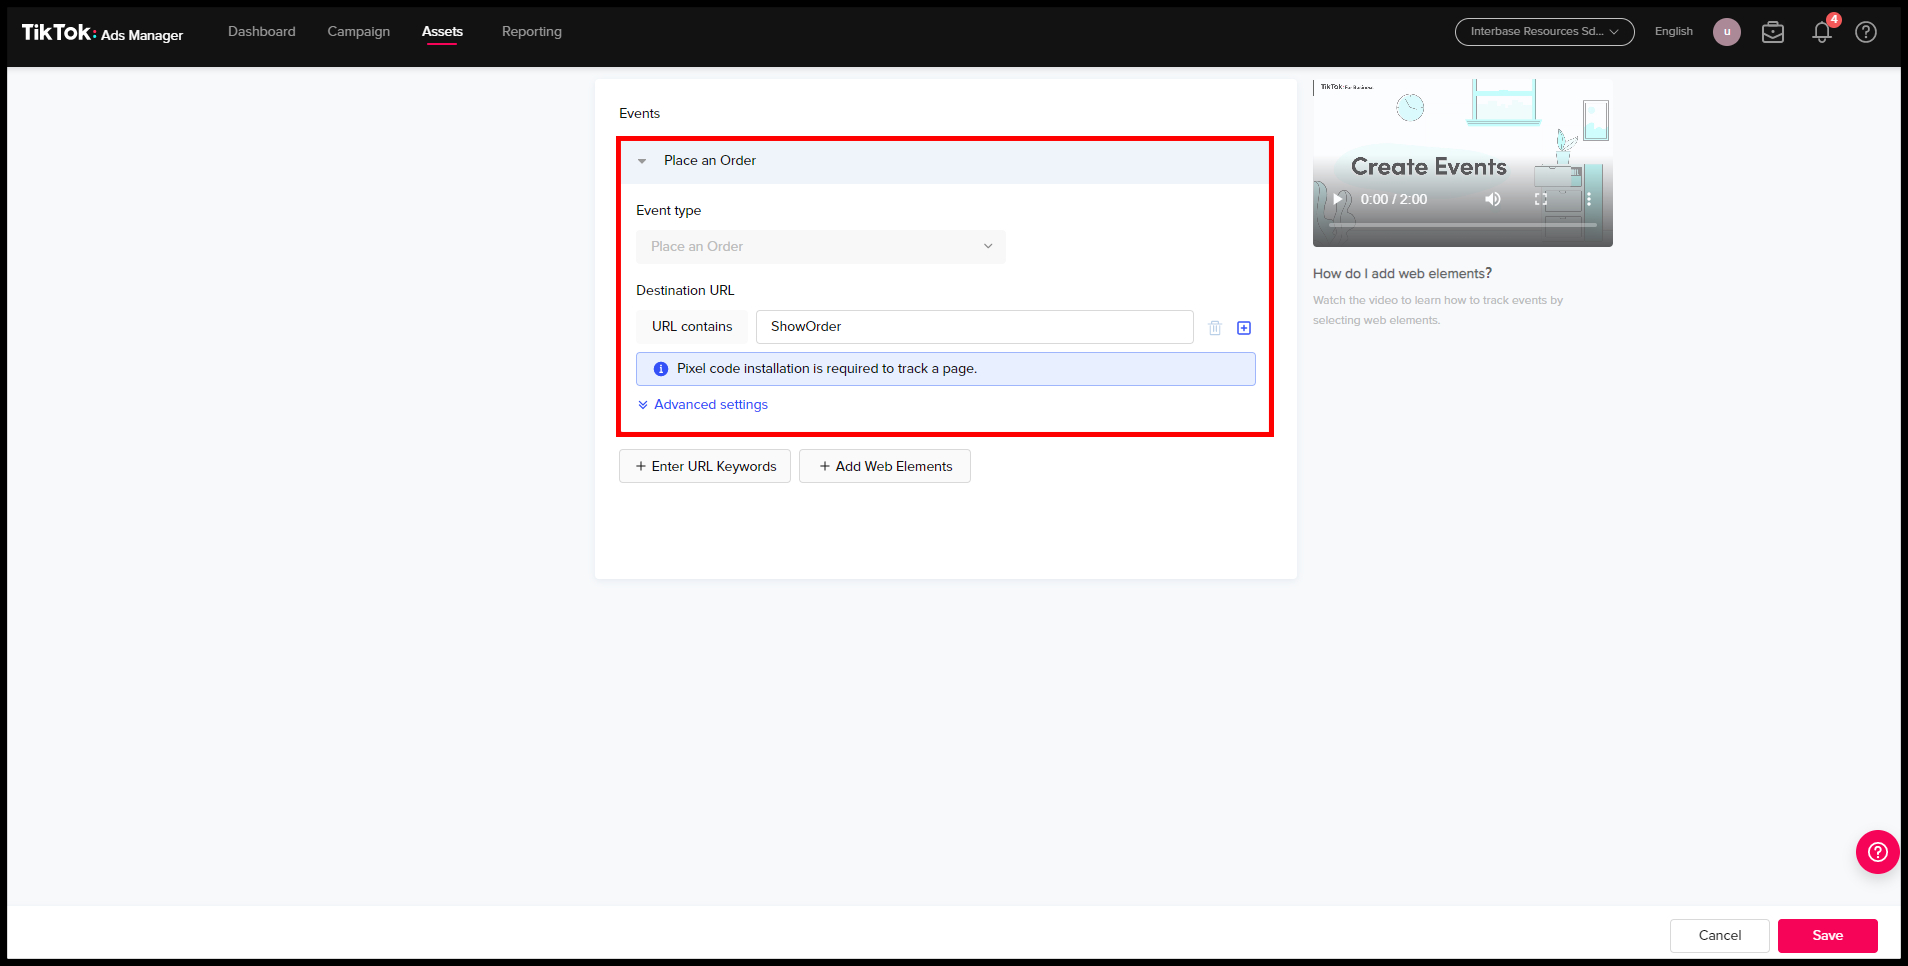
15. Next, you need to click Event type drop-down list and select “Place an Order“. In URL contains, enter “ShowOrder“. Then, click Complete Setup.
16. Click “Proceed“.

17. Your Pixel ID has successfully created.
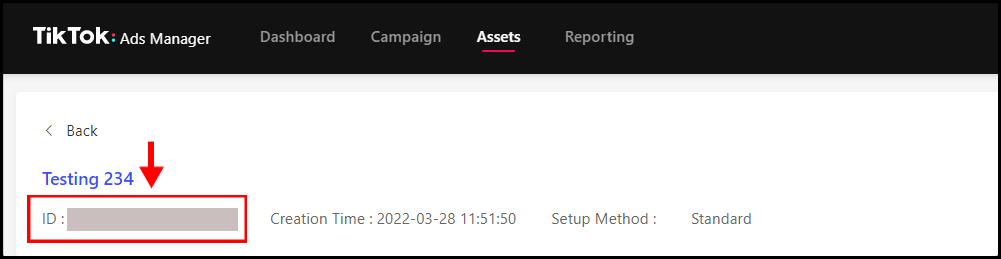
NOTE: The TikTok Pixel ID is located below the Pixel name. This is the ID which needs to be entered in Lelong.
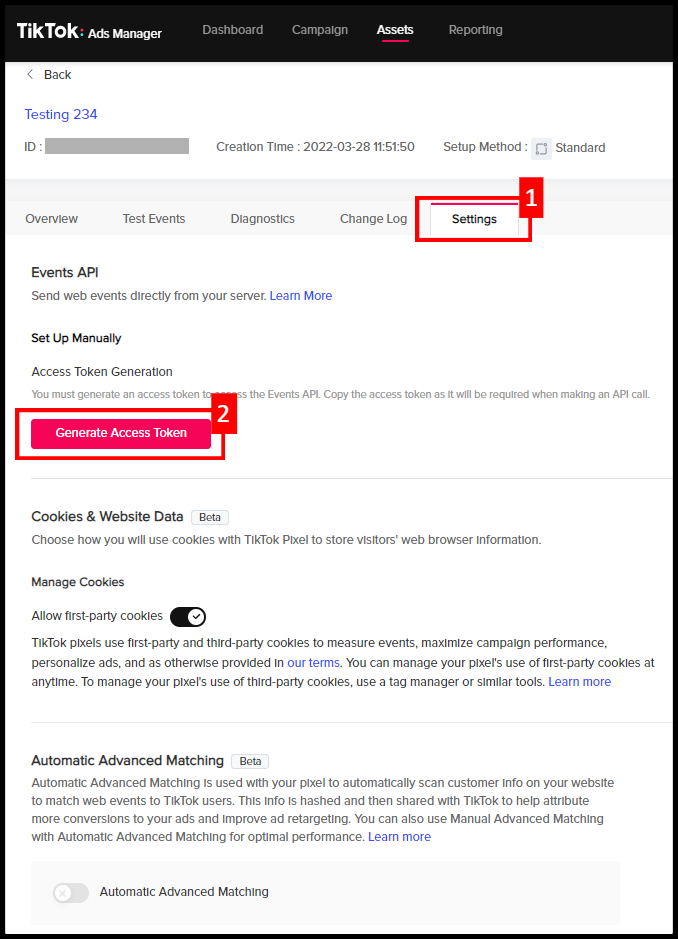
Step 18. Click on “Generate Access Token” under settings, then copy the code to paste it to “Tiktok Access Token” column in Lelong setting page.

19. Click on “Add Events” to add other tracking.

20. Add “Place an Order” option as Event type and set URL contains as “ShowOrder”.
21. Next, click “+ Enter URL Keywords” to add other Event type.
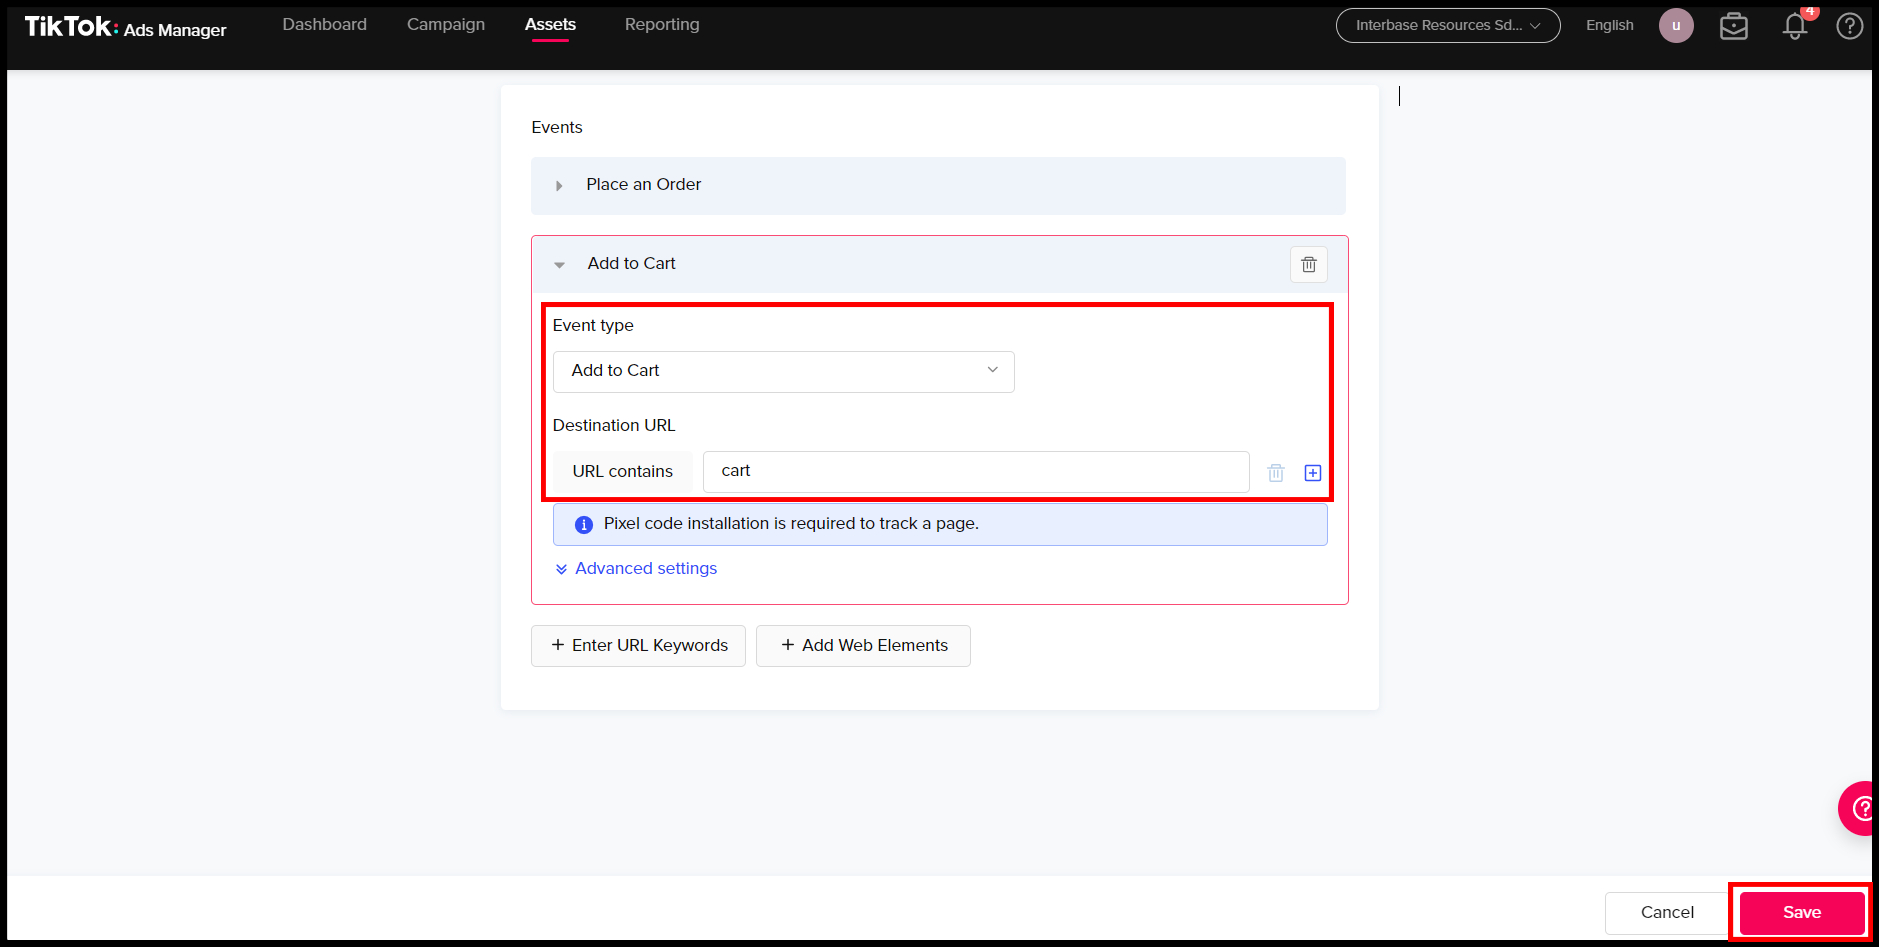
22. To track Add to Cart, select “Add to Cart” option as Event type and set URL contains as “cart”.
23. Next, to track View Content, select “View Content” option as Event type and set URL contains as per listed below:

24. To track Initiate Checkout , select “Initiate Checkout” option as Event type and set URL contains as “PlaceOrder“.

25. Lastly, click “Save” button to save the changes accordingly.