Discount promotions is a features that you can use to schedule price changes for your storewide listings. It’s really important for short-term promotions and temporary holiday sales such as Mother’s Day or Black Friday. Change product sale prices and stop worrying about the need to revert them back to regular values on time.
Remarks : After the sale end, system will reflect the remaining available quantity.
Follow the step by step guide below to setup discount promotions:
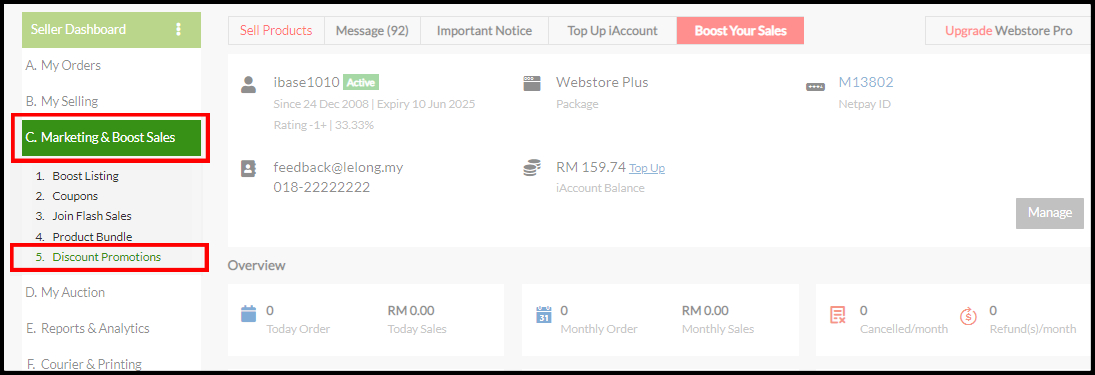
1. In Seller Dashboard, go to “C. Marketing & Boost Sales” and click on “5. Discount Promotions”.
1) To start assign discount price to any product, click Add Product in Product Scheduler page.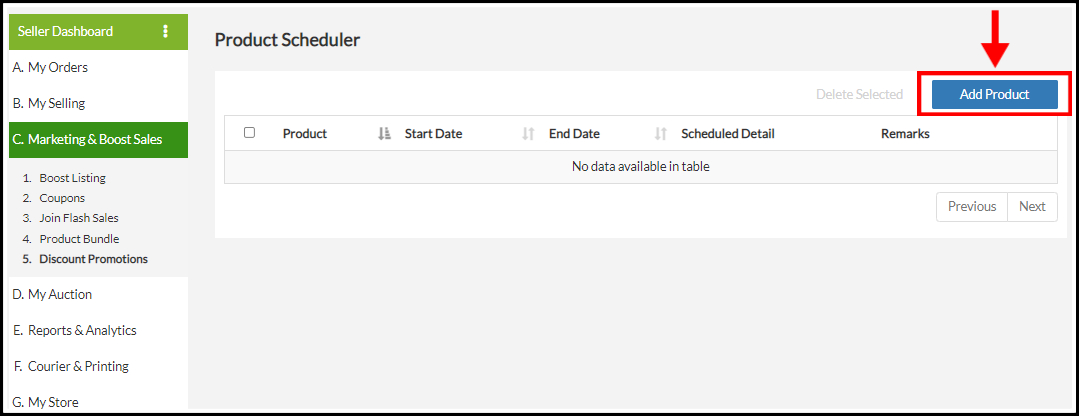 |
2) Click+ Add Product. 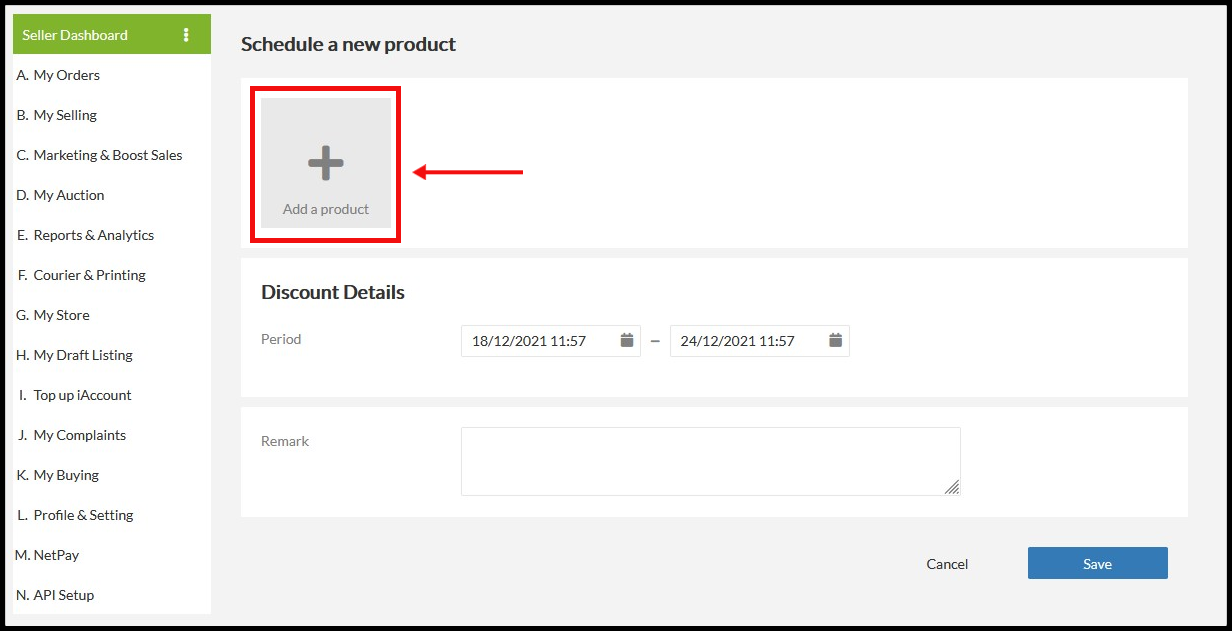 |
3) Select specific products to which you want to apply price changes.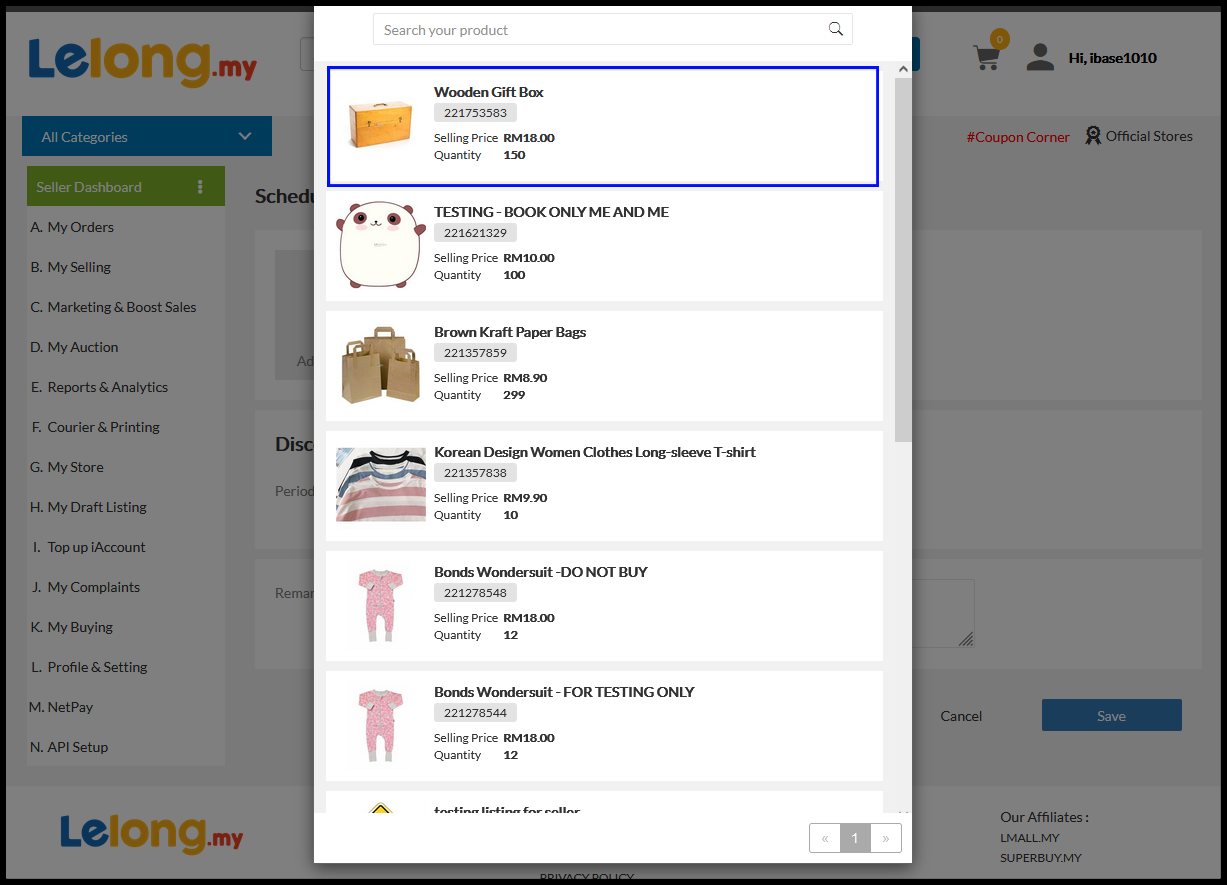 |
4) Next, you will be directed to schedule a new product setup page.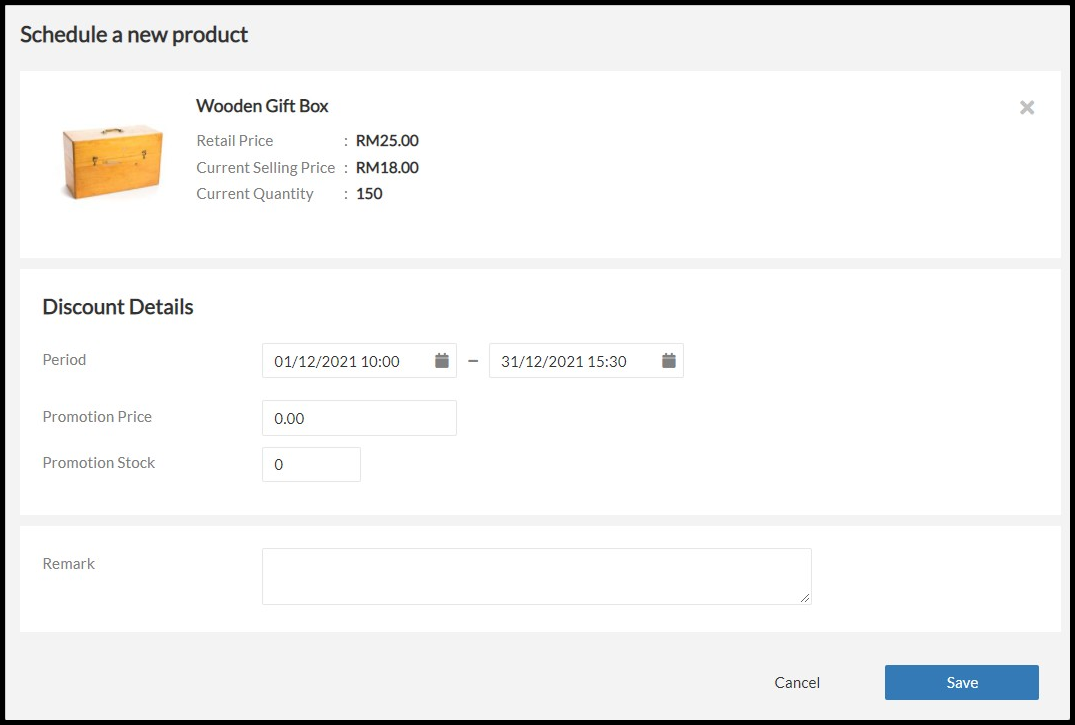 |
| 5. In Period section, you may schedule specific date and time the sale will be applicable for your customers. a) Click left box to set Start Date and right box for End Date of sale price. 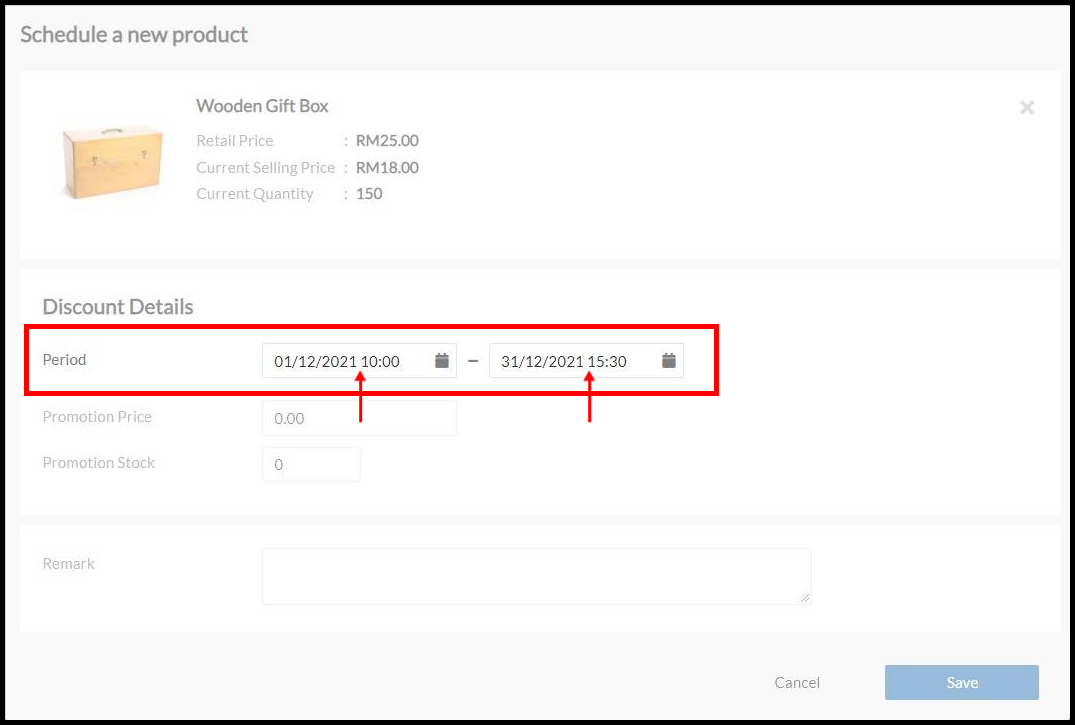 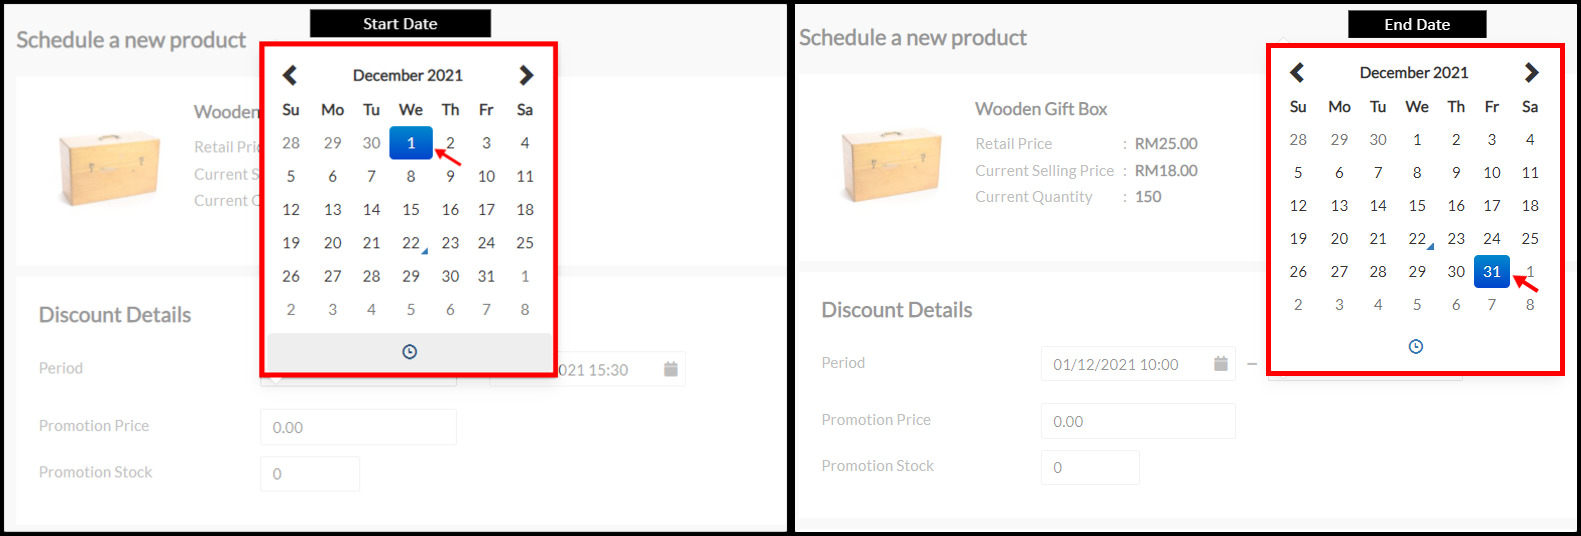 b) Click the clock button to set Start Time and End time for the price changes. 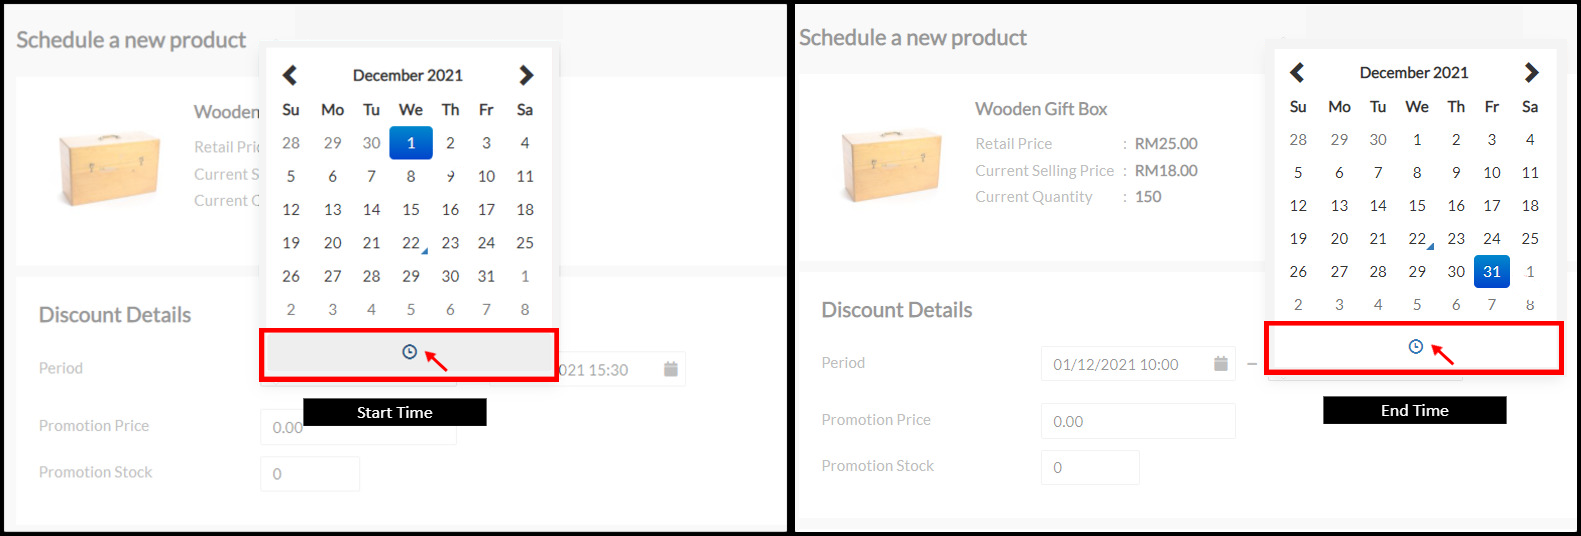 c) To set time you may click time and select. Or click the increment and decrement buttons, the value increases and decreases by one. 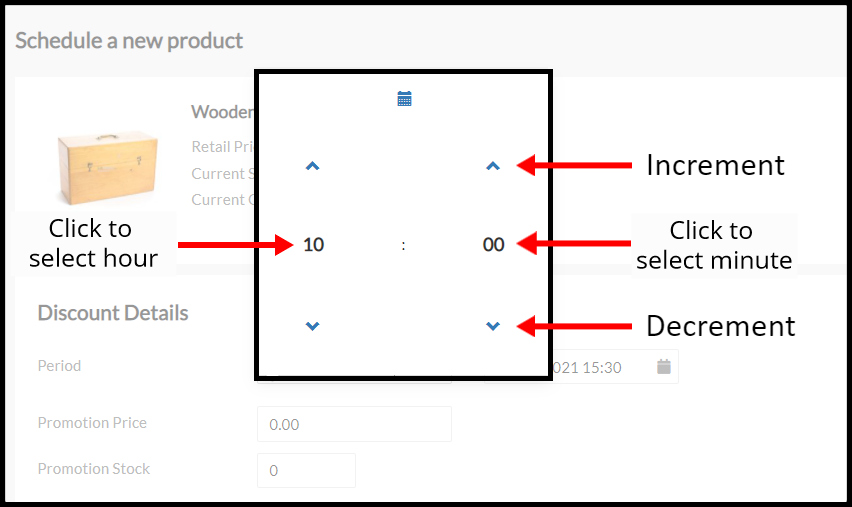 d) Click to select Hour and Minute. 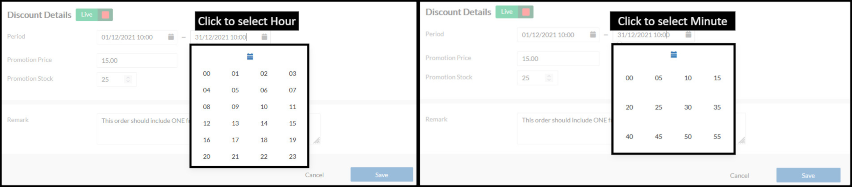 |
| 6) a) Promotion Price : Input the value of promotion price b) Promotion Stock : Input the quantity of promotional items c) Remark : Add remark for this promotional item 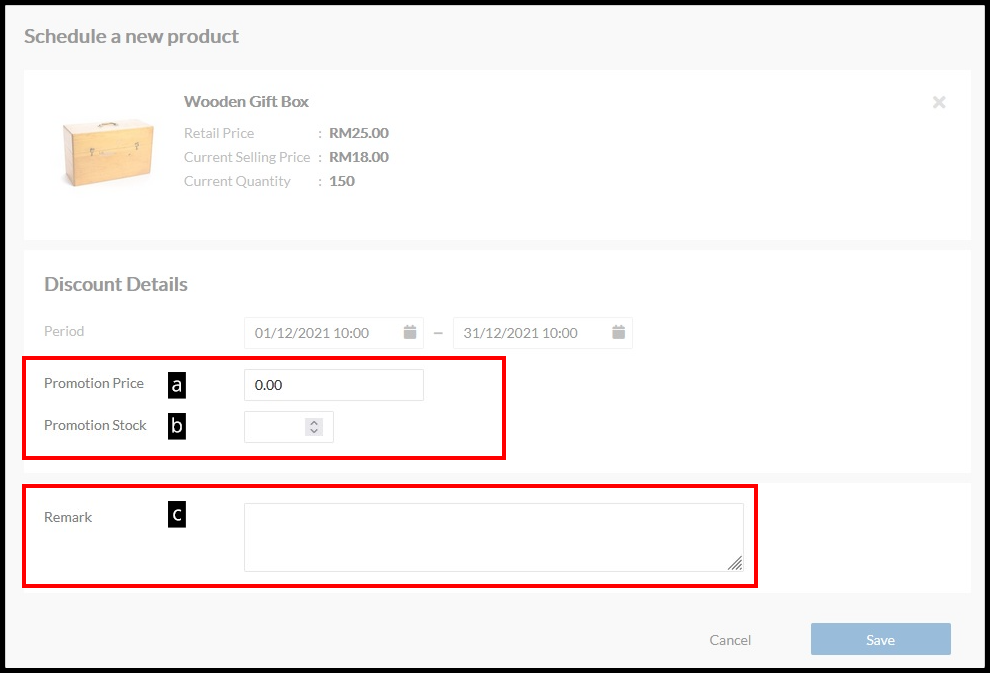 |
| 7) Once done, click Save and Confirm. 8) The product will be updated and listed in Product Scheduler page. 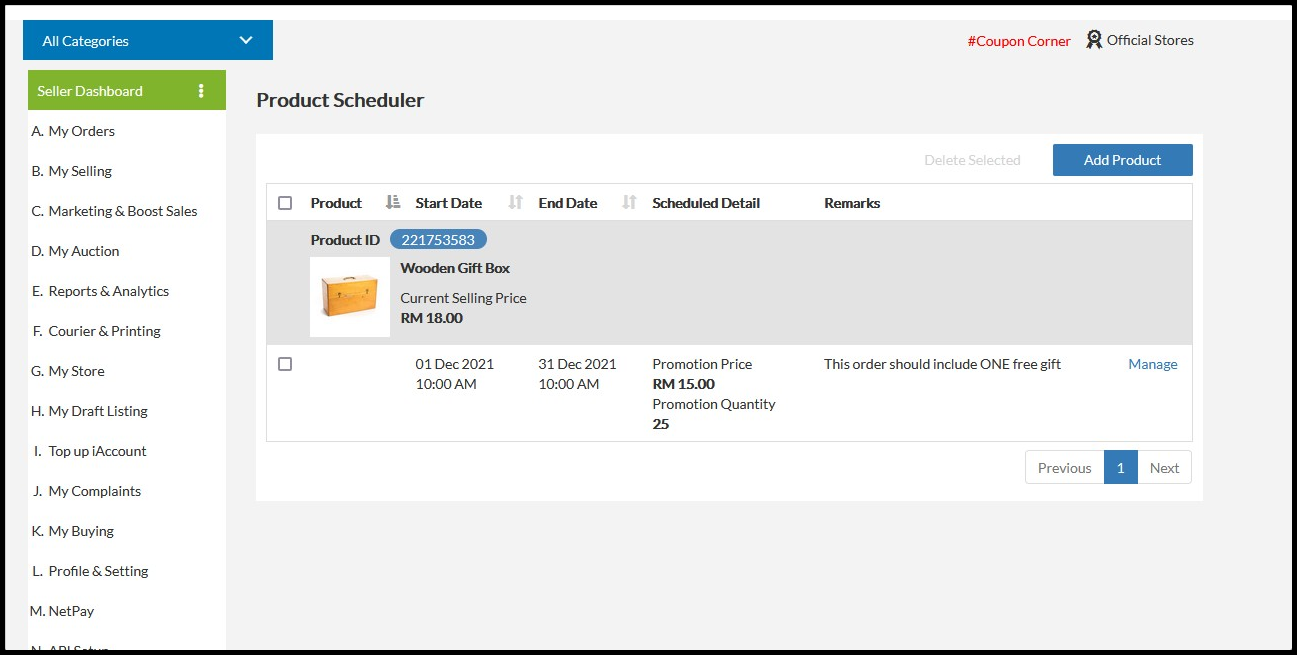 |
9 ) To add new product, click Add Product button.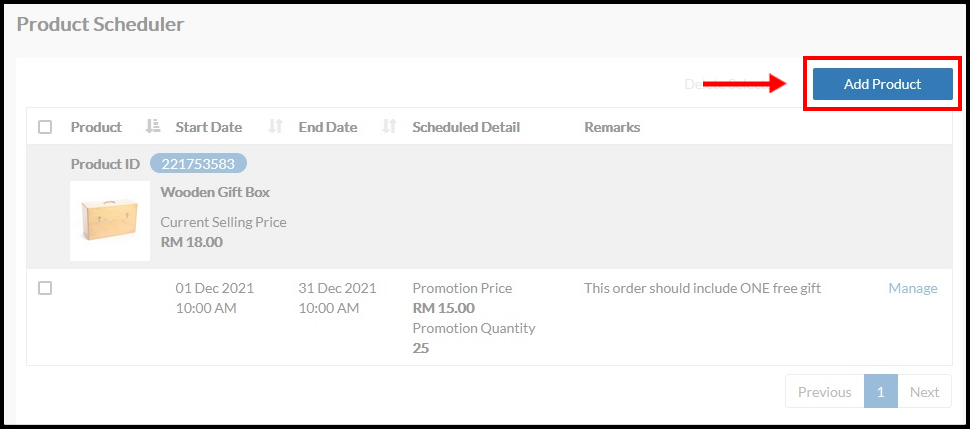 |
10) If you select Variant Product, you may click Select Variant button to choose specific variant product to apply price changes.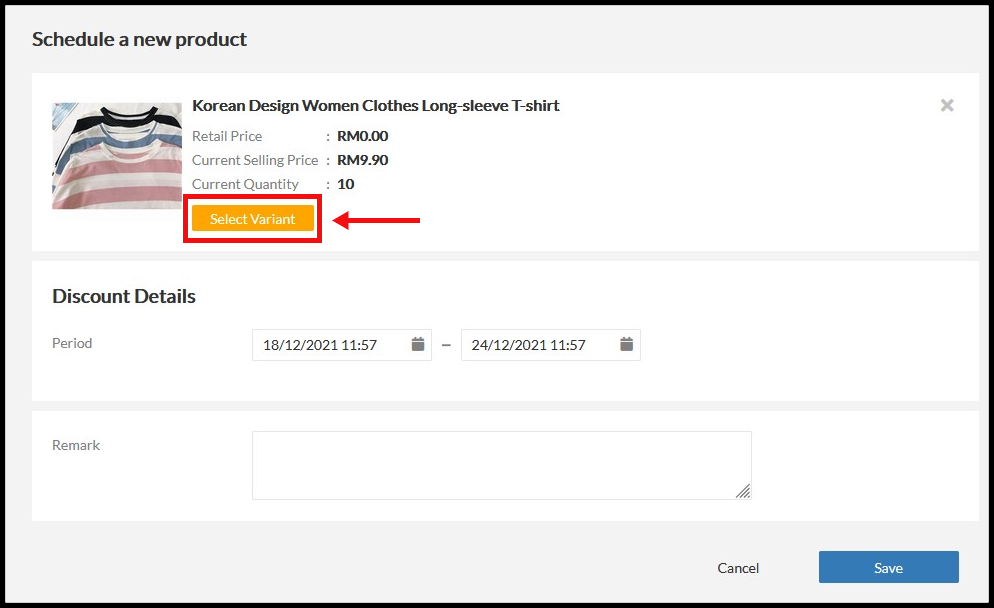 |
11) Then, tick on the box for the product you want to apply price changes. Once done, click “Confirm“.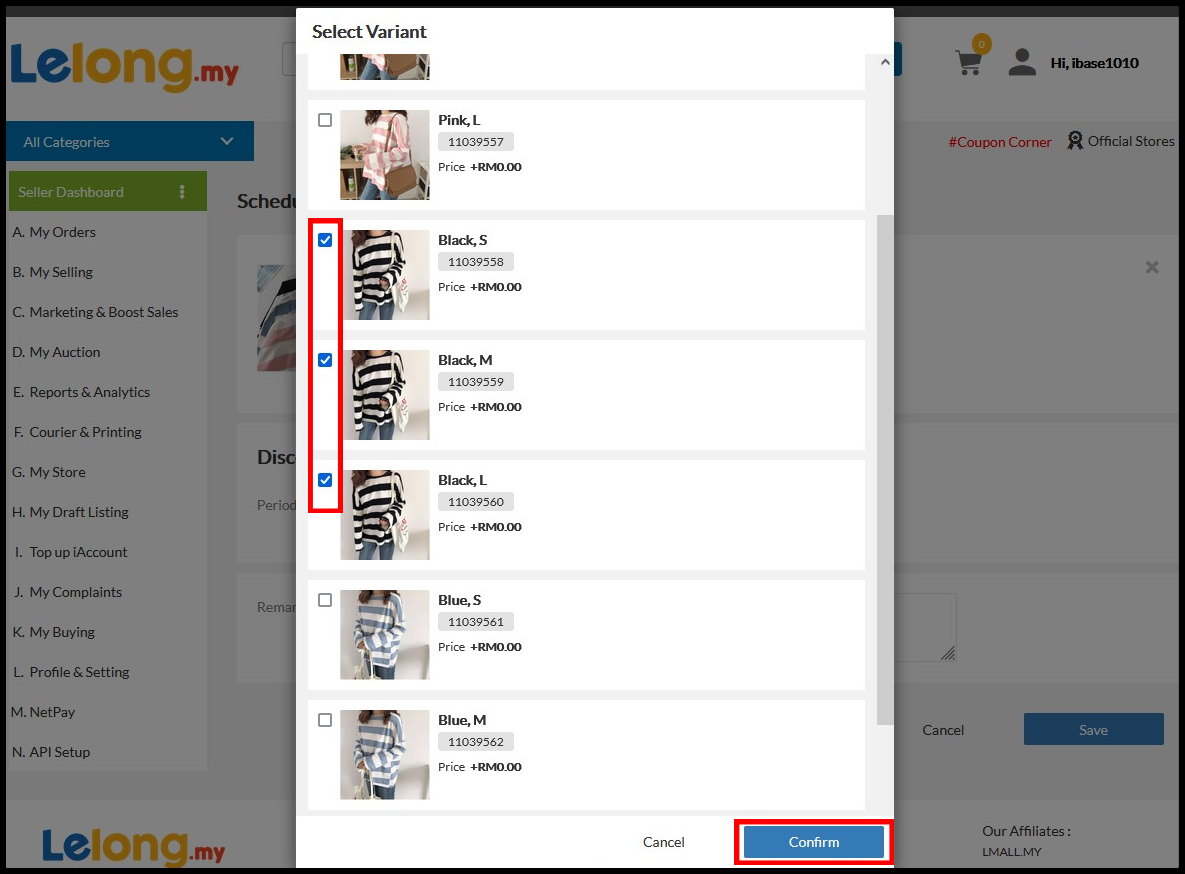 |
| 12) a) Promotion Base Price : Input the value of promotion base price b) Promotion Variance Price : Input the value of promotion variance price. You may increase and decrease the price according to product option criteria. Put (+) before price for price increase and put (-) for price decrease. c) Quantity: Input the promotion quantity for each variance 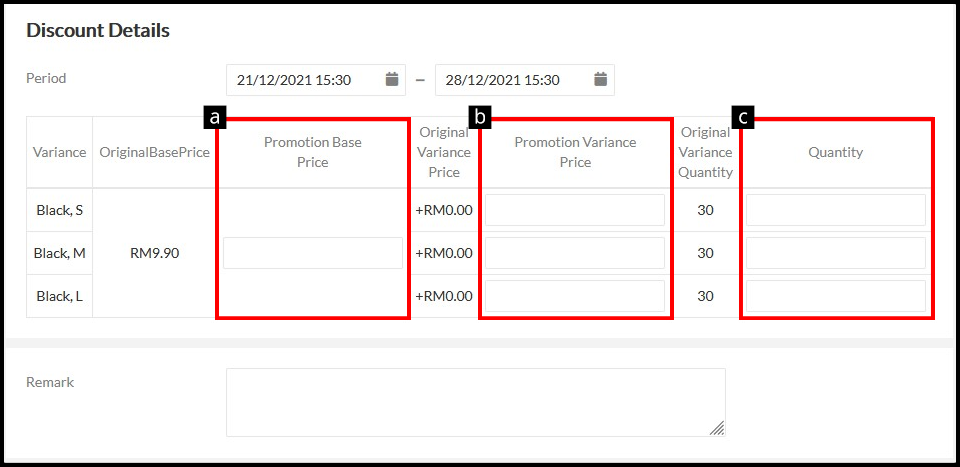 For example: 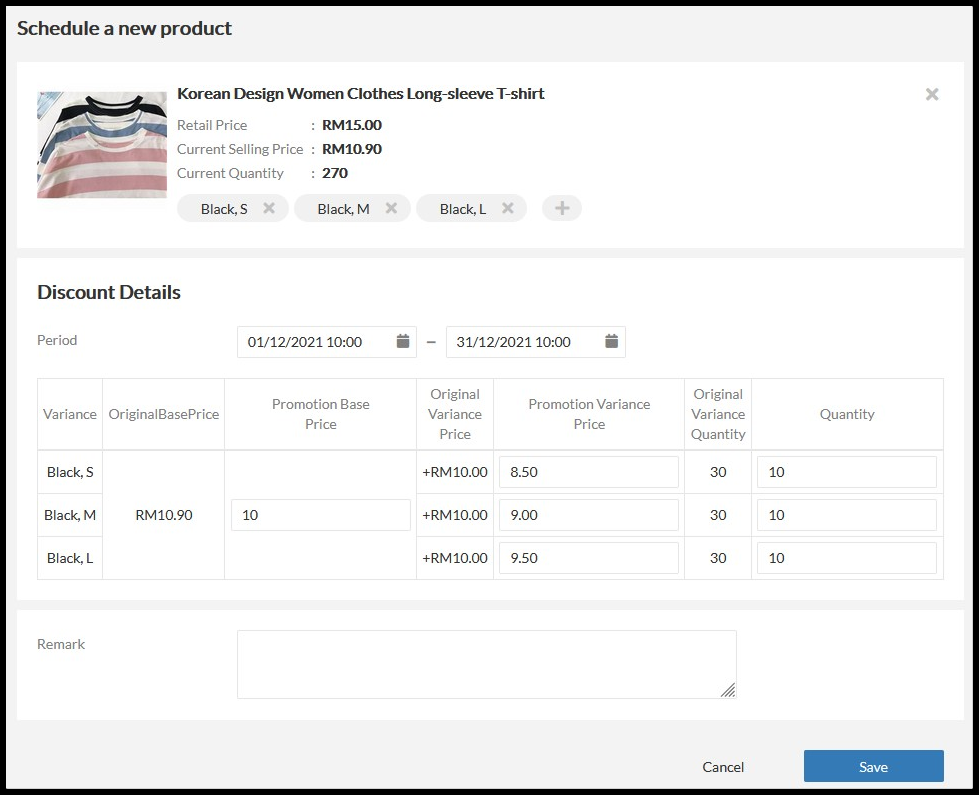 |
| 13) Once done, click Save and Confirm. 14) Delete – Select a product that you would like to delete. – Click Delete Selected and Confirm. 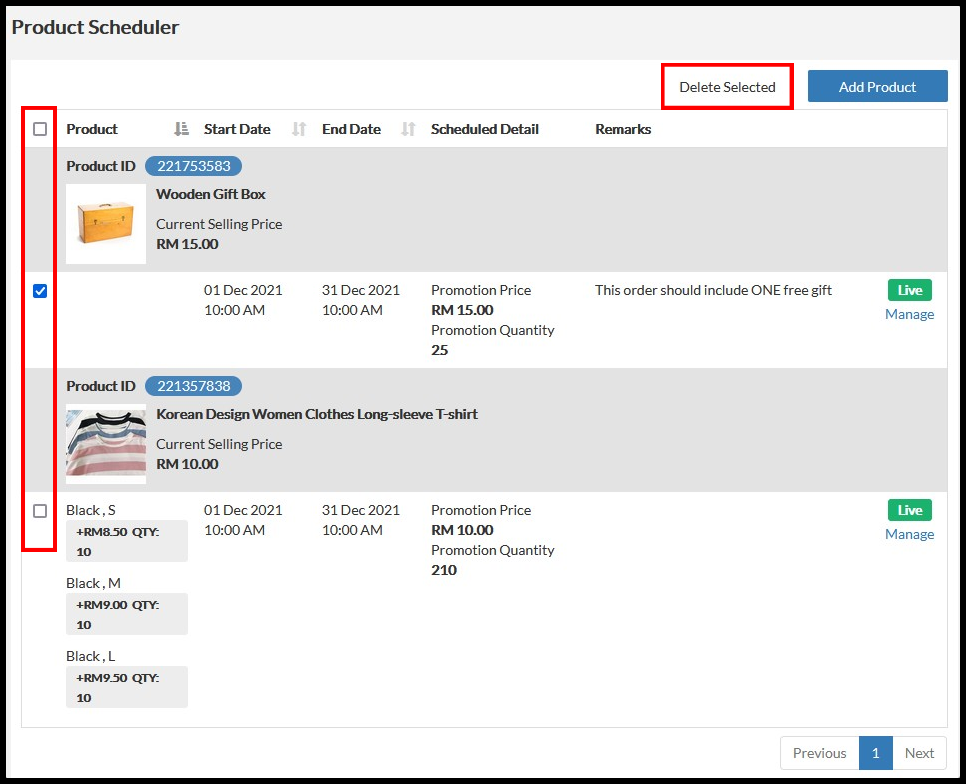 – Click Confirm if you confirmed to delete the product. Kindly be informed once confirmed, the action cannot be reversed. 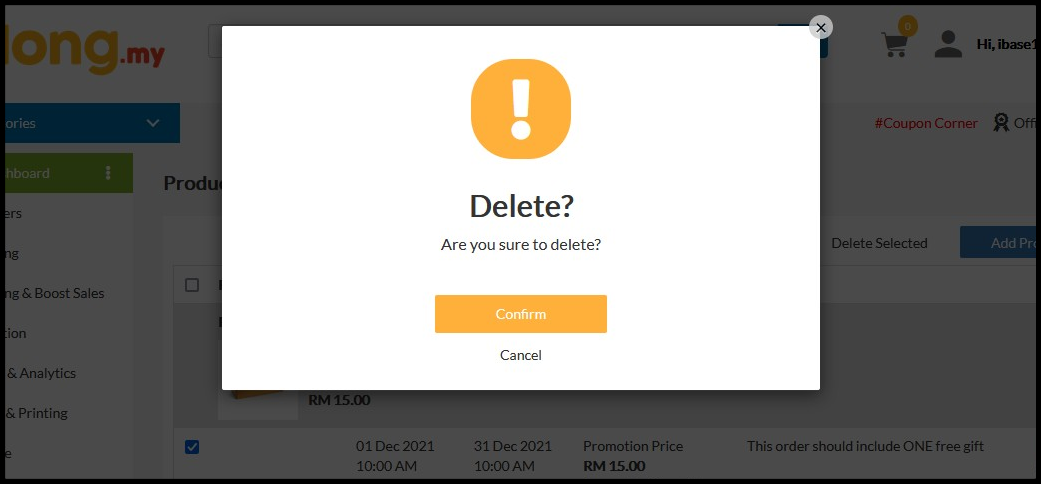 – Your product has been successfully deleted. |
| 15) Edit – Select a product that you would like to edit. – Click Manage. 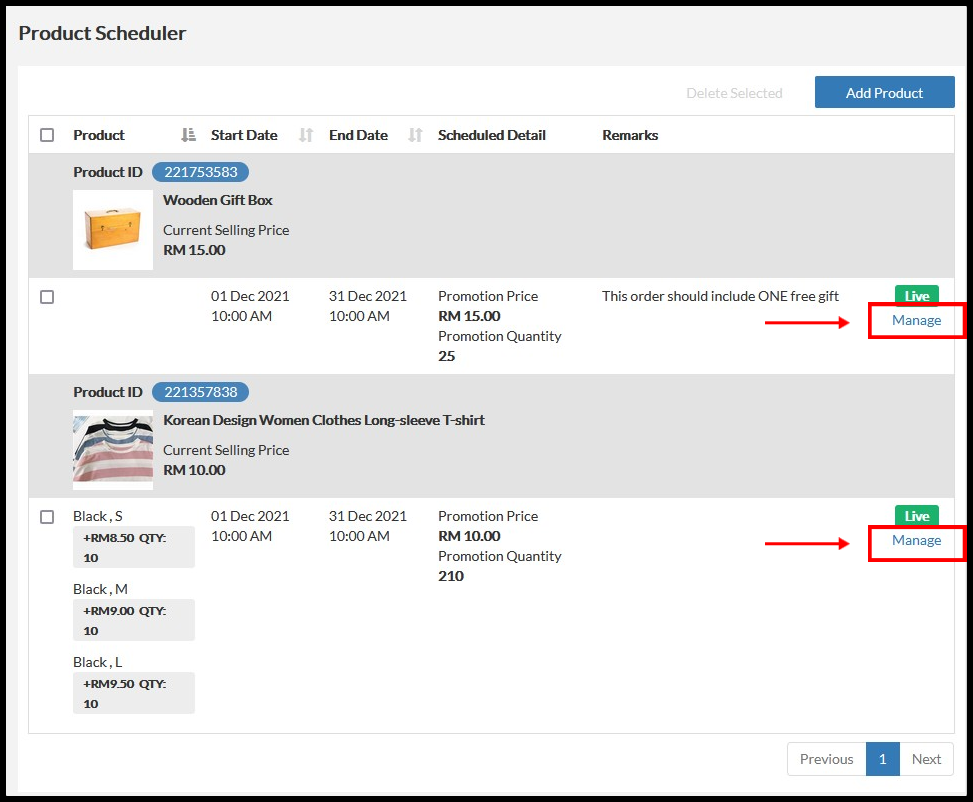 – You will directed to edit product details as following. You may update the product details accordingly. Once done editing, you may click Save to save the changes. 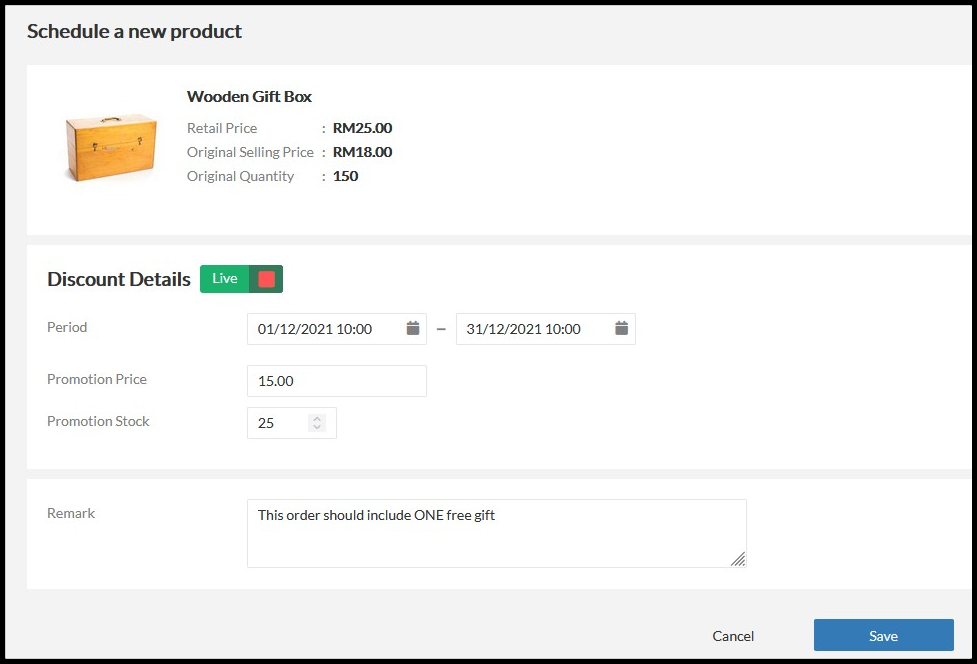 |
| 17) Terminate – Select a product that you would like to edit. – Click Manage. – Click button Terminate. 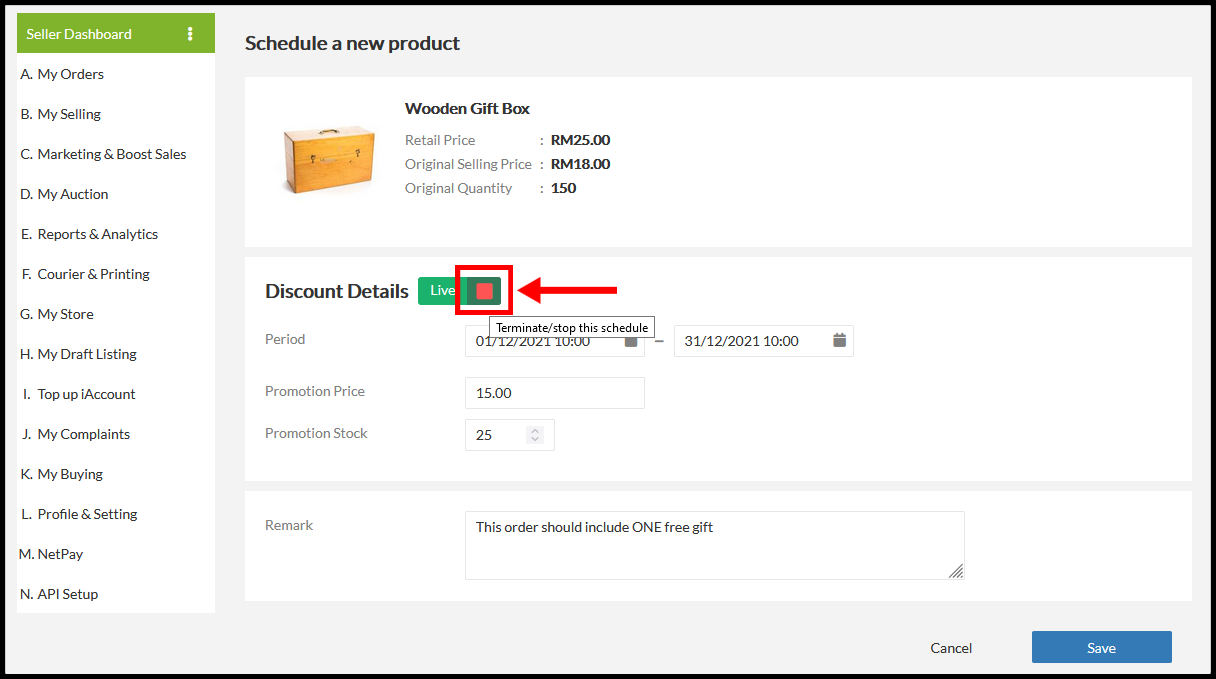 – Click Terminate Now if you confirmed to terminate the product. 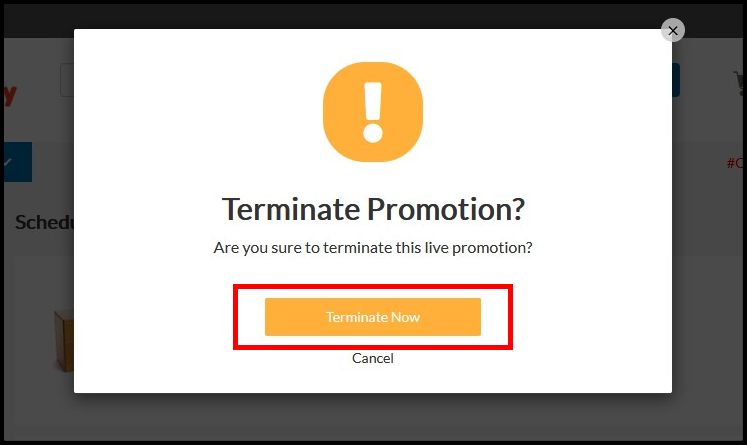 |