| Product Coupon: Discount is applied on each unit of selected product(s).
Step 1: Go to “C. Marketing & Boost Sales > 2. Coupons”
|
|||
Step 2: Click on “Add Coupon”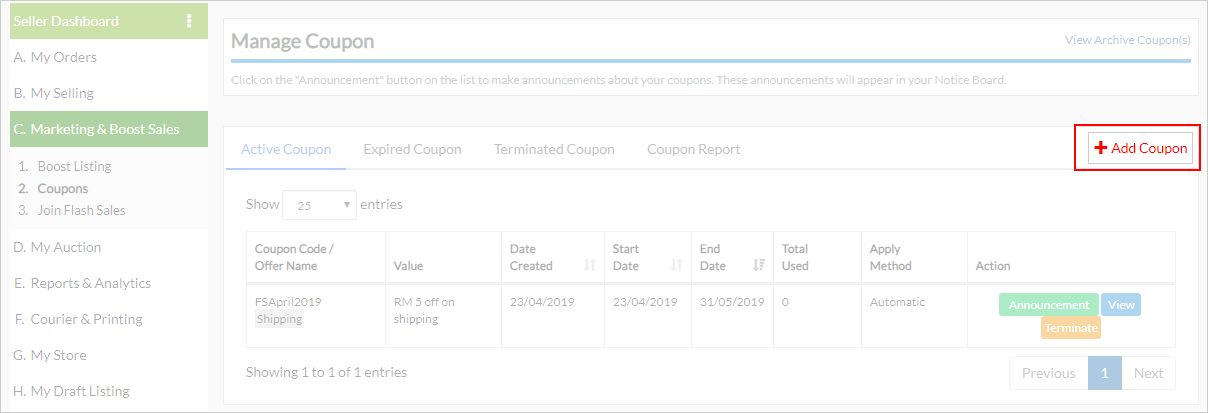 | | |
|||
| Step 3: Fill in the coupon creation form.
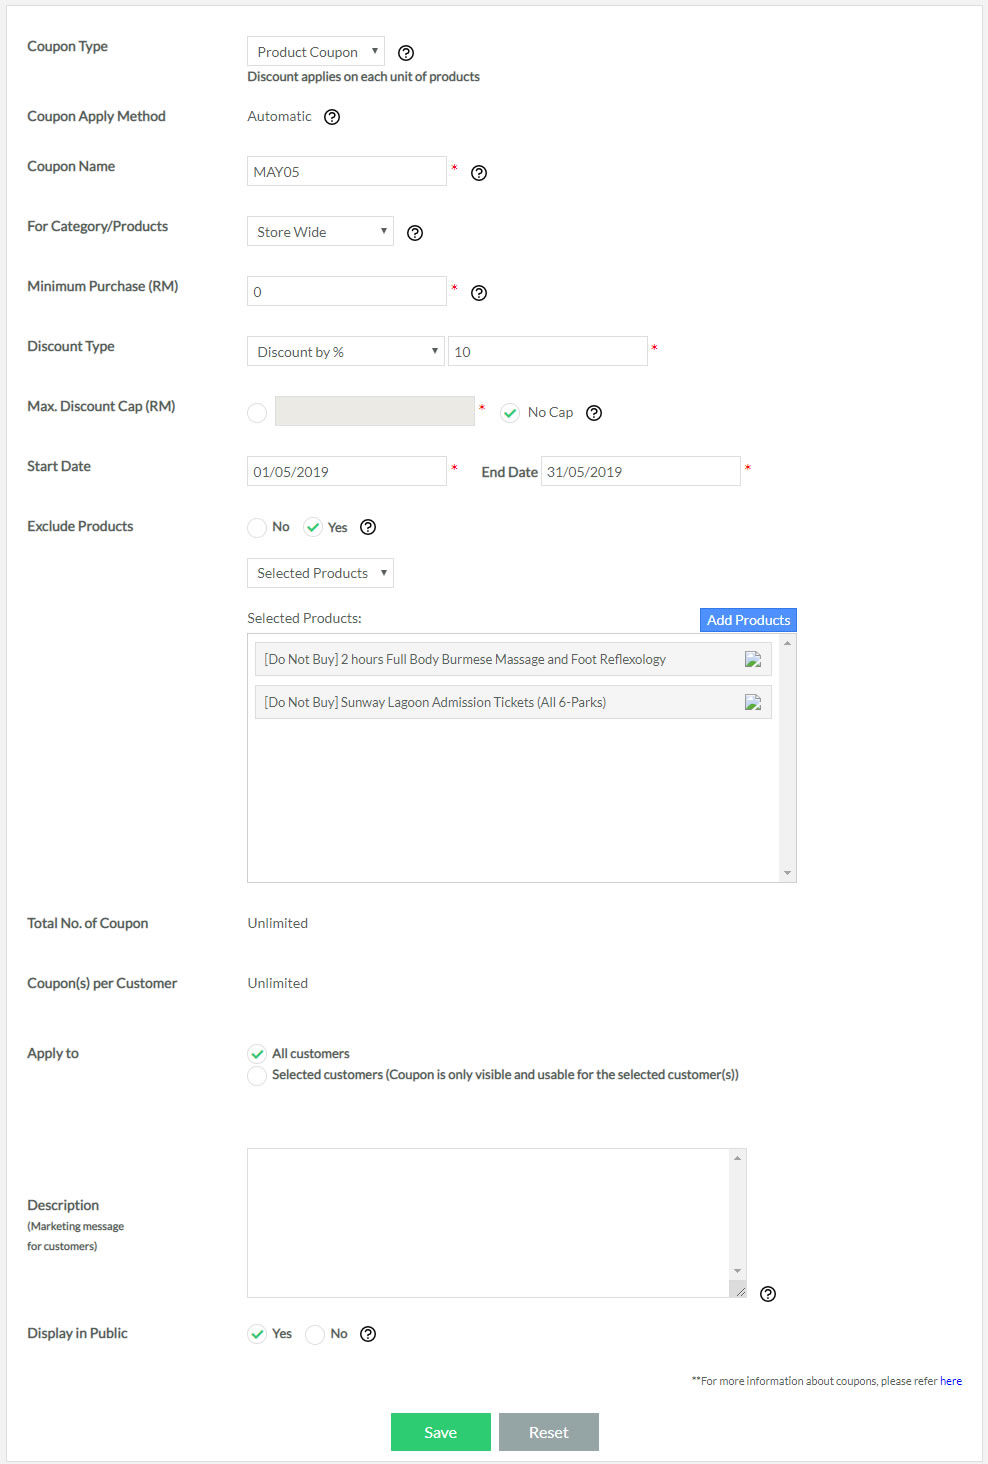
a. Coupon Type – Select “Product Coupon” b. Coupon Apply Method – “Automatic” will only be applied and display the discounted price on live posting. |
|||
|
|||
| c. Offer Name– Generate a code for own tracking & reference, not visible to the buyer.d. For Category/Product- The coupon can apply to Store Wide, Selected Category or Selected Product.
e. Minimum purchase (RM) – The minimum amount a buyer must spend in one (1) order in order to apply the coupon code. Set as zero (0) if there is not minimum spend. f. Discount Type – Select “Discount by %” and fill in how many % off you would offer; Select “Discount by Amount in RM” if prefer to offer a discount by RM instead g. Exclude Products – Coupon is eligible to selected products h. There is no limitation for this level, so it only shows “Unlimited”. i. Apply To – Check the box “Selected customers” and enter the UserID(s) if the coupon only offer to particular buyer(s). If there is a few buyers are entitled to the coupon, separated their UserID by a comma (,). Check the box “All customers” if you would like the coupon use by all buyer(s). j. Start Date – The first day the coupon can be used. k. End Date – The last day the coupon can be used. l. Description – The information/ details about the coupon you offer. Maximum 250 characters, and buyer will able to see the message during their checkout process. m. Display in product detail – The coupon code will publicly display in product detail page. |
|||
Step 4: Click “Save” button to save the coupon created.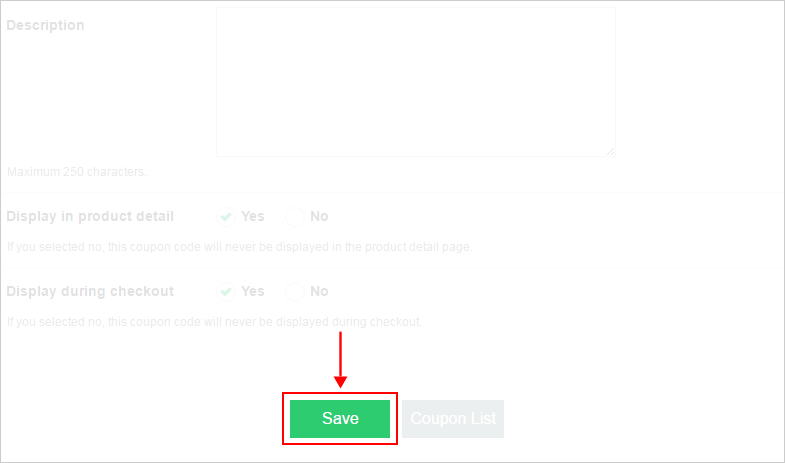 |
|||
| Step 5: Your successful created coupon will display under “Manage Coupon”. (For more details on “Manage Coupon”, Refer to “How to manage coupon”).
|


| Example of creating a coupon |
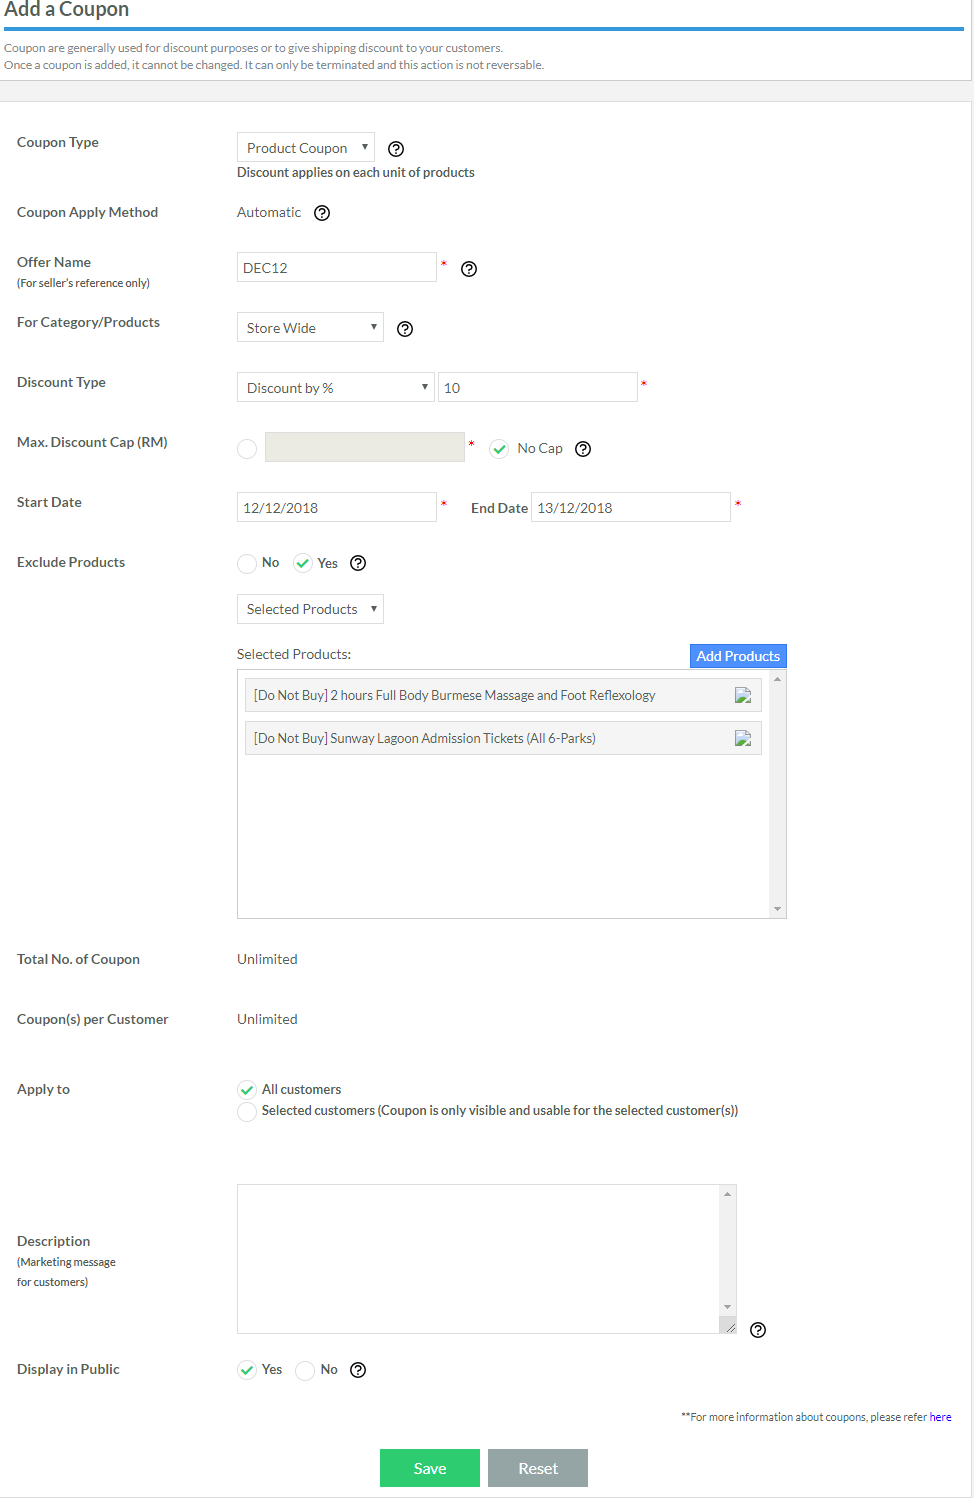
| Example 1: 10% discount with no maximum discount amount.
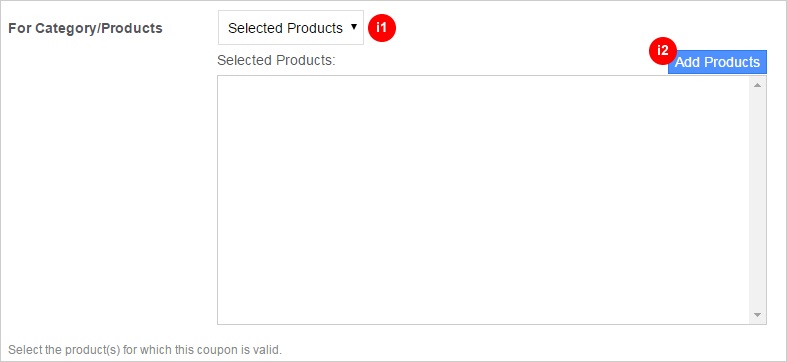
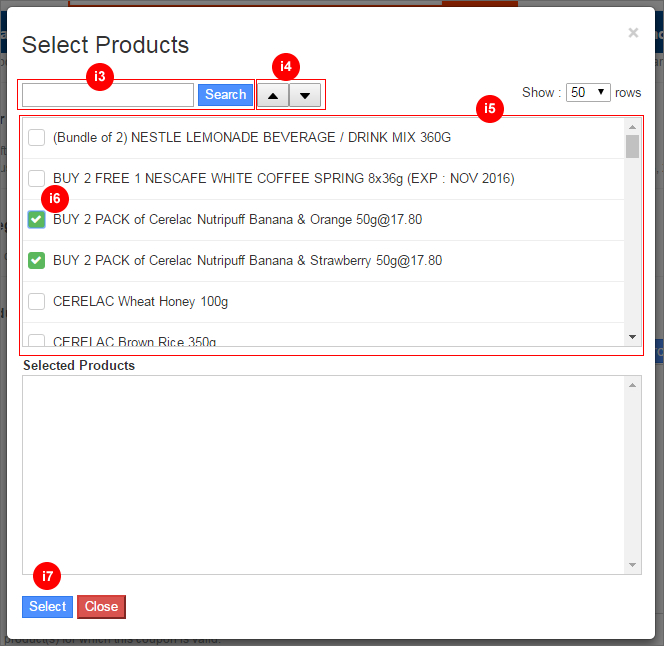
Apply on all store categories but exclude selected product(s). Here is the sample of how you can set it: a. Coupon Type– Product Coupon b. Offer Name- MAY05 c. For Category/Products- Store Wide d. Minimum purchase – 0 (No minimum purchase required) e. Discount Type- Discount by 10 % f. Max Discount Cap (RM)- No cap g. Start Date- 1st May 2019 is the first day the coupon can use. h. End Date- 31st May 2019 is the last day the coupon can use. i. Exclude Products- Yes j. Apply to- All customer k. Description – The information that buyer will view during checkout. l. Display in public– Yes, a buyer will be aware of the promotion when browsing the product. m. For Products – A window with a list of your products will prompt out.
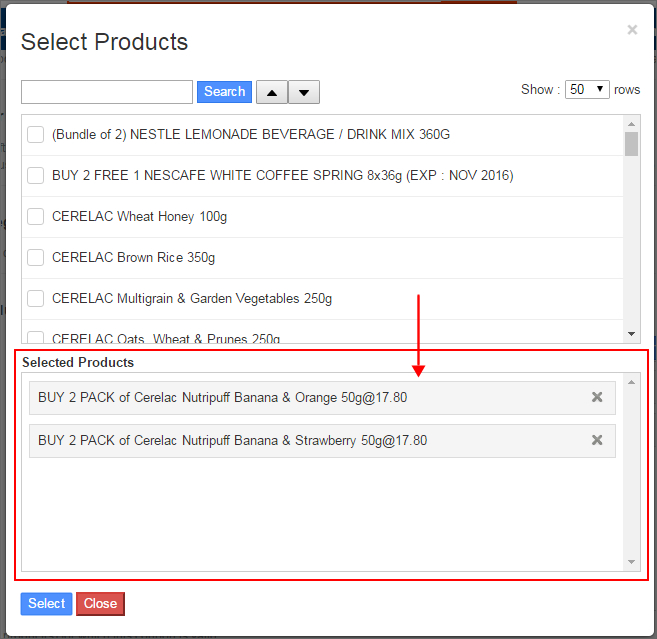
Your selected products will display under “Selected Products” column.
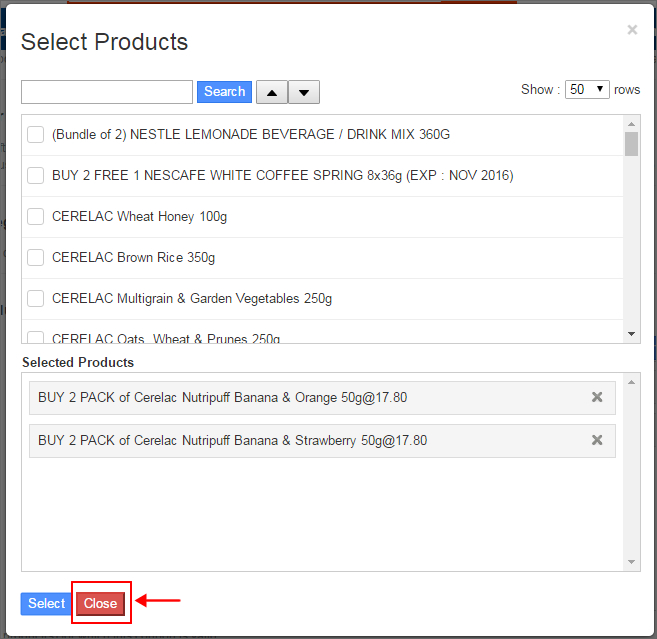
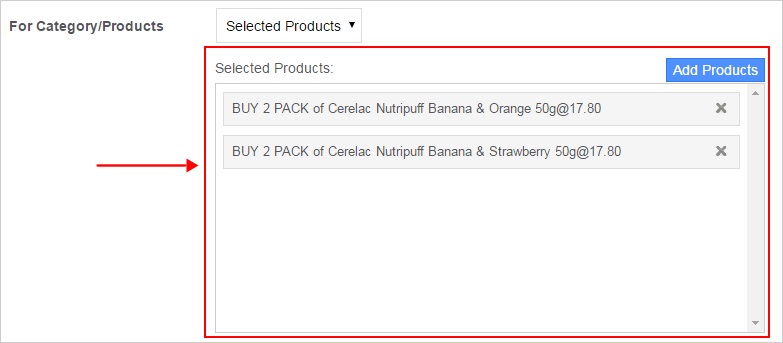
After close the window, you will see the selected products are now displayed at your coupon creation page. |
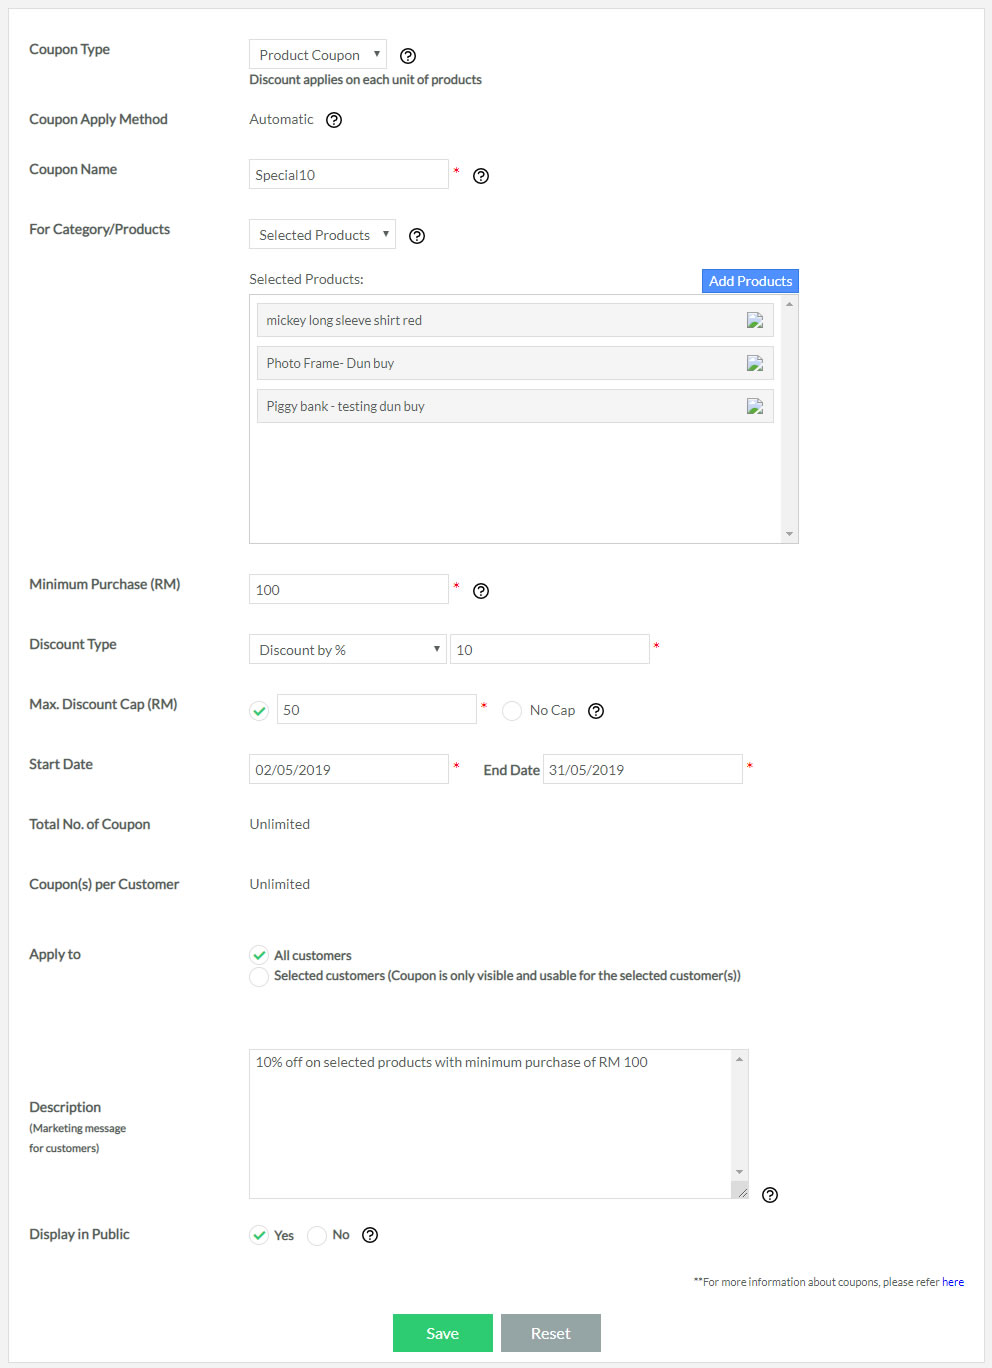
| Example 2: 10% off on selected products with minimum purchase of RM 100
10% off will only applied when the selected products had meet the minimum purchase amount of RM 100. |
| Here is the sample of how you can set it:
a. Coupon Type– Product Coupon b. Offer Name- Special10 c. For Category/Products- Selected Products d. Minimum purchase – 100 e. Discount Type- Discount by 10 % f. Max Discount Cap (RM)- Max cap of RM 50 g. Start Date- 2nd May 2019 is the first day the coupon can use. h. End Date- 31st May 2019 is the last day the coupon can use. j. Apply to- All customer k. Description – The information that buyer will view during checkout. l. Display in public– Yes, a buyer will be aware of the promotion when browsing the product.
|
| In shopping cart:
Once the minimum purchase amount of the selected products are meet, 10% discount will auto apply to the selected products.
|
