To start selling your product, you have to first create a product posting.
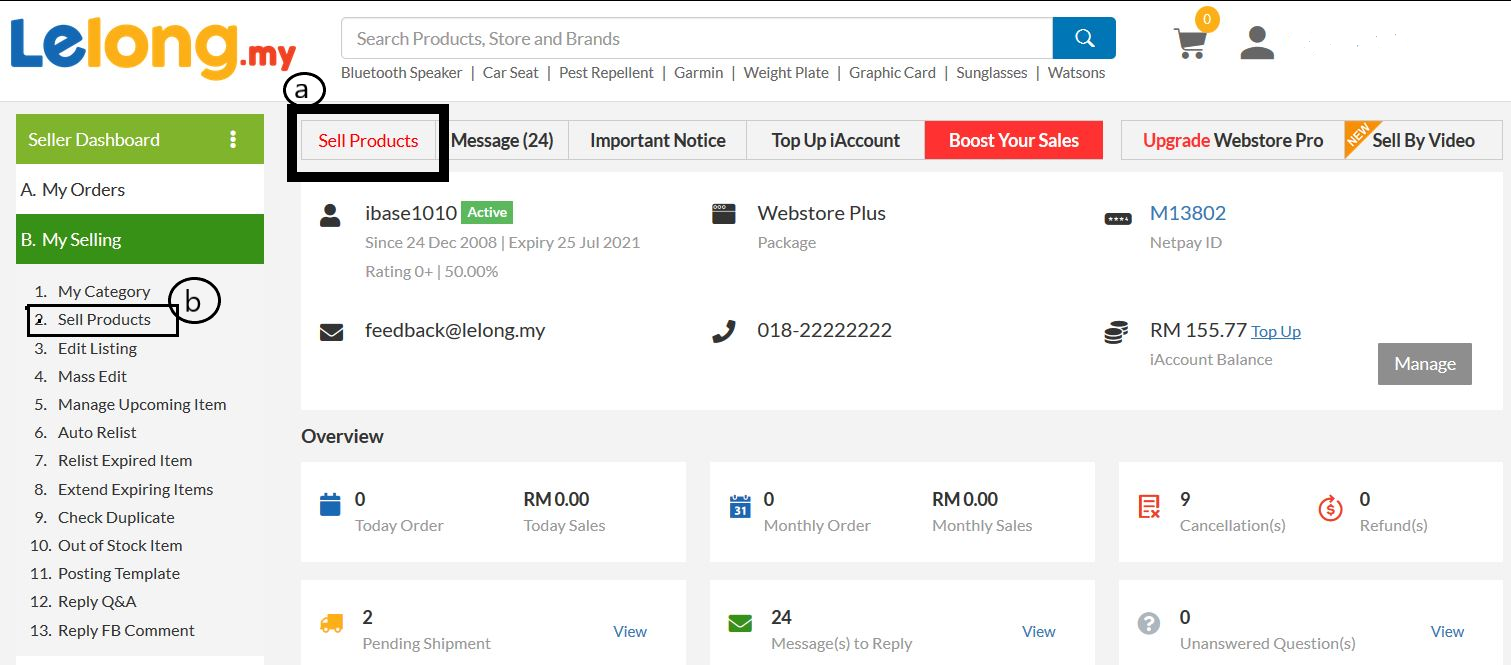
STEP 1: After log in to your merchant’s account, click on
a. “Sell Products” button, or
b. Go to “B. My Selling“, then “2. Sell Products“.
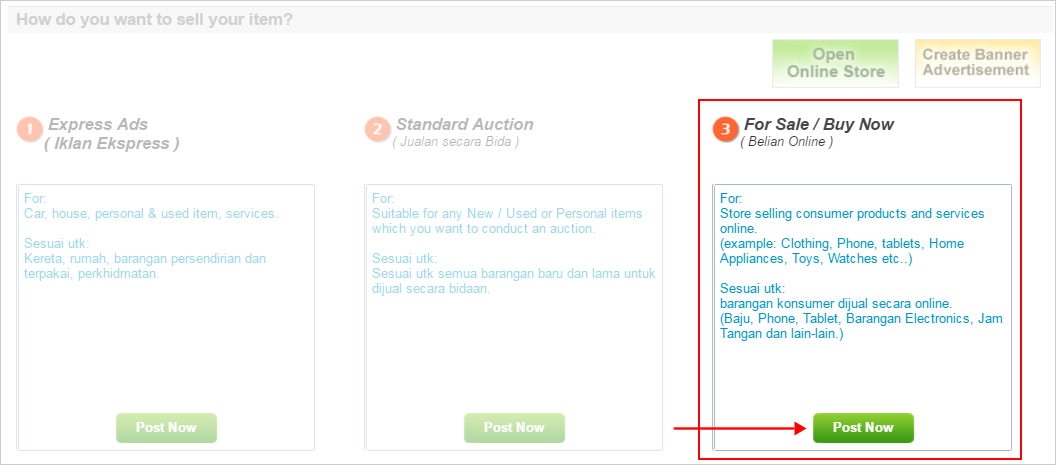
STEP 2: Choose “3. For Sale / Buy Now” and click “Post Now” button
To sell your product, using the “Buy Now” option will be the most effective as the buyer can purchase the item immediately.
STEP 3: Post your product
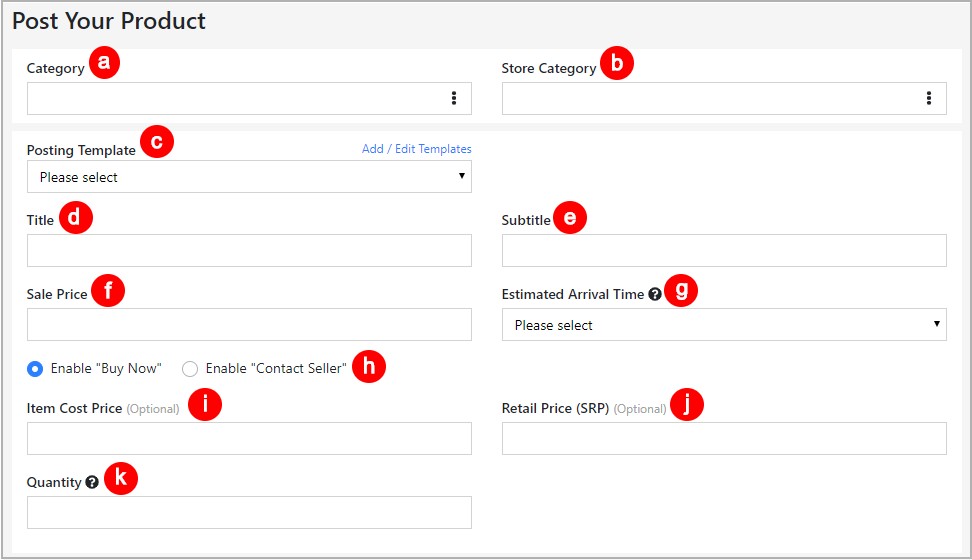
Select Category
a) Choose / Search category for Lelong.my Marketplace.
b) Choose / Search a category for your Webstore item listing.
Indicate product Information
c) Choose a template that you had pre-set earlier, if none then
proceed to next filled.
d) Title – Write your product title (max 70 characters including space)
E.g: Ladies Jumpsuit
e) Subtitle – To descripe more about your product
f) Sale Price – Product Selling Price. E.g: RM 89
g) Click “Estimated Arrival Time” to select from dropdown menu – The expected timeline for the order to arrive after payment is completed.
h) Choose “Enable Buy Now”.
i) The cost price of product. It is an optional field and visible by you only.
j) Retail Price (SRP): Suggested retail price for the product.
Example of how it look likes after filled up the SRP.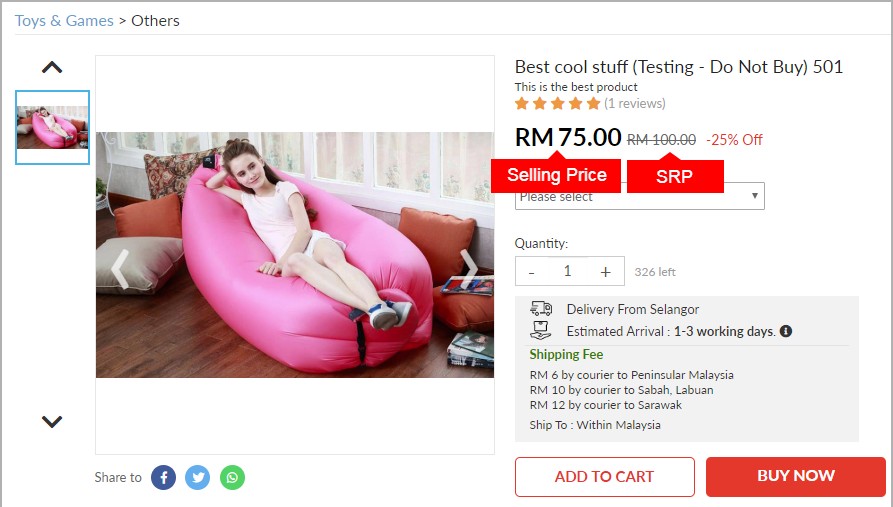
k. Quantity – Available stock (in-hand stocks)
Key in the number of available stock on column.
E.g: You have 10 units, key in 10 in the column.
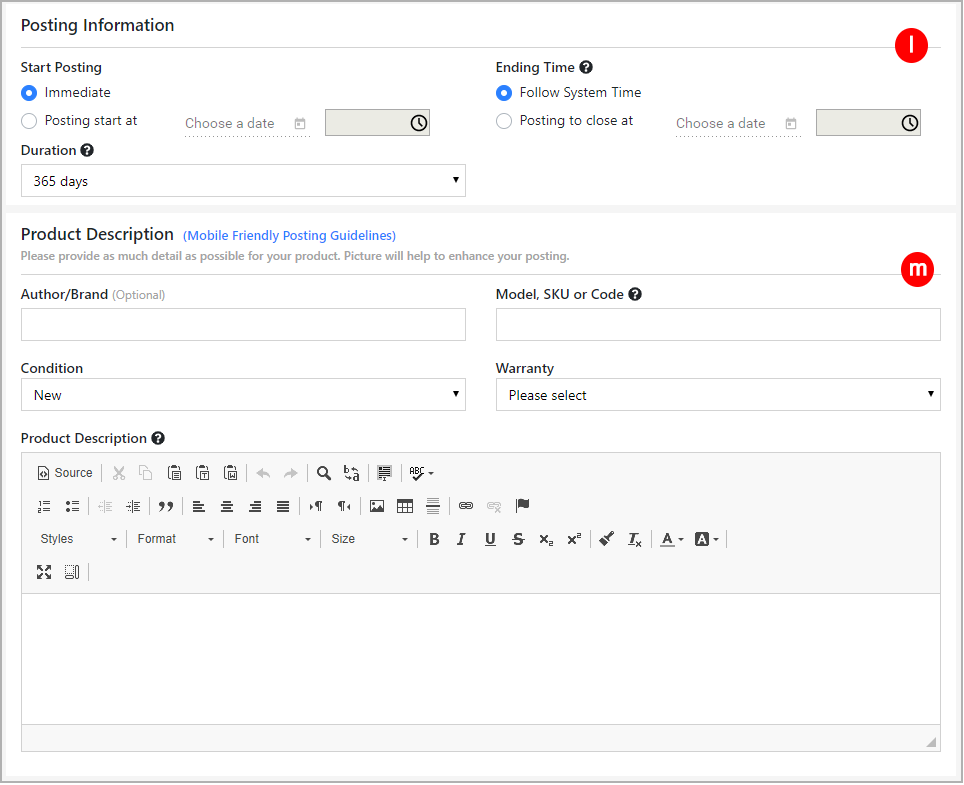
l-i) Start your posting – you can choose to start immediately or preschedule with the preferred date & time.
l-ii) Ending Time – You may end your posting by following the system time or your preferred time.
l-iii) Duration – The time period for the item to sell in your store. (The shortest duration will be 10 days while the longest duration will be 365 days.
Include Product Description
m-i) Author / Brand – Product’s brand or Book Author.
E.g: SJ
m-ii) Model/SKU/Code – Key in product’s model or code. If you have your own SKU, you may key in for your own reference.
m-iii) Condition – Product’s condition.
E.g: New (for brand new item)
m-iv) Warranty – Update the warranty period of your product
m-vi) Product’s Description – here is where you provide more details about your product.
E.g: Product features, specifications and etc.
*Remarks
To insert image(s) in description, please do not copy & paste image URL from Facebook and Instagram directly. This is because Facebook and Instagram image links will be expiry after a while.
Kindly use Image hosting such as https://imgbb.com/ to insert the photo.
Upload Image
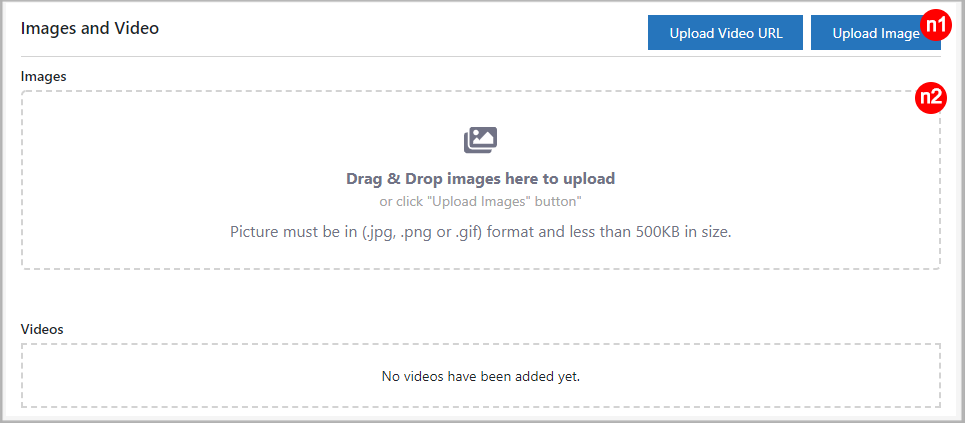
n) Upload photos (Max :12 photos)
2 ways to upload your product photos.
Method 1 click on “Upload Image” [n1].
i) Click on the image file you want to upload.
ii) Then, click on “Open”
iii) Your image is uploaded.
p/s: For select multiple images, click on “Ctrl” button while click on images.
Method 2 drag and drop images to “Drag and Drop Images ” column [n2]
Open the file where you keep your product images. Then drag the photos and drop them to the column.
Your images will display as below once sucessful upload.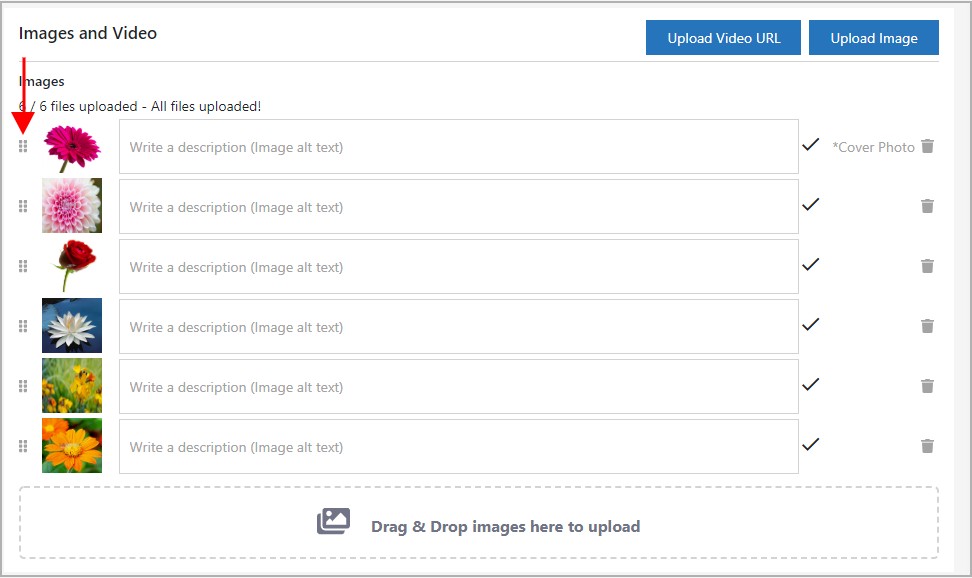
Drag up or down to change the image display order.
Insert YouTube video
o: Insert YouTube video into your posting.
1. Go to www.youtube.com
2. Search the video that you want to insert into your posting.
3. Copy the video URL link.
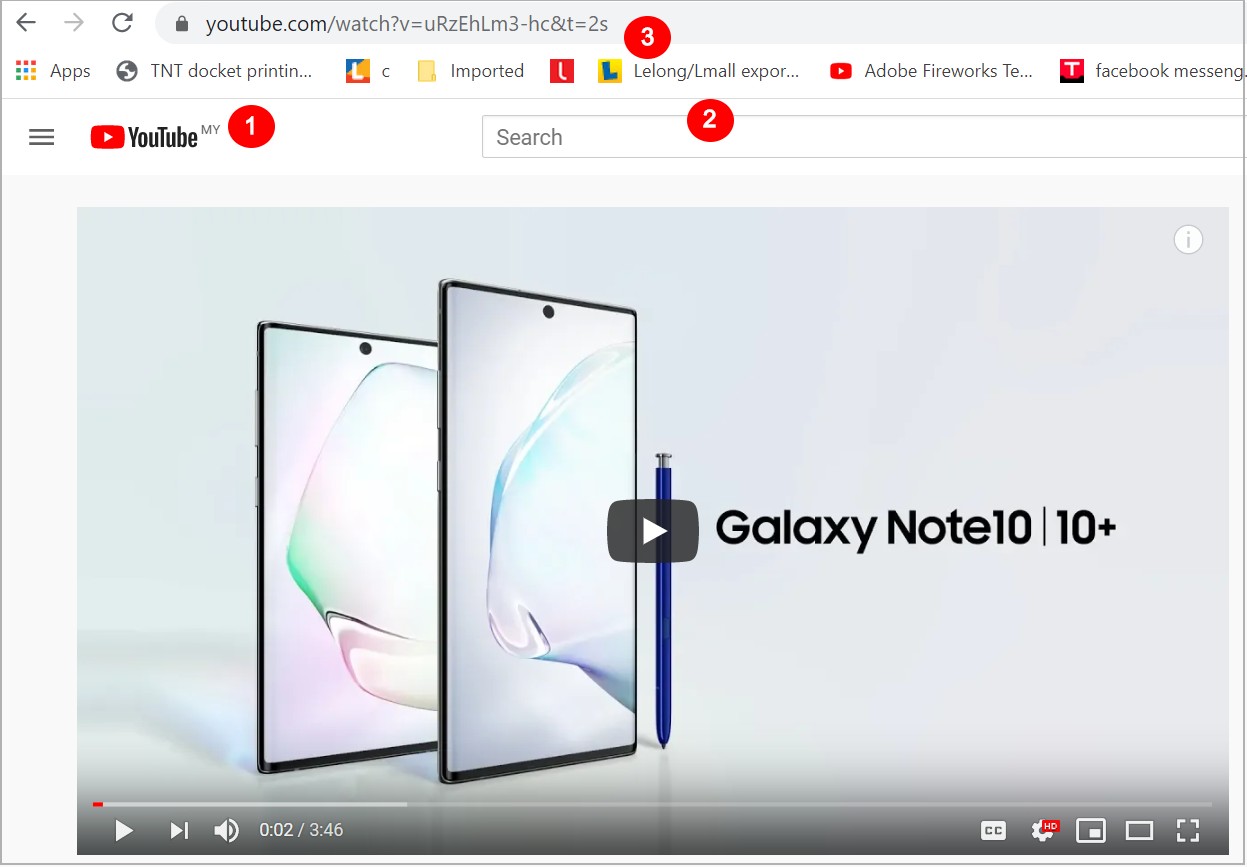
Then, go to “o. Upload Video URL”.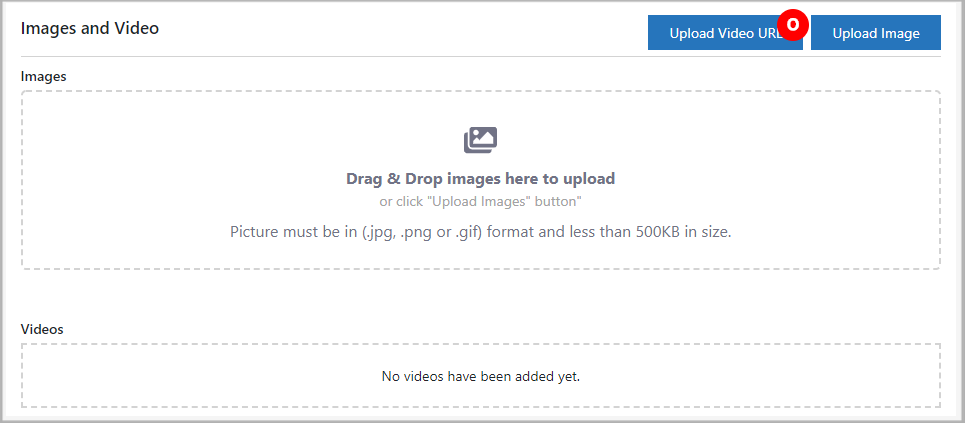
Paste the copied URL to the “Video URL” column then click on “Confirm”.
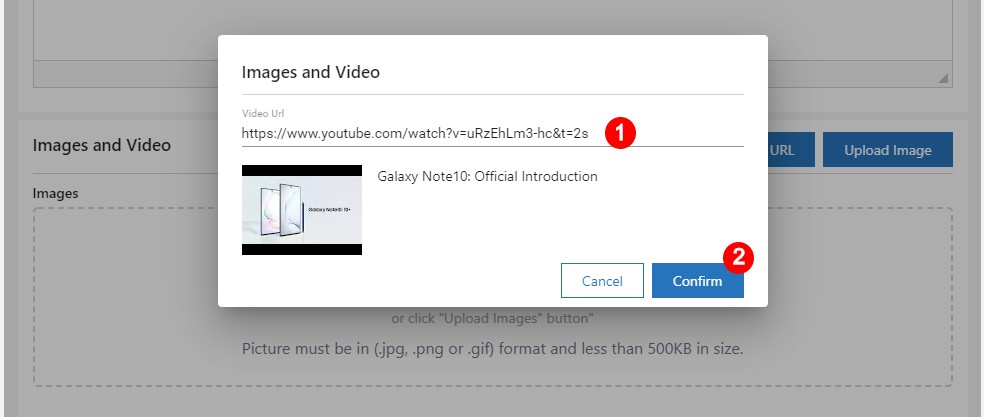
The Youtube video is succefully added.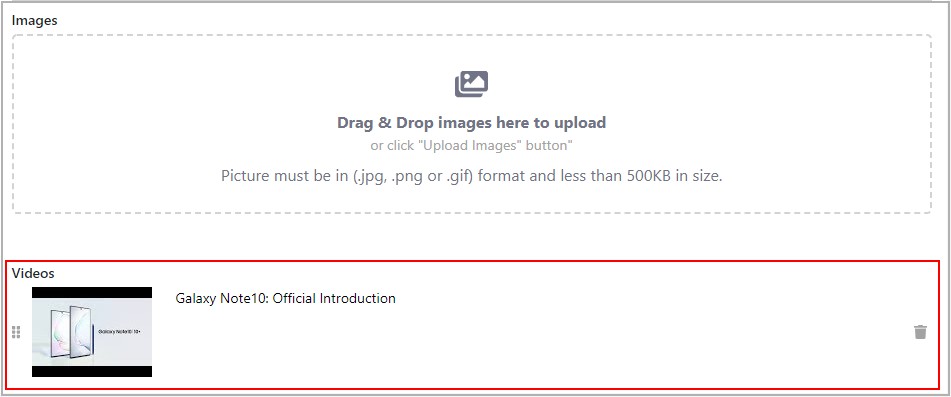
Min/ Max Purchase
Minimum purchase quantity: Buyer must purchase more than or equal to the set quantity of items to checkout per order
Maximum purchase quantity – per order: Buyer must purchase less or equal to the set quantity of items to checkout per order.
Maximum purchase quantity – per buyer: Maximum purchase quantity that a buyer can purchase for a product (buyer can combine the quantity in 1 order or split to multiple order until the set quantity was hit)
p/s: The max purchase quantity per buyer history will auto-reset every 30 days.
* No limit = That is no limit purchase for the product.
Payment and Shipping
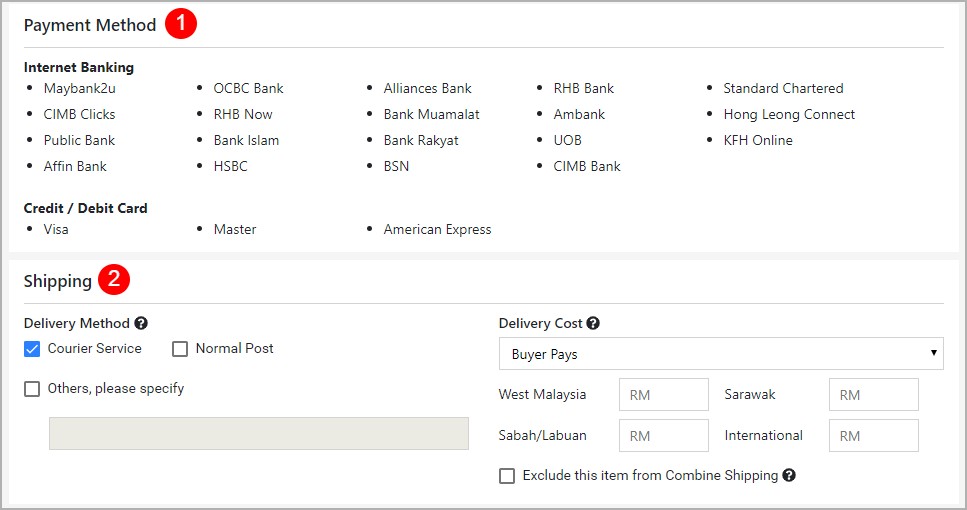
1. Payment method – Default will be NetPay
2. Delivery Method – How do you deliver the item.
Delivery Cost:
I. Buyer pays – Buyer is paying the shipping fees.
II. Seller pays – Seller bear the shipping fees. It will appear as “FREE SHIPPING” in your product page.
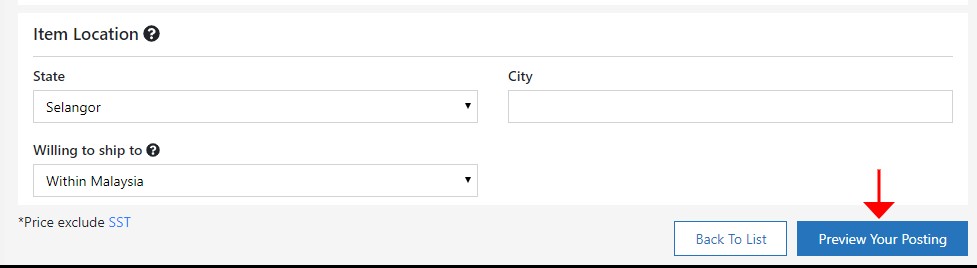
Product dimensions, weight & location
 1.1) Estimated shipping weight: Keyed in your product weight in Kilogram (kg)
1.2) Width, Height & Length: Keyed in your product packaging width, height and length in centimeters (cm)
2. Item Location – The location of the product. It can be your current or physical shop location. You can also choose where you want to ship the item.
Preview Posting
Click on “Preview Your Posting” to preview the content you had keyed in earlier.
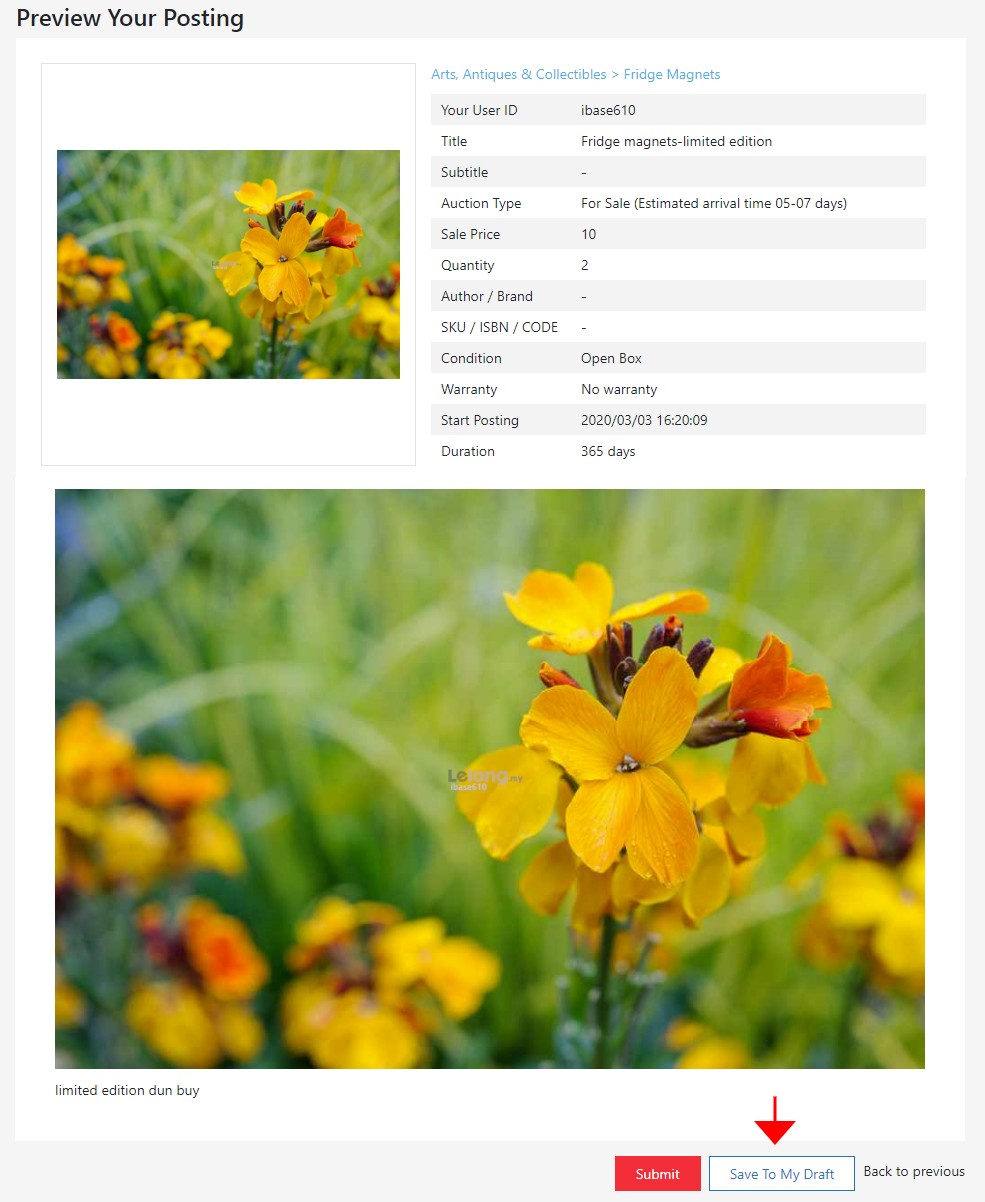
Recommend you to select “Save to My Draft” instead of “Submit “.
** Save to My Draft – As backup to your posting. You still can edit the posting before it goes live.
** Submit – Your posting will live immediately. No backup at your end.
Product posting created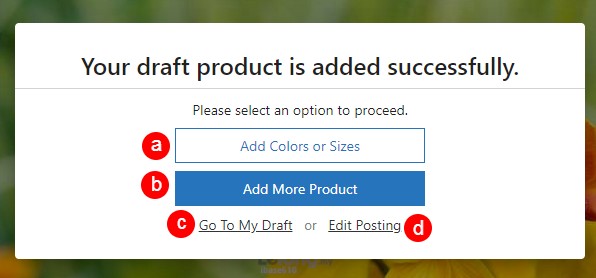
You have successfully created your product posting.
a. Add Color / Size for this product – Click if you would like to include additional details for this product. (Refer “How to do Option / Variants “guidelines)
b. Add More Item – Click this to create another product posting.
c. Go to My Draft – Check your previously saved product posting.
d. Edit Posting – To edit your current posting
Post Item to Live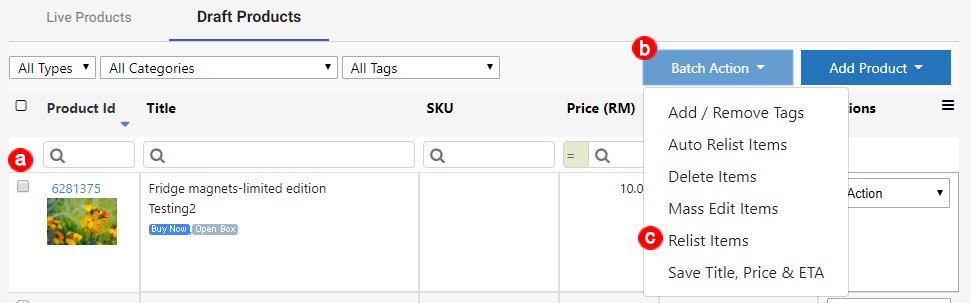
Click “c” – Go to My Draft (previous image) or go to F. My Draft Listing > 1.My Draft
a. Tick items you wish to post to live
b. Under “Batch Action” drop-down menu choose “c. Relist Items”
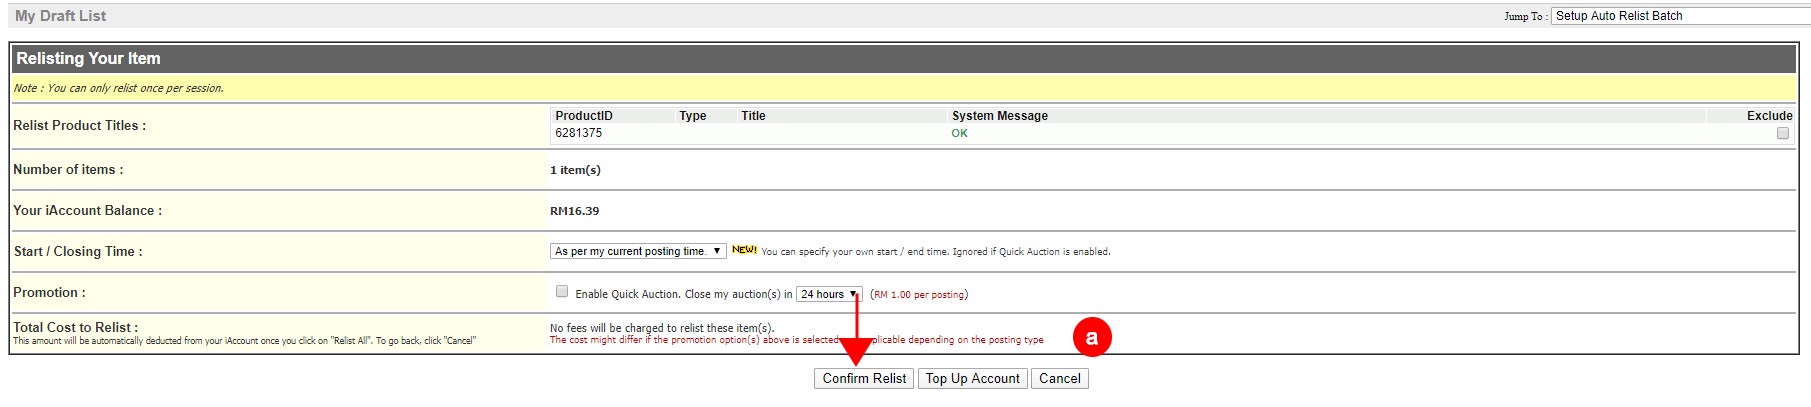
Then, you will directed to page as display above.
a. If there is charges, it will be shown in (a)
b. If you confirm to relist, click “Confirm Relist”
Once posted to live, this prompt message will appear. Click “Click to Continue” to go back to My Draft List.