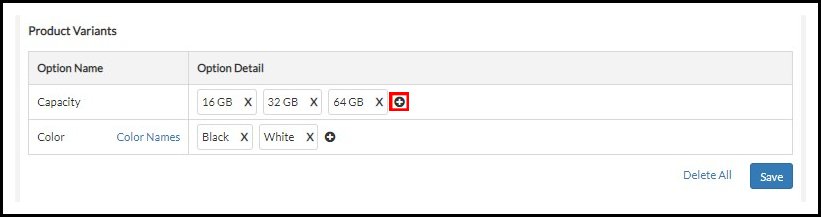
Adding/ Removing Item Options
To add or remove “Option Detail”, click on the “+” or “x” icon under “Option Detail”
a. “+” icon is to add new option detail
i) Click on the “+” icon.
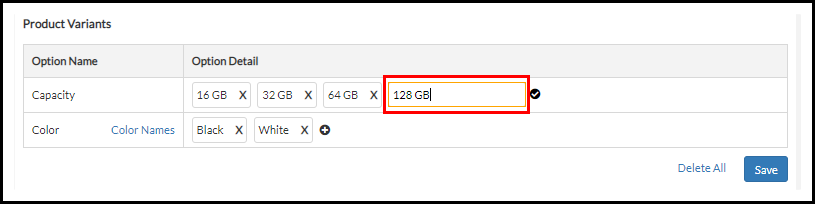
ii) Update the new option you would like to add in the empty text box. For example, we add new option “128 GB” for capacity. Then, click cursor anywhere in this page and your new variant has successfully added.
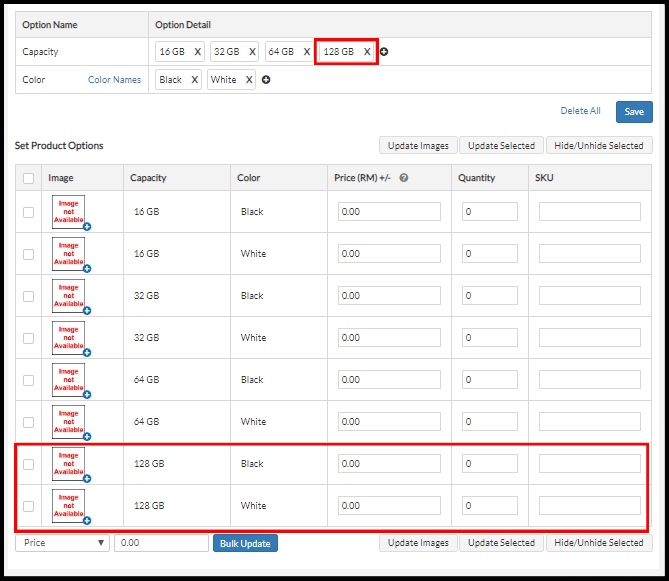
iii) Your new variant has successfully added as following.
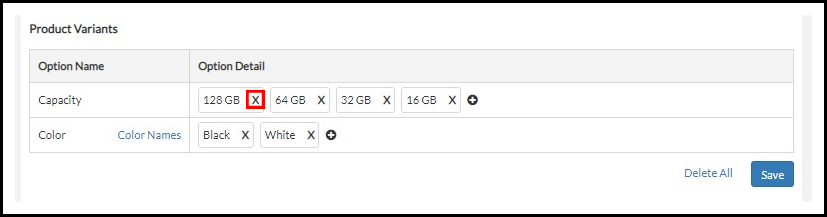
b. “X” icon is to remove existing option detail.
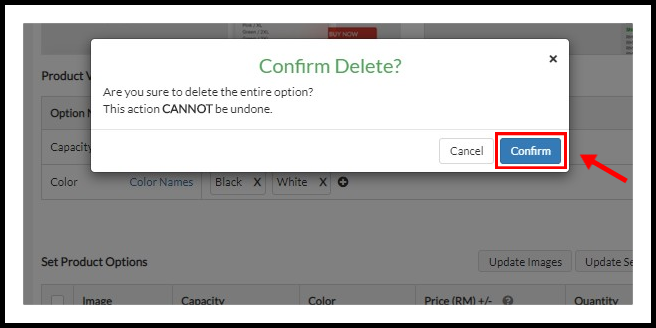
i) Click for “x” icon for option that you would like to remove. For example, we want to remove for 128 GB option.
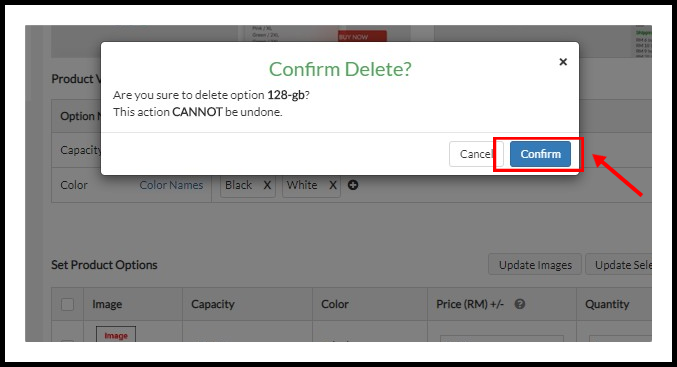
ii) A window will pop-out to ask for your action confirmation. Click on confirm button if you confirm to delete the option. Once confirm delete, this action cannot be undone.
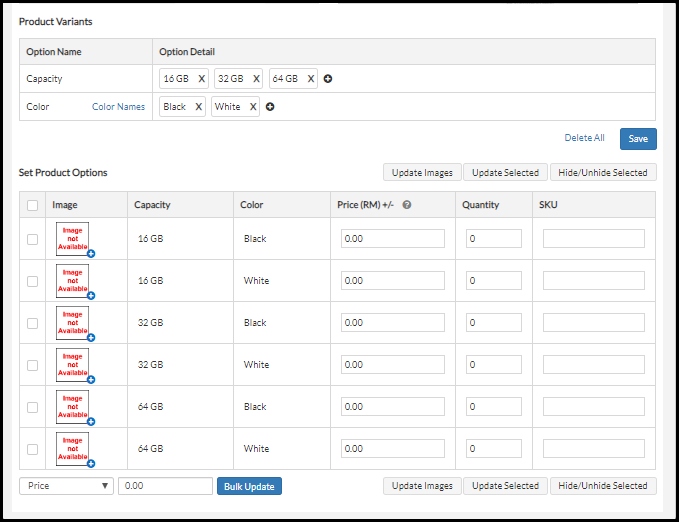
iii) Your deleted option has successfully removed from set product options as following.
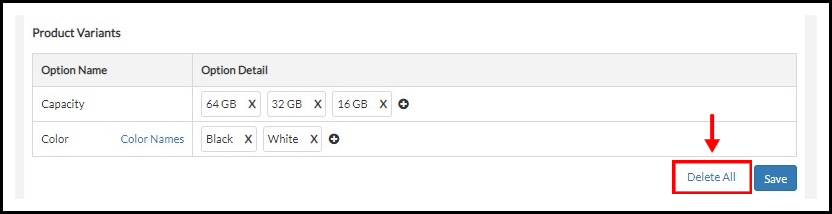
c. “Delete All” is to delete all the options that had created.
i) Click on the “Delete All” button
ii) A window will pop-out to ask for your action confirmation. Click on confirm button if you confirm to delete the option. Once confirm delete, this action cannot be undone.
iii) Your created options are deleted now.
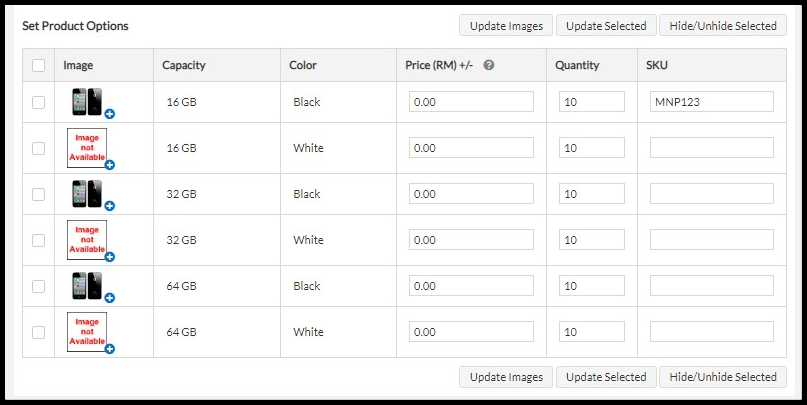
Edit Quantity:
- Key in your stock in hand or available quantity.
- Tick the box on the left side for option you have update the quantity.
- Then, click “Update Selected” button.
- Your quantity has been updated.

To Increase or Decrease Price According to Product Variant:
- To decrease or increase the selling price of your product, you can edit at the price column.
- Specify the price difference to the default selling price. Amount must start with a negative sign “-” for decrease price.
- NOTE: Default Price +/- Price Difference = New Variant Product Price
- Below are 3 examples for Price Increase, Decrease and Remain Unchanged.
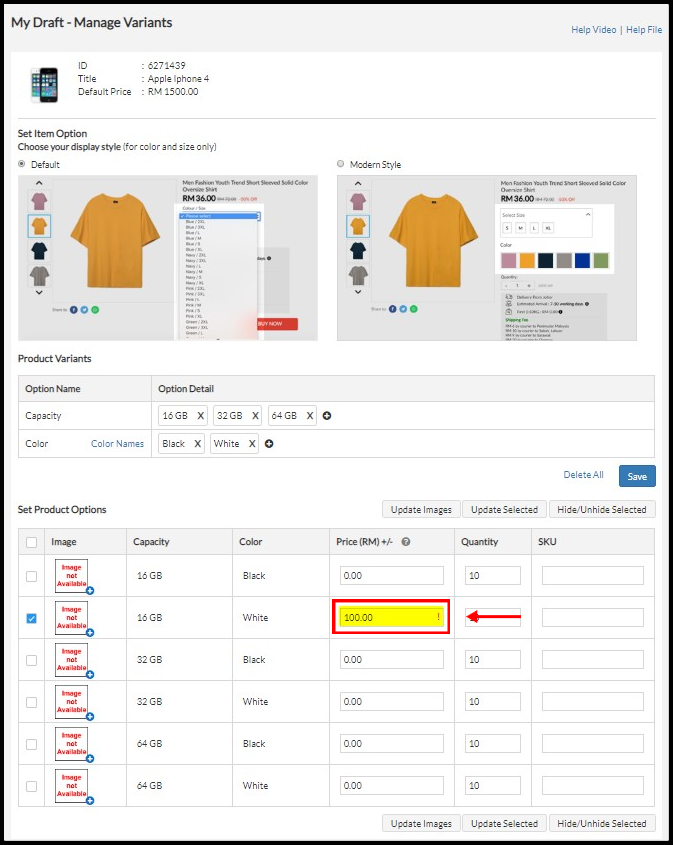
In this case, we use Apple iPhone 4 with default price RM 1, 500.
a. Increase Price
Test Item Variance Posting : RM 1, 500 (Default Product Selling Price)
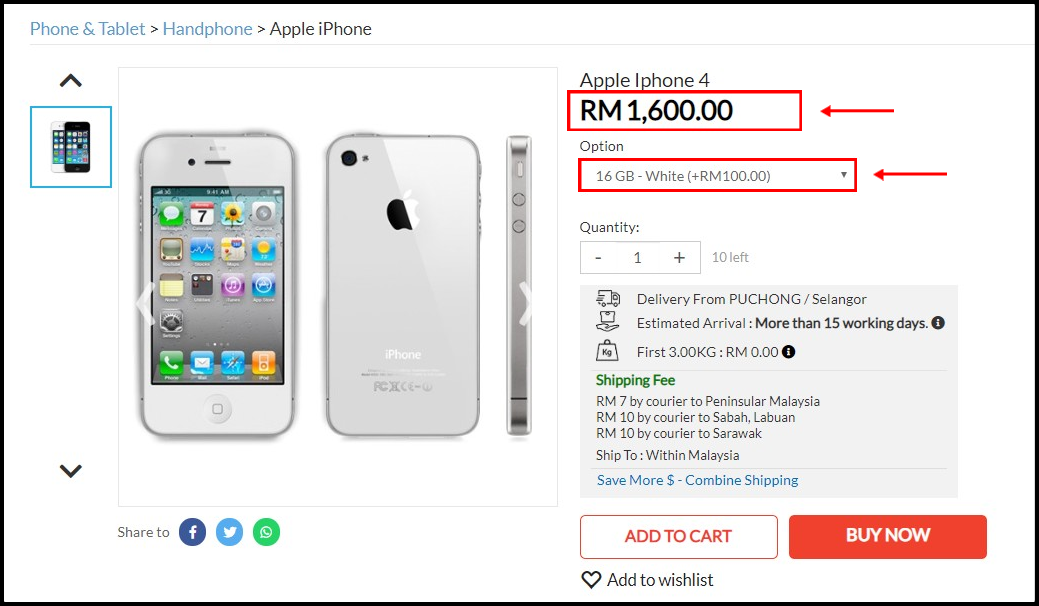
Test Item Variance Posting, Option: (16 GB – White): RM 1, 600 (New Variant Product and Price)
Price Difference: RM 100 (New Product Price – Default Product Selling Price)
Thus you need to insert “100” to price column and the price for Test Item Variance Posting (White) (16 GB) will be shown RM 1, 600 in “Product Detail” page.
Sample product display screen, after buyer choose for “16 GB – White”, the price will change to RM 1, 600.
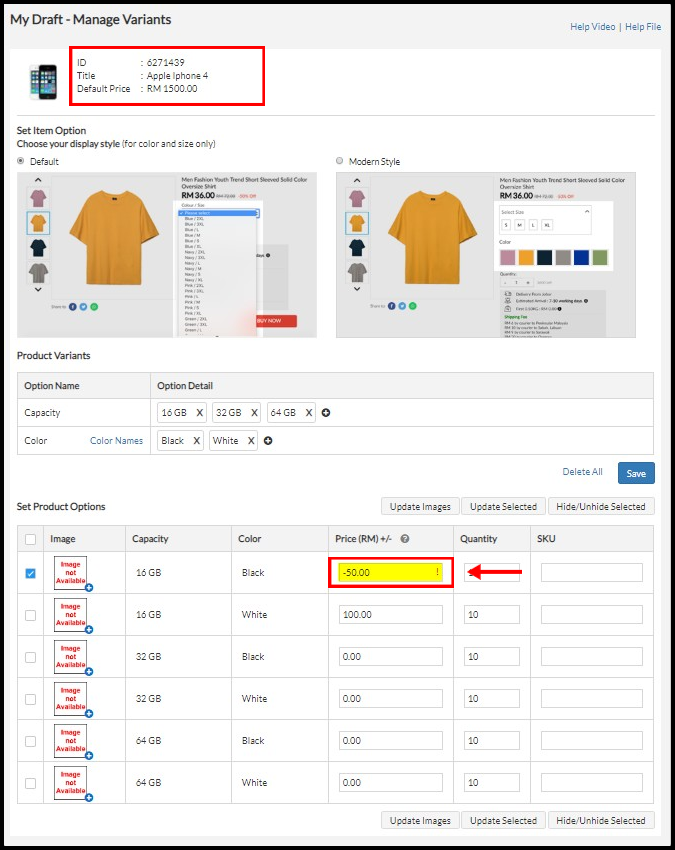
b. Decrease Price
Scenario:
Test Item Variance Posting : RM 1500 (Default Product and Price)
Test Item Variance Posting (16 GB – Black ): RM 1 450 (New Variant Product and Price)
Price Difference: -RM 50 (New Product Price – Default Product Selling Price)
Thus you need to insert ‘-50’ to the price column and the price for Test Item
Variance Posting (16 GB – Black) will be shown RM 1450 in the ‘Product Detail’ page.
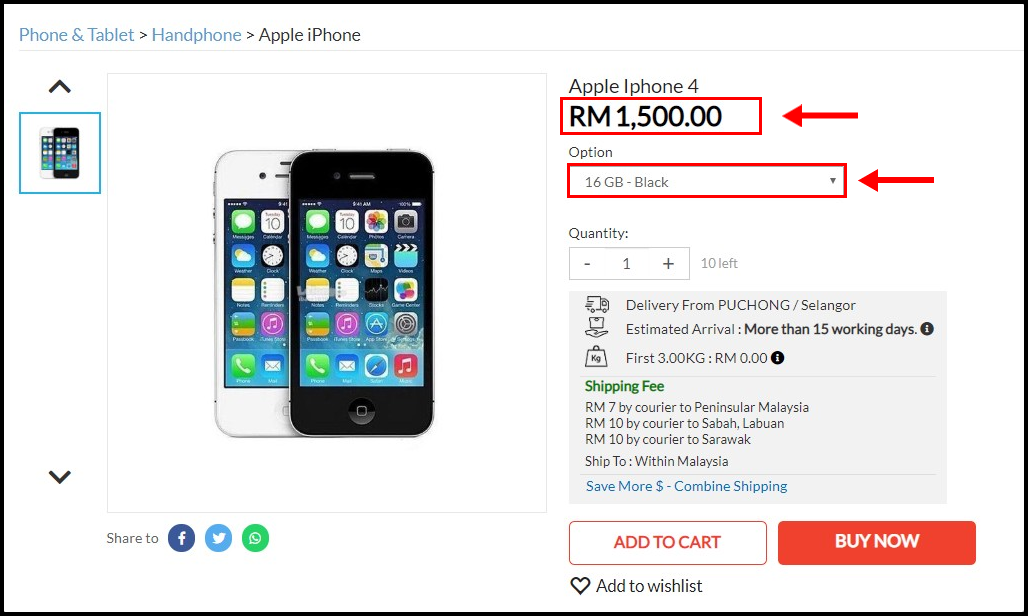
Sample product display screen, after buyer choose for “16 GB – Black”, the price will change to RM 1 450.

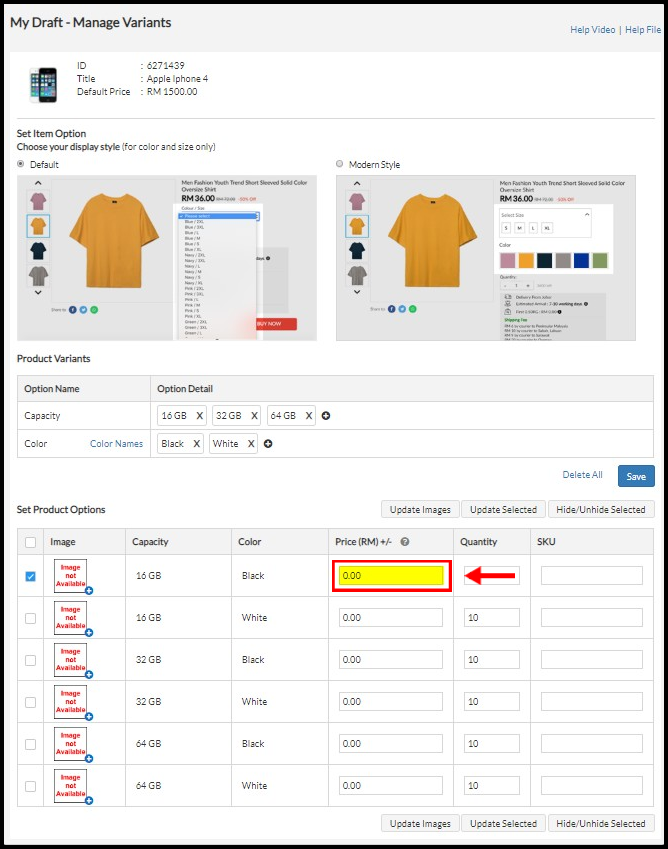
c. Price remain unchanged
Scenario:
Test Item Variance Posting : RM 1500 (Default Product and Price)
Test Item Variance Posting (16 GB – Black): RM 1 500 (New Variant Product and Price)
Price Difference: RM 0 (New Product Price – Default Product Selling Price)
Thus user need to insert ‘0’ to the price column and the price for Test Item Variance Posting (16 GB – Black) will be shown RM 1 500 in the ‘Product Detail’ page.
Sample product display screen, after buyer choose for “16 GB – Black”, the price remain unchanged which is RM 1 500.
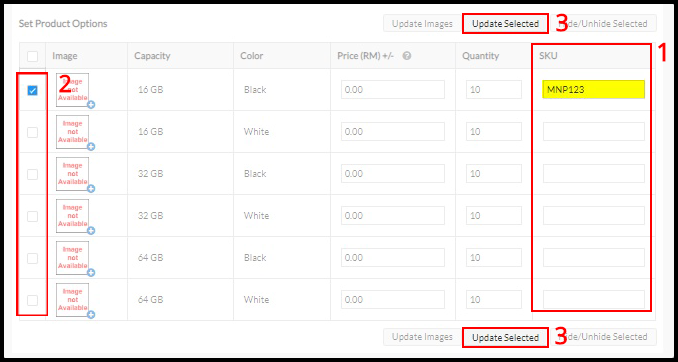
Edit SKU ( Stock Keeping Unit) :
- Key in the SKU. The SKU must be in unit.
- Tick the box for option that you wish edit the SKU.
- Click “Update Selected”.
- The SKU will be updated at the column “SKU”.
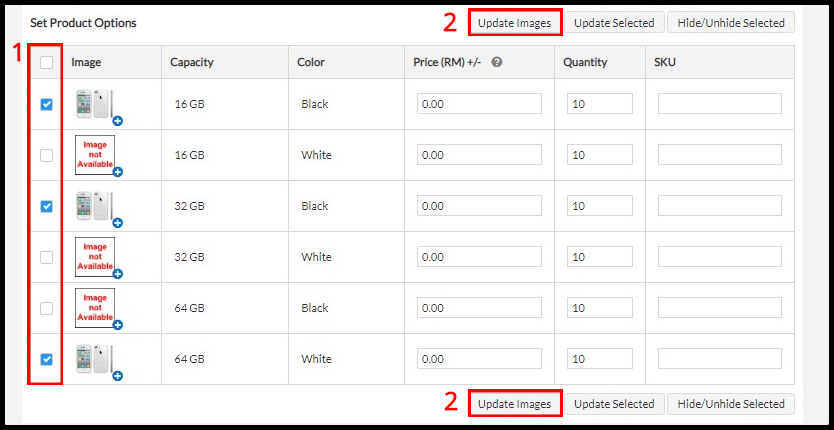
Edit Photo :
- Tick the box for option that you wish to edit photo. You may tick more than one box for multiple photo update.
- Click ” Update Images”.
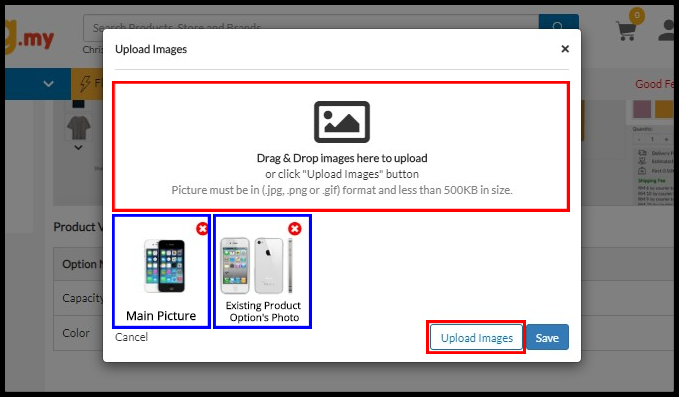
3. You may drag and drop the photo in the box or click “Upload Images ” button to upload image.
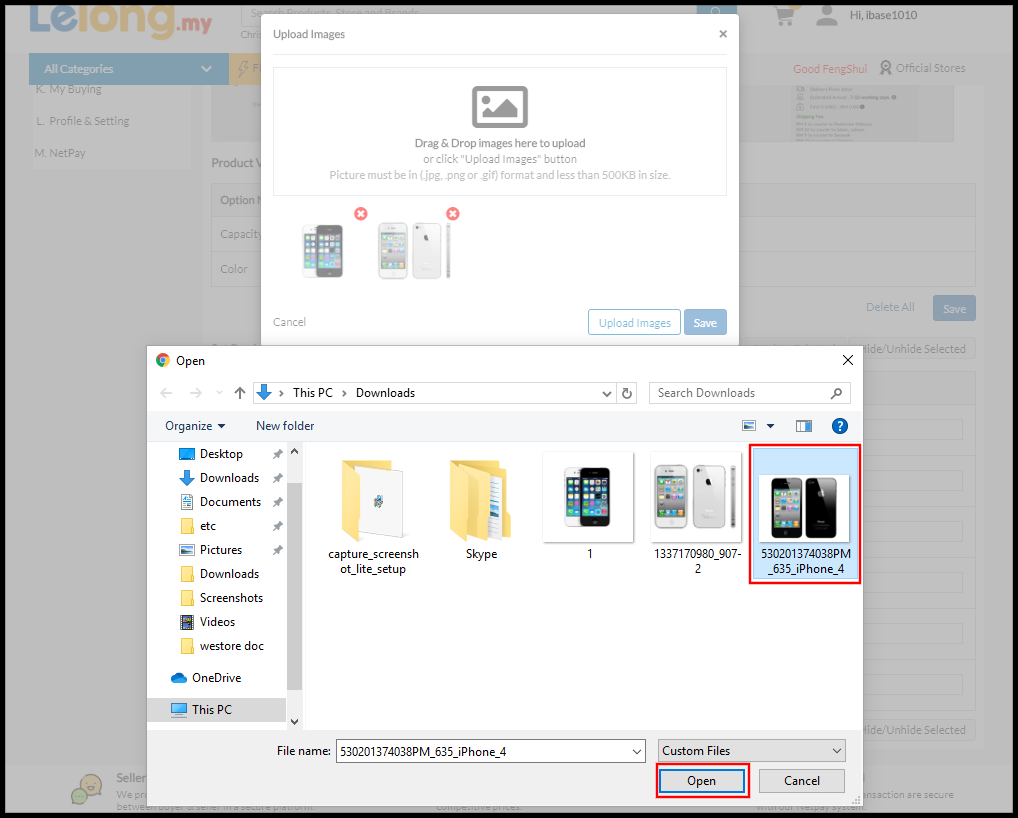
4. Choose you image file and click “Open”.
5. Click “Save“.

6. Your photo has successfully update in image section.