|
The discount will deduct from the order by percentage. |
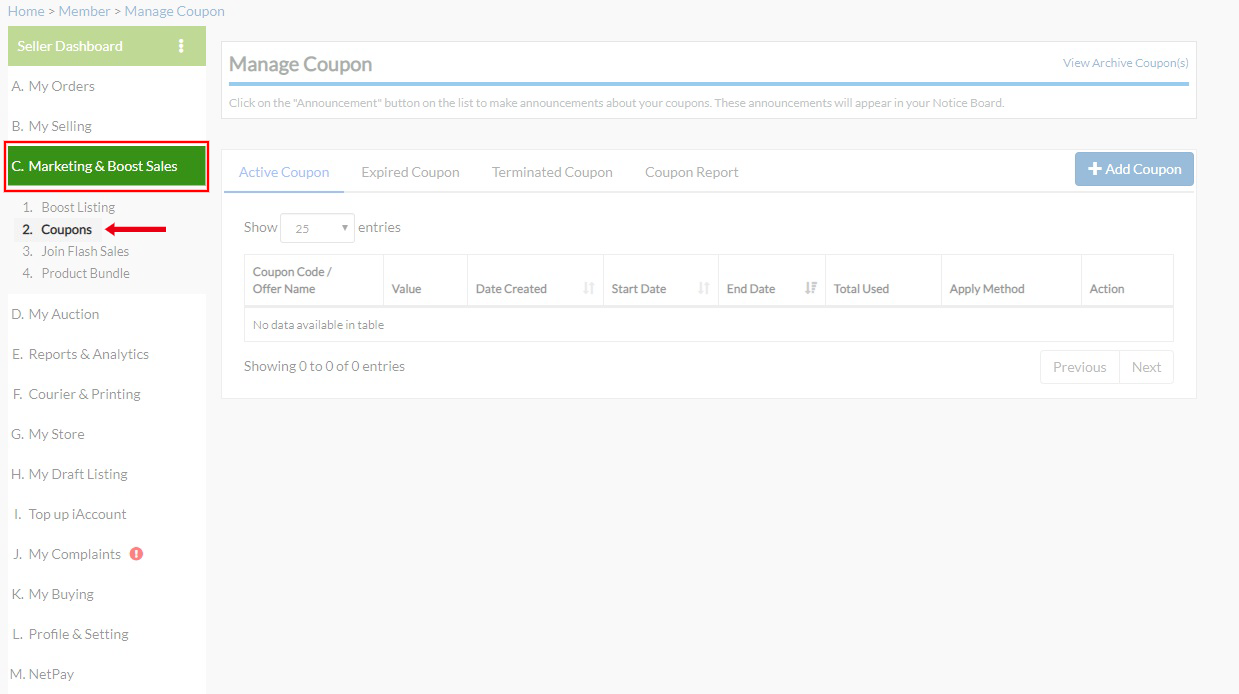
| Step 1: Go to “C. Marketing & Boost Sales > 2. Coupons” |
| Step 2: Click on “Add Coupon” |
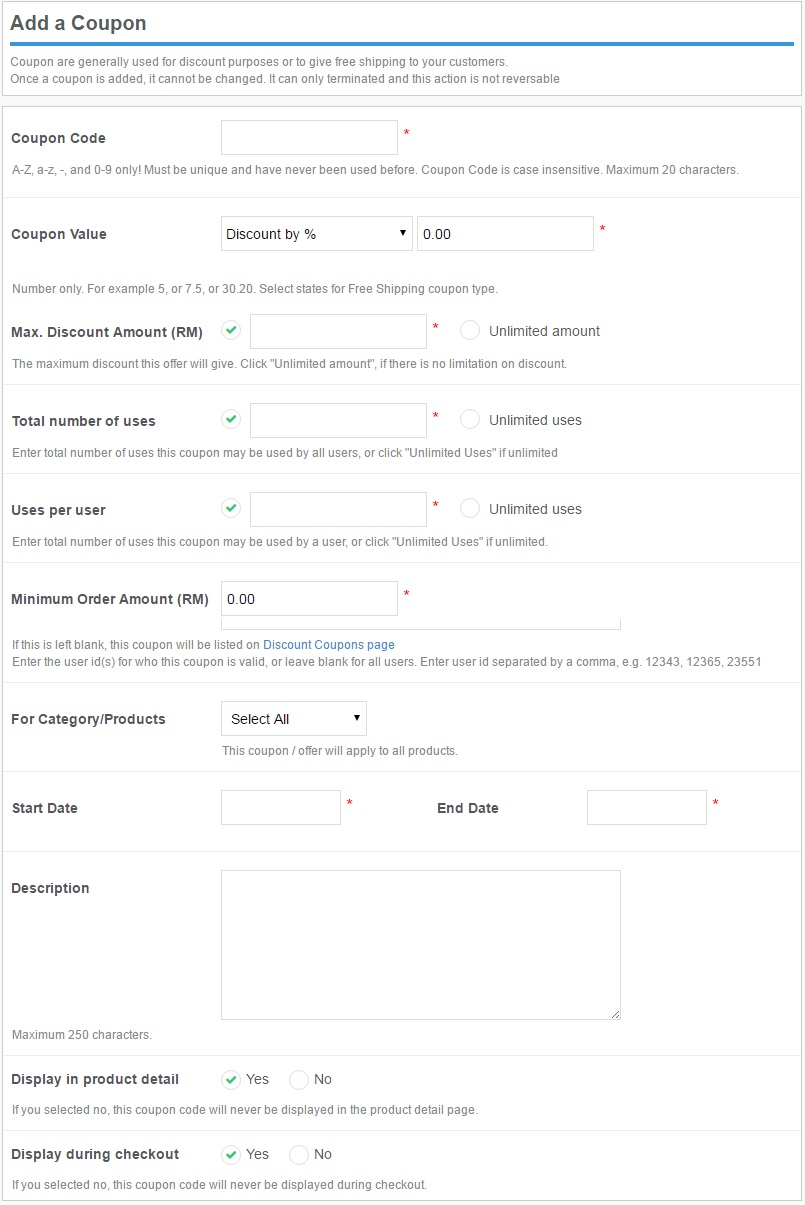
| Step 3: Fill in the coupon creation form.
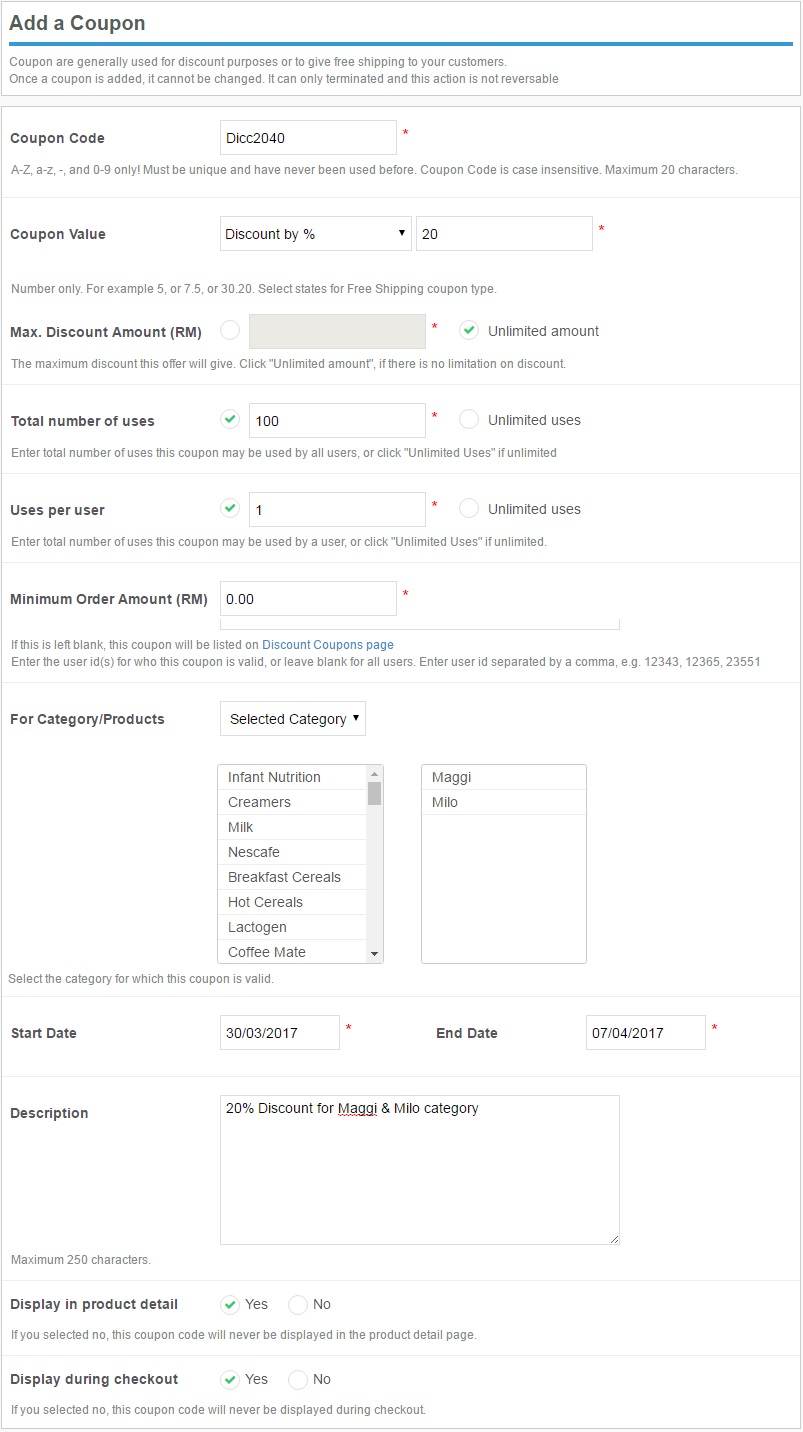
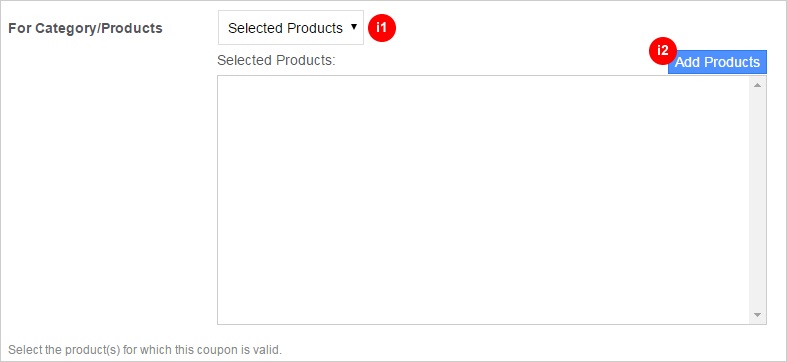
a. Coupon Code – The code that buyer will use to apply upon check out. Each coupon code is unique. b. Coupon Value – Choose “Discount by %” and fill in how many % off you would offer. c.Max Discount Amount (RM) – To limit the discount amount which the buyer will receive while using a coupon. d. Total number of uses – How many times a coupon can be used. e. Uses per user – Limit number of uses per buyer. f. Minimum Order Amount (RM) – The minimum amount a buyer must spend in one (1) order in order to apply the coupon code. Set as zero (0) if there is not minimum spend. g. Only for UserID – Enter the UserID(s) if the coupon is only offers to particular buyer(s). If there is a few buyers are entitled for the coupon, separated thier UserID by a comma (,). Left the box blank if you would like the coupon use by all buyer(s). h. For Category – The coupon can apply to the store category, include master and sub categories. i. For Products – The coupon can apply to selected product(s). j. Start Date – The first day the coupon can be used. k. End Date – The last day the coupon can be used. l. Description – The information/ details about the coupon you offer. Maximum 250 characters, and buyer will able to see the message during their checkout process. m. Display in product detail – The coupon code will publicly display in product detail page. n. Display during checkout – The coupon code will publicly display in buyer’s shopping cart when they added any items from your store. |
| Step 4: Click “Save” button to save the coupon created. |
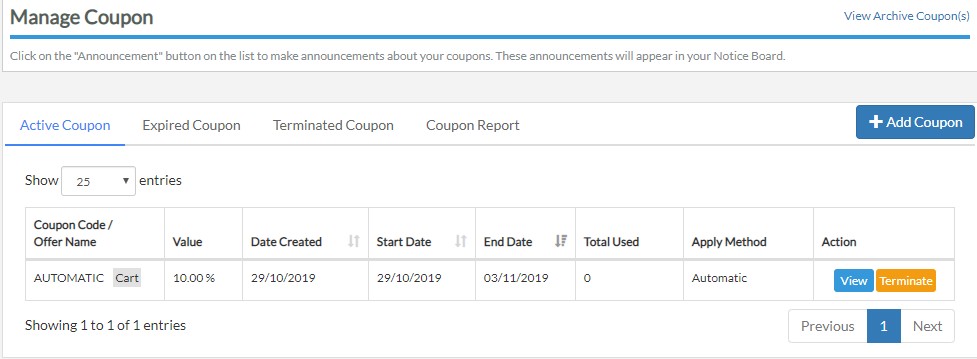
| Step 5: Your successful created coupon will display under “Manage Coupon”. (For more details on “Manage Coupon”, Refer to “How to manage coupon”). |
| Step by step guide to create the coupon? |
| Example 1:
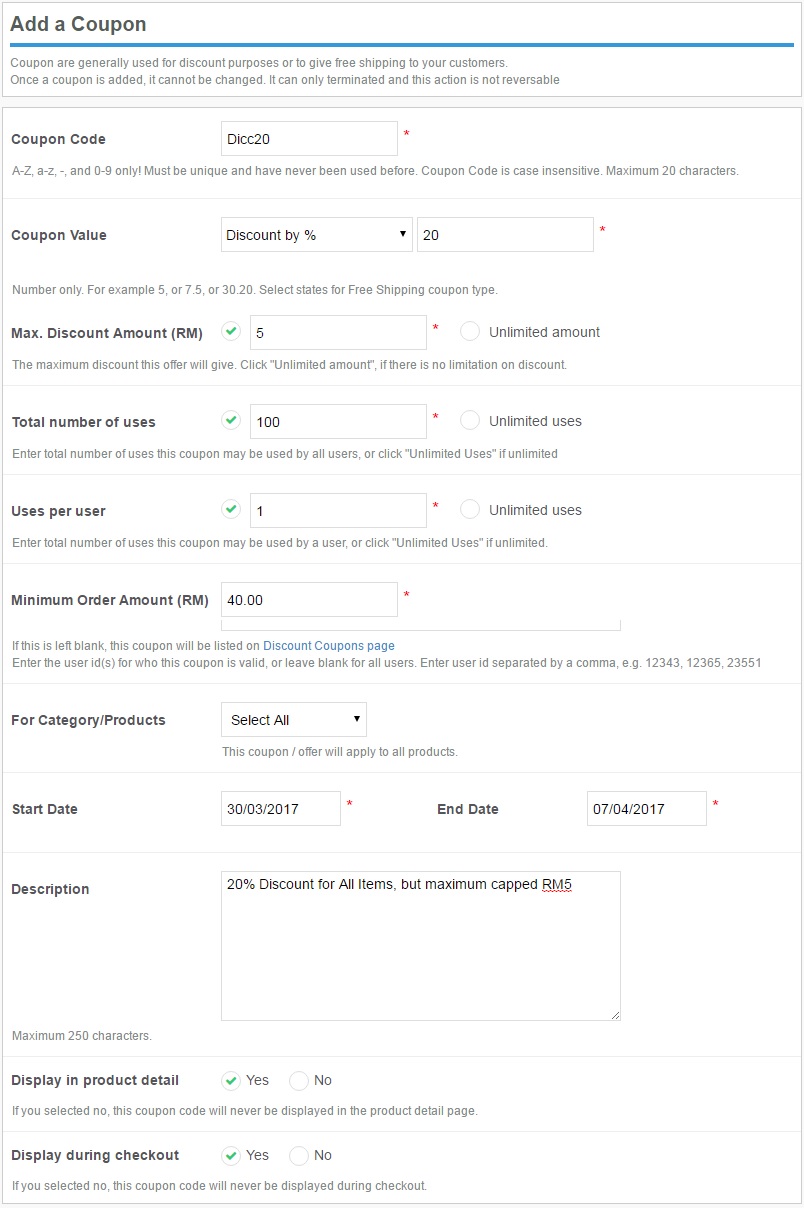
A storewide 20% discount with minimum purchase of RM 40.00, with maximum discount amount of RM 5 from 16 – 23 February 2017. Here is the sample of how you can set it: A. Coupon Code – Disc20 |
| Example 2:
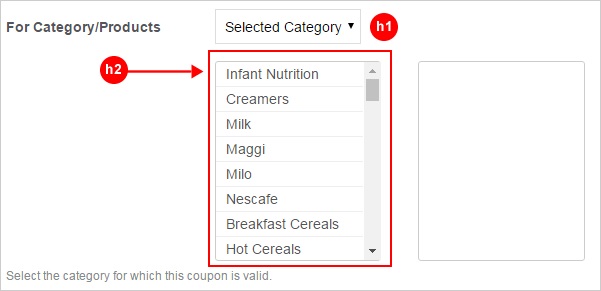
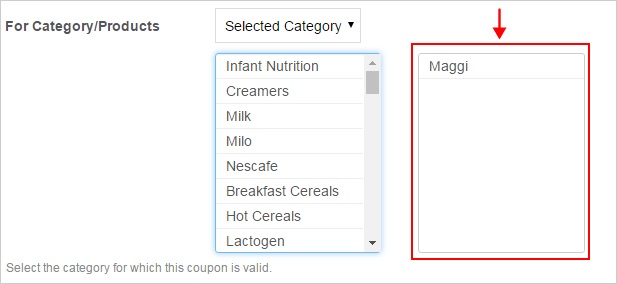
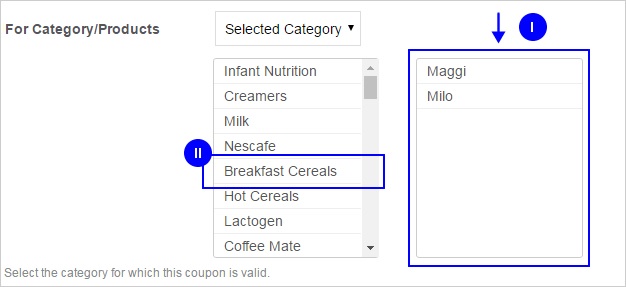
20% discount with minimum purchase of RM 40.00, with no maximum discount amount from 20-26 February 2017. Here is the sample of how you can set it: a. Coupon Code – Disc2040 3. Selected category will go to the table on the right. * To deselect the chosen category, just click on the category you would like to remove on the right table. Example: To deselect “Breakfast Cereals” from the selected categories. Just click on “Breakfast Cereals”. Now, the category “Breakfast Cereals” is not available on the right table (Refer I) and is back to table left (Refer II). i. For Products – Choose for “Apply to All” as the coupon is offer to all products in the store. |
| Example 3:
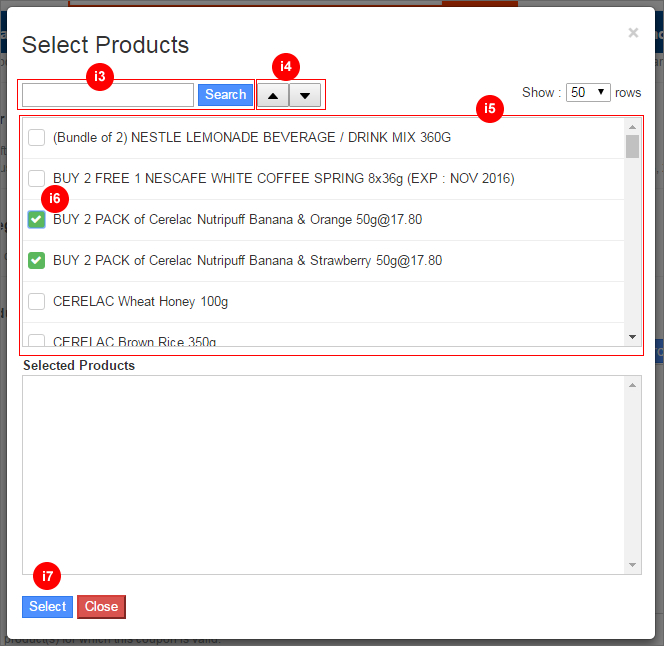
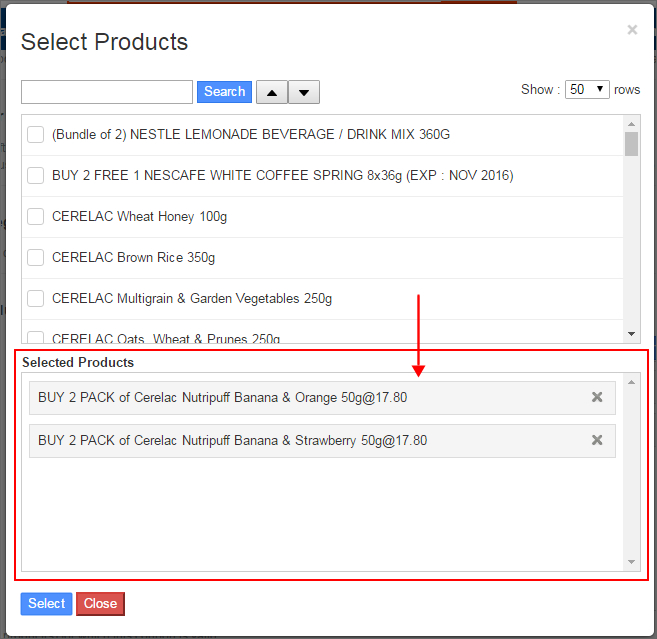
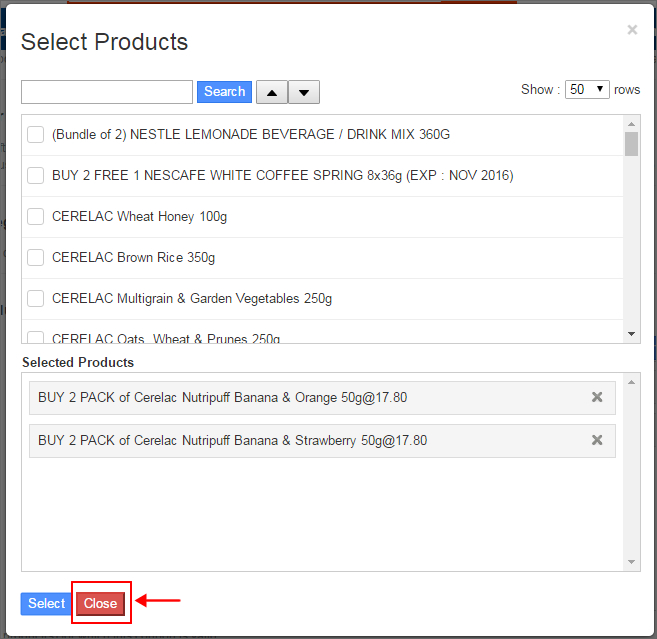
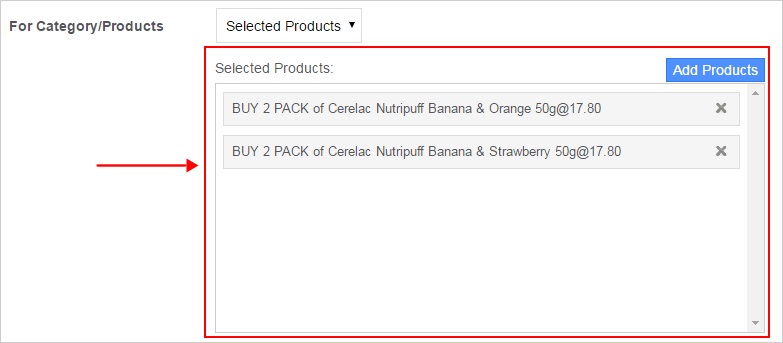
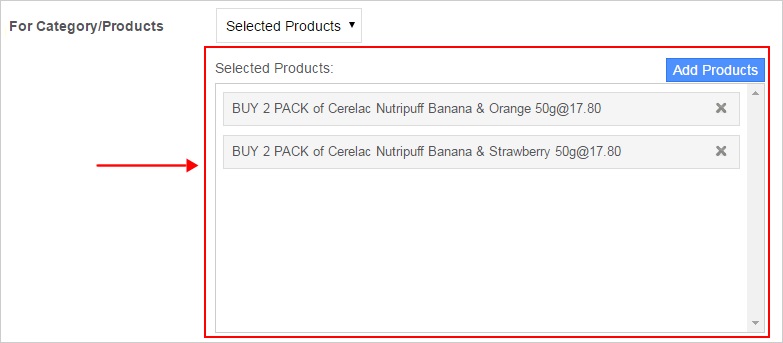
10% discount with minimum purchase of RM 30.00, with no maximum discount amount. Here is the sample of how you can set it: a. Coupon Code – Disc10 3. A window with a list of your products will prompt out. 4. Your selected products will display under “Selected Products” column. 5. Once done, click on “Close” button. 6. After close the window, you will see the selected products are now display at your coupon creation page. To add more products, just click on “Add Products” and repeat the step from 2 – 6. To deselect the product, just click on the “X” button as below. j. Start Date – 30th March 2017 is the first day the coupon can use. |
| What will buyer sees during checkout? |
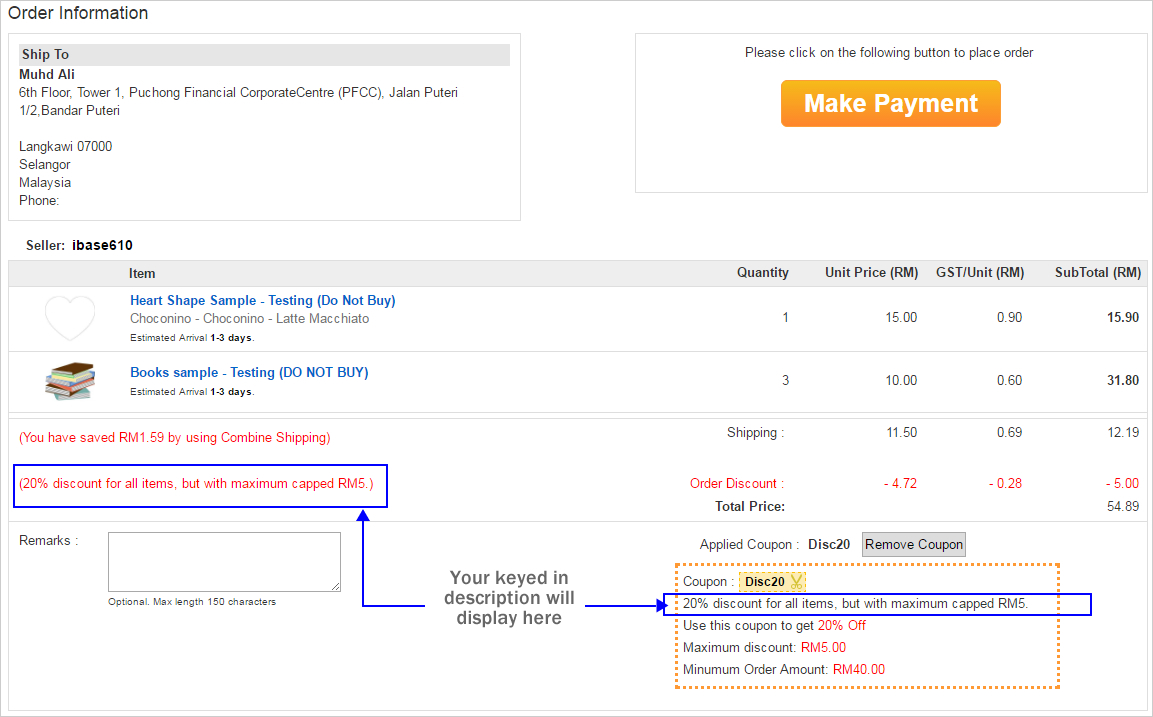
| Example 1: The order meet all the discount criteria and buyer successfully applied the coupon. |
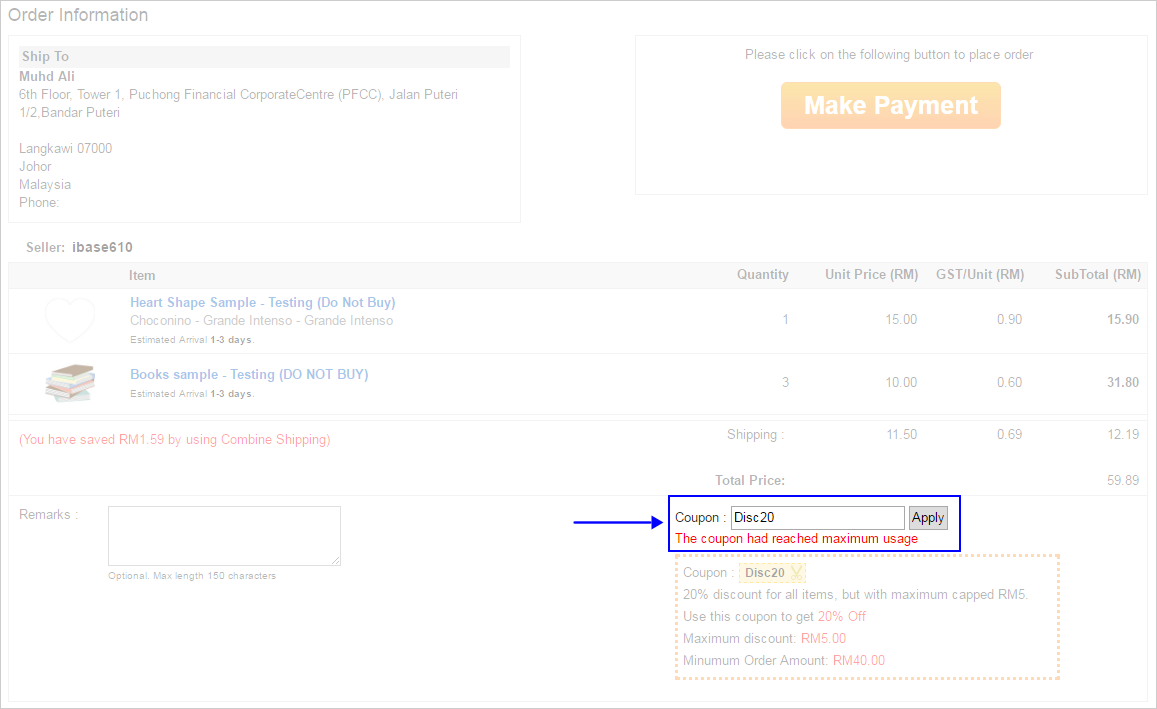
| Example 2: As the coupon is limit 1 use per user, so if buyer placed from same seller the message of “The coupon had reached maximum usage” will display. |
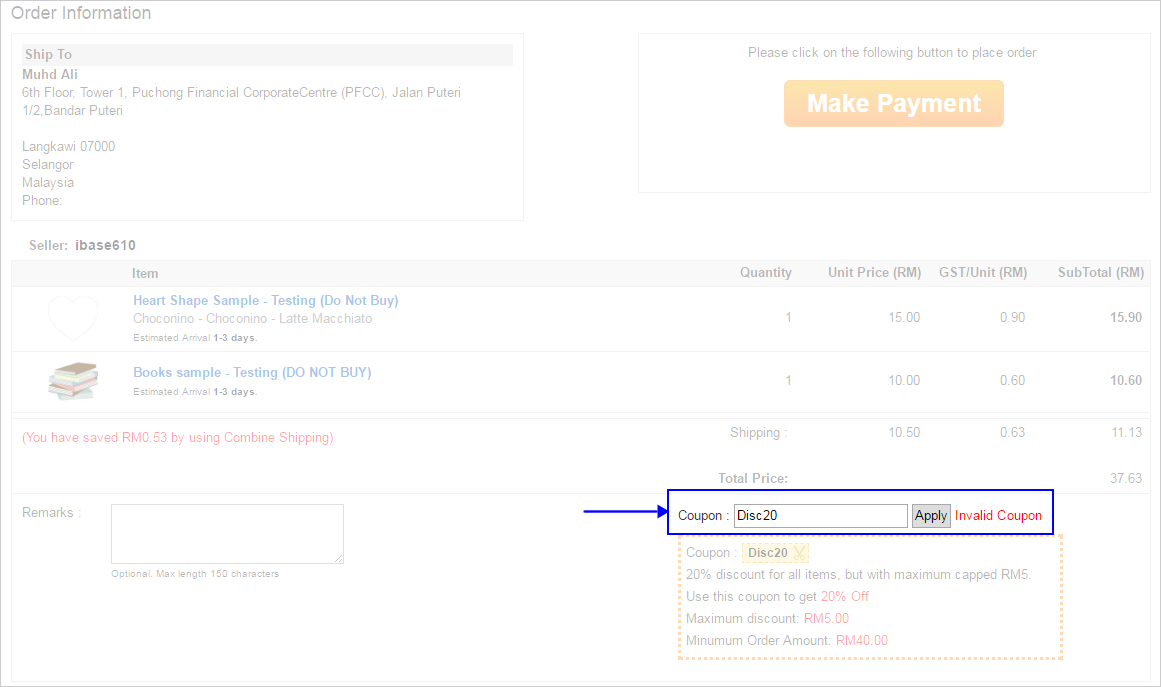
| Example 3: The error message of “Invalid Coupon” will appear if buyer try validate the coupon to cart which is not fulfilling the discount criteria. |

